

Objective
Use Jeedom commands to enable or disable Wi-Fi on my network and more specifically Wi-Fi access on a profile (my daughter’s profile).
Important: This tutorial is in two parts
Depending on what you want to do and/or understand about the use of Synology APIs and how the Synology-API plugin works, you have two options:
- Either you read the Part I that explains to you, step by step in the most pedagogical way possible what you do
- Either you read directly the Part 2 who will provide you, turnkey the tile of your equipment, with the commands and information already programmed
Hardware, software
- To activate wifi on a profile, you need a Synology router (I use an RT2600ac) and install the Safe Access application (free)

- On the Jeedom side, you need the Jeedom-Synology link called Synology-API

Creating a profile in Safe Access
Safe Access is an intelligent and particularly efficient management developed by Synology and it integrates SRM, the operating system of its routers, since version 1.2.
This application allows you to create a profile per family member, then assign to each one his equipment (tablets, phone, computer …). Internet timetables, types of websites authorised or prohibited are then defined for each person. One can even define a “quota” of internet time …
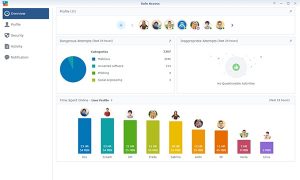
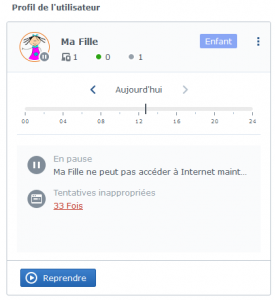
And in this profile management, we can pause (= cut internet) or resume (= internet access activated), it is these two states that will be treated here.


Part 1: Complete explanation with pedagogical virtue, step by step
Send orders to Syno
Find the commands to send to the router
Synology-API is a great tool for dialogue between Jeedom and Synology equipment (Router or NAS), but you still have to have the API that you need to use to send these commands.
To date, Synology has not documented its APIs (not the ones we are interested in), so we must try to find the API that will have to be used as well as the method to be applied to it and possibly the parameters to be sent with the API.
The SRM interface (for routers) and the DSM interface (for Diskstation NAS) interact with the equipment thanks to this API, so we have to look at the command sent by the browser when we click on a button to have the command sent.
I did this tutorial with FireFox, but all browsers are equipped with similar tools.
Log in to your router and press F12 to have the console, open the Network tab. You should have the screen below.
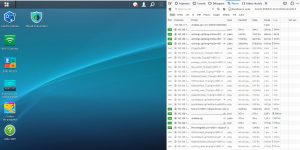
On the right are the dialogues between your browser and your router.
At this stage, the manip consists of:
- Launch Safe access and have the button on the screen
- Purge the right screen (with the small basket)
- Click on
- Pause the query display to avoid being polluted by too many lines
- Click on the right on the line that corresponds to the command that has just appeared
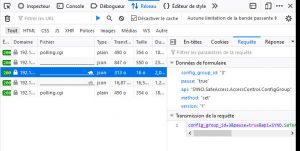
To identify the correct query if there are multiple lines, open the ‘Query’ tab on the right and look at the method used. If it is Set, it is probably a request to the server.
At this point, we have all the necessary information to create our order on Jeedom.
Here is what should be noted:
- Name of API: SYNO.SafeAccess.AccessControl.ConfigGroup
- Method to be used: set
And two parameters:
- config_group _id=3 (this corresponds to the id of the profile I want to use, so my daughter’s profile in my example)
- pause=true (meaning pause)
The same manipulation can be done to fetch the command that corresponds to the button but you have understood, only the pause parameter will change and this will give pause=false.
Adding an order to Jeedom
To send an order from the Syno, you must add an action command in the Synology-API plugin.
- Launch Synology-API and click on the + to launch the wizard
- In API to use, select SafeAccess.AccessControl.ConfigGroup, Note that the SYNO. at the beginning of the name is deleted.
- In Method to be used, select Set
- In other settings, add &config _group _id=3&pause=true Be careful not to forget the & at the beginning.
- click Launch Query.
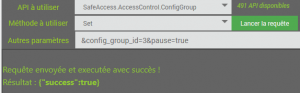
The assistant replied: Request sent and executed successfully! This is because it worked and Syno replied that the request was executed.
Just below, the wizard proposes to save this command to be able to reuse it directly or via a scenario. Fill in the form and validate the addition of the order
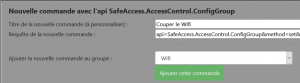
You can save the second command to restore Wifi. In this example, I have a ‘WiFi’ command group that has two commands, one to cut and one to restore the connection.
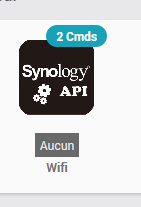
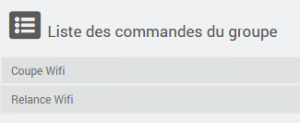
Use of these "Action" commands
Like all Jeedom action commands, these commands can be used in all your scenarios or screens.
Note that they are executed correctly immediately, even if your SRM or DSM interface does not update instantly.
Recover information from Syno
Find the commands to send to the router
On the principle of previous queries, the Syno can be questioned for information. To respect the Jeedom language, we will refer to these queries as "info commands".
Continuing the current example, we will question the Syno to find out whether the profile ‘My daughter’, i.e. ID3 in Pause mode, is activated or not.
The manipulation to find this information is identical to the previous explanation, it is necessary to ‘track’ the requests that appear at the time when Safe Access is opened, that is when the interface questions the server to retrieve this information.
I give you the answer right away, you have to use:
- API: SafeAccess.AccessControle.ConfigGroup
- Method to be used: Get
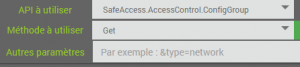
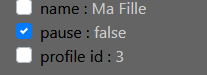
This request returns the following reply:
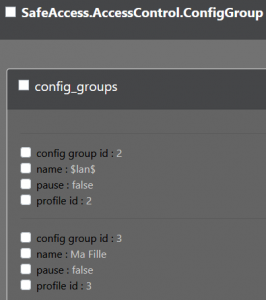
- The Id2 corresponds to my entire Lan and the Id3 corresponds to the ‘My daughter’ profile.
- The "pause" field will answer false when the internet is activated and true When the internet is shut down.
- I tick the penultimate box and click on Save
Using the info in Jeedom
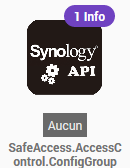
Once added, the info command is added to the API list
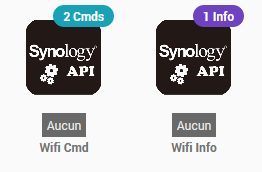
I rename our two orders to make it simpler
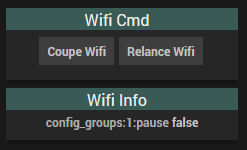
On the Dashboard, my two widgets are not bad
Improve Widget (v1)
The information that tells us whether Wi-Fi is enabled or not is not a boolean, but a string false or true, it will be necessary to hack a Jeedom widget for this, here is what I propose to create a Widget:
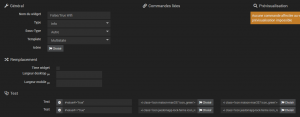
I chose to do two tests:
- value# != "true" which displays icon maison-man337 icon_green
- value# == "true" which displays icon jeedomapp-lock-ferme icon_red
Improve Widget (v2)
I left the previous paragraph because it has a pedagogical virtue to explain widgets but since then I have integrated the Wifi widget into the plugin.
Simply choose the Synologyapi/WifiOnOff widget from the info command, which gives the status of Wi-Fi:
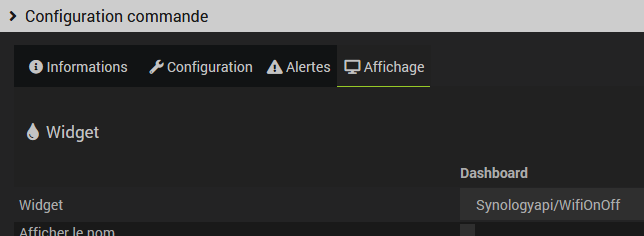
Merge Wifi Cmd and Wifi Info into Wifi
It would have been possible to create a Virtual to merge the device that contains the commands (Wifi Cmd) and the device that contains the feedback (Wifi Info). But the plugin is able to merge two devices to have on the same device Jeedom commands and info.
All you need to do is follow the fusion wizard
The device thus created contains two commands and an info:

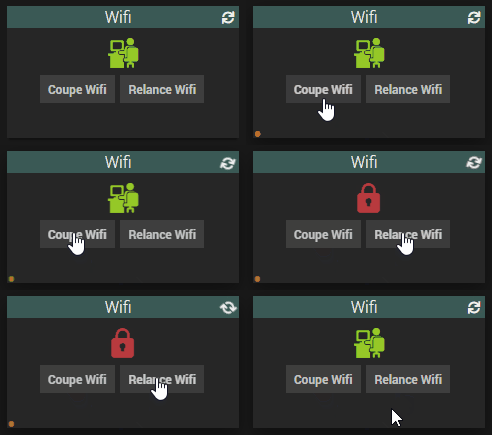
And here are the results according to the state of Wifi
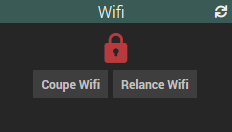
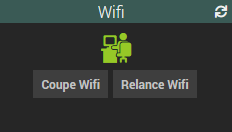
Both buttons work and the icon shows the status of the connection.
Bonus: Updating the state of Wi-Fi
The green or red icon indicating the status of the wifi can be updated in several ways:
- Either automatic by a cron, every minute for example
- Either manually by clicking on the top right of the tile, it launches a "refresh"
- Or automatically following a change of status
The last option will be detailed here.
Just ask Jeedom to launch a "refresh" after each press of one of the control buttons.
To achieve this, click on the small icon that symbolizes a gear of each command.

In the configuration tab, click on Add on this block:

Then pick up the Refresh command for the Wifi equipment


Do this for both orders (WiFi Cup and Wi-Fi Recovery)
Part 2: Direct import of a device model
If you do not have the soul of a computer scientist and do not want to understand what you are doing, use the second part directly, which gives you the device model.
You will thus directly have the commands and information that will be preprogrammed, even the widgets are included thus offering you a clean and usable tile immediately.
Import a model of equipment
The Synology-API plugin has integrated an import feature, you just have to click on the button Import a Model, just under the name of the relevant Synology equipment:
For this "WiFi" device, here is the JSON file to import
- http://jeedom.sigalou-domotique.fr/documentssigalou/Wifi.json
- or in zip format: http://jeedom.sigalou-domotique.fr/documentssigalou/Wifi.zip
Once the widget is imported, it is up and running.
Note that in the template provided, the group ID is 2, if you have another ID, it will have to be changed.
In order for the widget to be updated, it must be added the bonus of the 1st part, follow this link to add the refresh after each press of the buttons
 English
 French
 Spanish
 Chinese
 German