

📘🔐 Special file: Nuki Smart Lock Ultra
This article is part of my complete file from installation to accessories to home automation.
- I replace my Danalock V3 with a Nuki Smart Lock Ultra
- I connect the Nuki Smart Lock Ultra to my home automation
- I add a Nuki Keypad 2 NFC to my Smart Lock Ultra
- I add a Door Sensor to my Nuki Smart Lock Ultra ← you are here 🎯
When I installed the Nuki Smart Lock Ultra on my front door, I have already made a leap forward comfort side: More key to look for, opening from the smartphone, integration into Home Assistant (my home automation platform) … in short, everyday life has become much more fluid.

Then I added the Keypad 2 NFC, Here, the family definitively adopted the lock: Each one has its own code, its own logic, its own habits.

But there was one question that I asked myself a little too often:
“OK, the lock is locked … but is ‑ what the door Is it really closed?”
That is when I decided to add the Nuki Door Sensor.
🧲 Why a Door Sensor on an already connected lock?
Without Door Sensor, the Nuki Ultra knows very well in which position the lock is located: locked, unlocked, in action.
On the other hand, it does not know nothing of the State physics of the door: Closed, open … all this remains invisible without a dedicated sensor.
As a result, you can end up with:
- a Door poorly closed but locked (yes, it is possible …);
- automatisms that lock when the door is not stopped;
- zero alert if the door remains open “a little too long”.
The Door Sensor brings this missing information to the Smart Lock: it allows Nuki to know if the door is closed or open, and to take this into account in the app, notifications and integrations (Home Assistant, other systems).
🚪 Why not a Zigbee or Matter door/window sensor?
That was my first idea: I could have checked that the door was closed with a Zigbee or Matter home automation sensor, connected to Home Assistant (or any other home automation box), as I already do for other doors and windows.
And Yes, it works. But the real difference with the Door Sensor Nuki’s position is that this equipment is part of theNuki Ecosystem :
- the Door Sensor communicates continuously with the lock;
- the Lock adapts his behavior depending on the condition of the door (open/closed);
- everything is configured in the same place, in theNuki App, without going through Home Assistant.
For example, the lock will not move until the door is closed, and conversely, as soon as the door is closed, the lock can lock automatically.
Obviously, all this is configured via the Nuki app, in an integrated and independent way, without the need to open Home Assistant. For a beginner, it is much simpler: a single app, a single universe.
🧩 What does the Nuki Door Sensor look like?

The Door Sensor It consists of two components:
- one Magnetic Sensor (the “big” module), to be fixed on the framework the door;
- one magnet discreet, to be fixed directly on the door.
Both are mounted on the inner side, like the Smart Lock. The sensor measures the magnetic field issued by the magnet and, based on this measurement, determines whether the door is considered closed or open.
⚠ Important:
- the Door Sensor is planned for the wooden or plastic doors ;
- the metal doors and sliding doors are not supported (the metal disrupts the measurement, and the sliding doors are completely out of the intended geometry).
If your front door is made of metal, this sensor is not suitable: it will then be necessary to start on another solution (classic home automation sensor + logic in Home Assistant, for example).
🧪 Nuki sensor vs “classic” aperture sensors (binary ON/OFF)
This is where Nuki makes a choice technological very different from our famous small door/window sensors Zigbee/Z-Wave at 10–20 €.
🔌 How does a conventional magnetic contact (Reed) work?
Conventional door/window sensors are usually based on a Reed Switch :
- the magnet is close → the metal slats of the Reed touch → the circuit is closed ;
- the magnet moves away → the slats separate → the circuit is open.
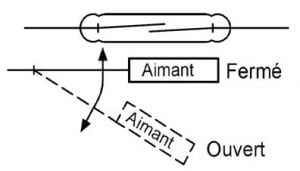
This is binary, ultra simple, very robust … but limited:
- the sensor only “includes” ON/OFF (near/not close);
- He can't tell the difference between slightly ajar and wide open door : as soon as the tipping distance is exceeded, it is “open”, point.
It is perfect for many uses (perimeter alarm, simple opening info), but we remain on a logic all or nothing which does not take into account the small mechanical nuances of the door.
💶 What Nuki does more (and why it's more expensive)
The Door Sensor Nuki’s switch is not limited to a simple binary Reed switch: he uses a Magnetic Sensor more sophisticated measuring theMagnetic field strength generated by the magnet.
Nuki does not specify whether it is a Hall effect sensor or a magnetoresistive sensor.
During calibration, the sensor records the signal value in different positions:
- door closed ;
- door open (with a gradual shift between the two).
Next, Nuki defines internal thresholds to decide whether, at a moment T, the door should be considered as closed or open. You only see “closed/open” in the application, but behind it the logic takes into account several intermediate values.
The system is therefore finer a simple gross ON/OFF: it takes into account a range of values, which improves the tolerance to micro‑variations (door play, expansion, slight position deviations, etc.).
I had the feeling that this sensor has a form of Learning capacity : the first tests were average and, little by little, it seems to “understand” the state of the door more and more.
Specifically, the technology chosen and the intelligence behind it explain:
- the higher price from Door Sensor compared to a simple alarm contact;
- the fact that it is thought of as “integrated” accessory the Nuki ecosystem (in terms of design, app, notifications, Matter, etc.), and not as a generic 2-wire sensor.
For a beginner, this can be summarised as follows: a conventional Reed sensor answers just “yes/no”, Door Sensor Nuki observes a little more finely what happens, and in addition he discusses directly with the lock.
🛠 Installation on my door: simple, but to be treated

As for the Smart Lock Ultra, Nuki offers a very well done assistant in the app. But there are still some subtleties that deserve to be well respected.
🧽 1. Surface preparation
Nuki recommends:
- from cleanse the bonding area (alcohol/soft cleaner);
- check that the surface is flat and dry, so that the sensor mounting plate adheres properly.
A sensor that has a slight play on its base is the door open to false positives … (in every sense of the word).
📍 2. Positioning of sensor and magnet
Official rules:
- the sensor attaches to the framework ;
- l’magnet on the door, inner side.
- Door and frame at same level → mounted magnet in parallel the sensor;
 |
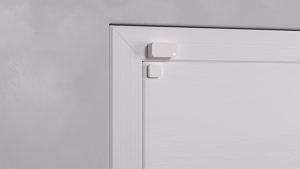 |
- Door recessed or protruding → magnet mounted at 90° on the song of the door, but always in front of the sensor.
 |
 |
And above all:
the distance between the sensor and the magnet shall be between 0.5 and 3 cm, door closed.

Nuki also gives a visual cue with the LED and the small mark on the sensor to align the bottom of the magnet in the right place. For a beginner, really follow the diagram: Do not place “eye”, follow the markers.
🔋 3. Powering on and pairing
The sensor works on a battery ER14250. When it is first put into service (withdrawn tongue), it is put into service. maintenance mode, ready to be added.
From the Nuki app:
- Menu → Manage devices → Accessories → Nuki Door Sensor ;
- the assistant is followed, the lock detects the sensor using Bluetooth;
- once paired, we clips the sensor on its mounting plate.
If you want to reset/modify the installation later, you can use the anti-‑sabotage button on the back to return it to maintenance mode. To put it simply: If you change the place of the sensor, remember to put it back in this mode before starting the procedure again.
🔁 Calibration: the step where you don’t have to rush
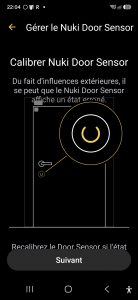
Calibration is the moment when the Door Sensor “learns” what a door is closed and a door open on YOUR specific installation.
The assistant asks you, step by step:
- from close the door → sensor records the ‘closed door’ value;
- dopen the door according to the instructions → the sensor records the values associated with the open position.
Nuki insists very clearly on one point in his doc:
it is necessary move the door slowly during these steps, so that the sensor correctly detects variations in the magnetic field.
For a beginner: Do not skip this step, take the time to follow exactly what the app is asking for, without forcing or going too fast.
😅 My galleys (and how I got away with it)
I'm not going to lie: I did not behave perfectly at first.
For example, I had:
- physically closed door, displayed “open” in the app;
- or a state that took time to update.
Going to see la Nuki Troubleshooting Doc, the main common causes are:
- sensor/magnet distance a little too limited (I have often been too close);
- Boiled Door too fast when calibrating (yes, it is written in the doc and everywhere and I was going too fast);
- light mechanical play in the door;
- sensor badly plated on its support (yes, I moved the sensor several times and the double-sided one needed to be redone).
On this last point, there is a trap with a small sensor anti-snapping (or “anti-sabotage”).

If the double-sided is not nickel, this small sensor blocks everything and a special state appears:
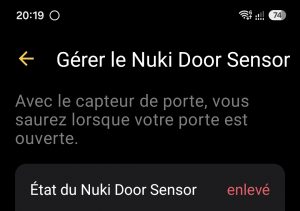
“Removed” is very clear: the sensor no longer touches its base completely, it is necessary to redo the holding of the double-sided to have instead, on this screen, the normal state of the Door Sensor and battery:
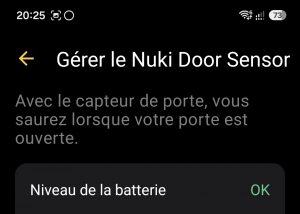
If Nuki has provided for this status to be displayed “removed”, is that many users have had the concern. Well thought out, but it surprises the first time.
What I did to stabilise all this:
- relaunch a recalibration since: Smart Lock → Settings → Manage Door Sensor → Calibrate Door Sensor ;
- be much more slow in door movements (yes, really slow);
- adjust the position of the magnet a little to stay well within the 0.5–3 cm range;
- check that the sensor was properly clipped without play.
Once this combo was respected, the behavior became frankly reliable.
📱 What it changes in the Nuki app
Once the Door Sensor operational, the Nuki app no longer merely displays:
- 🔒 locked / unlocked (state of the lock),
but also:
- 🚪 Closed door / Open Door (Door condition).

Combinations of the following type can therefore be seen:
- Door closed + lock locked → perfect;
- Door closed + lock unlocked → someone is at home;
- Door open + lock locked → to be monitored;
- Door open + lock unlocked → door really open.
🔔 Notifications and Alerts
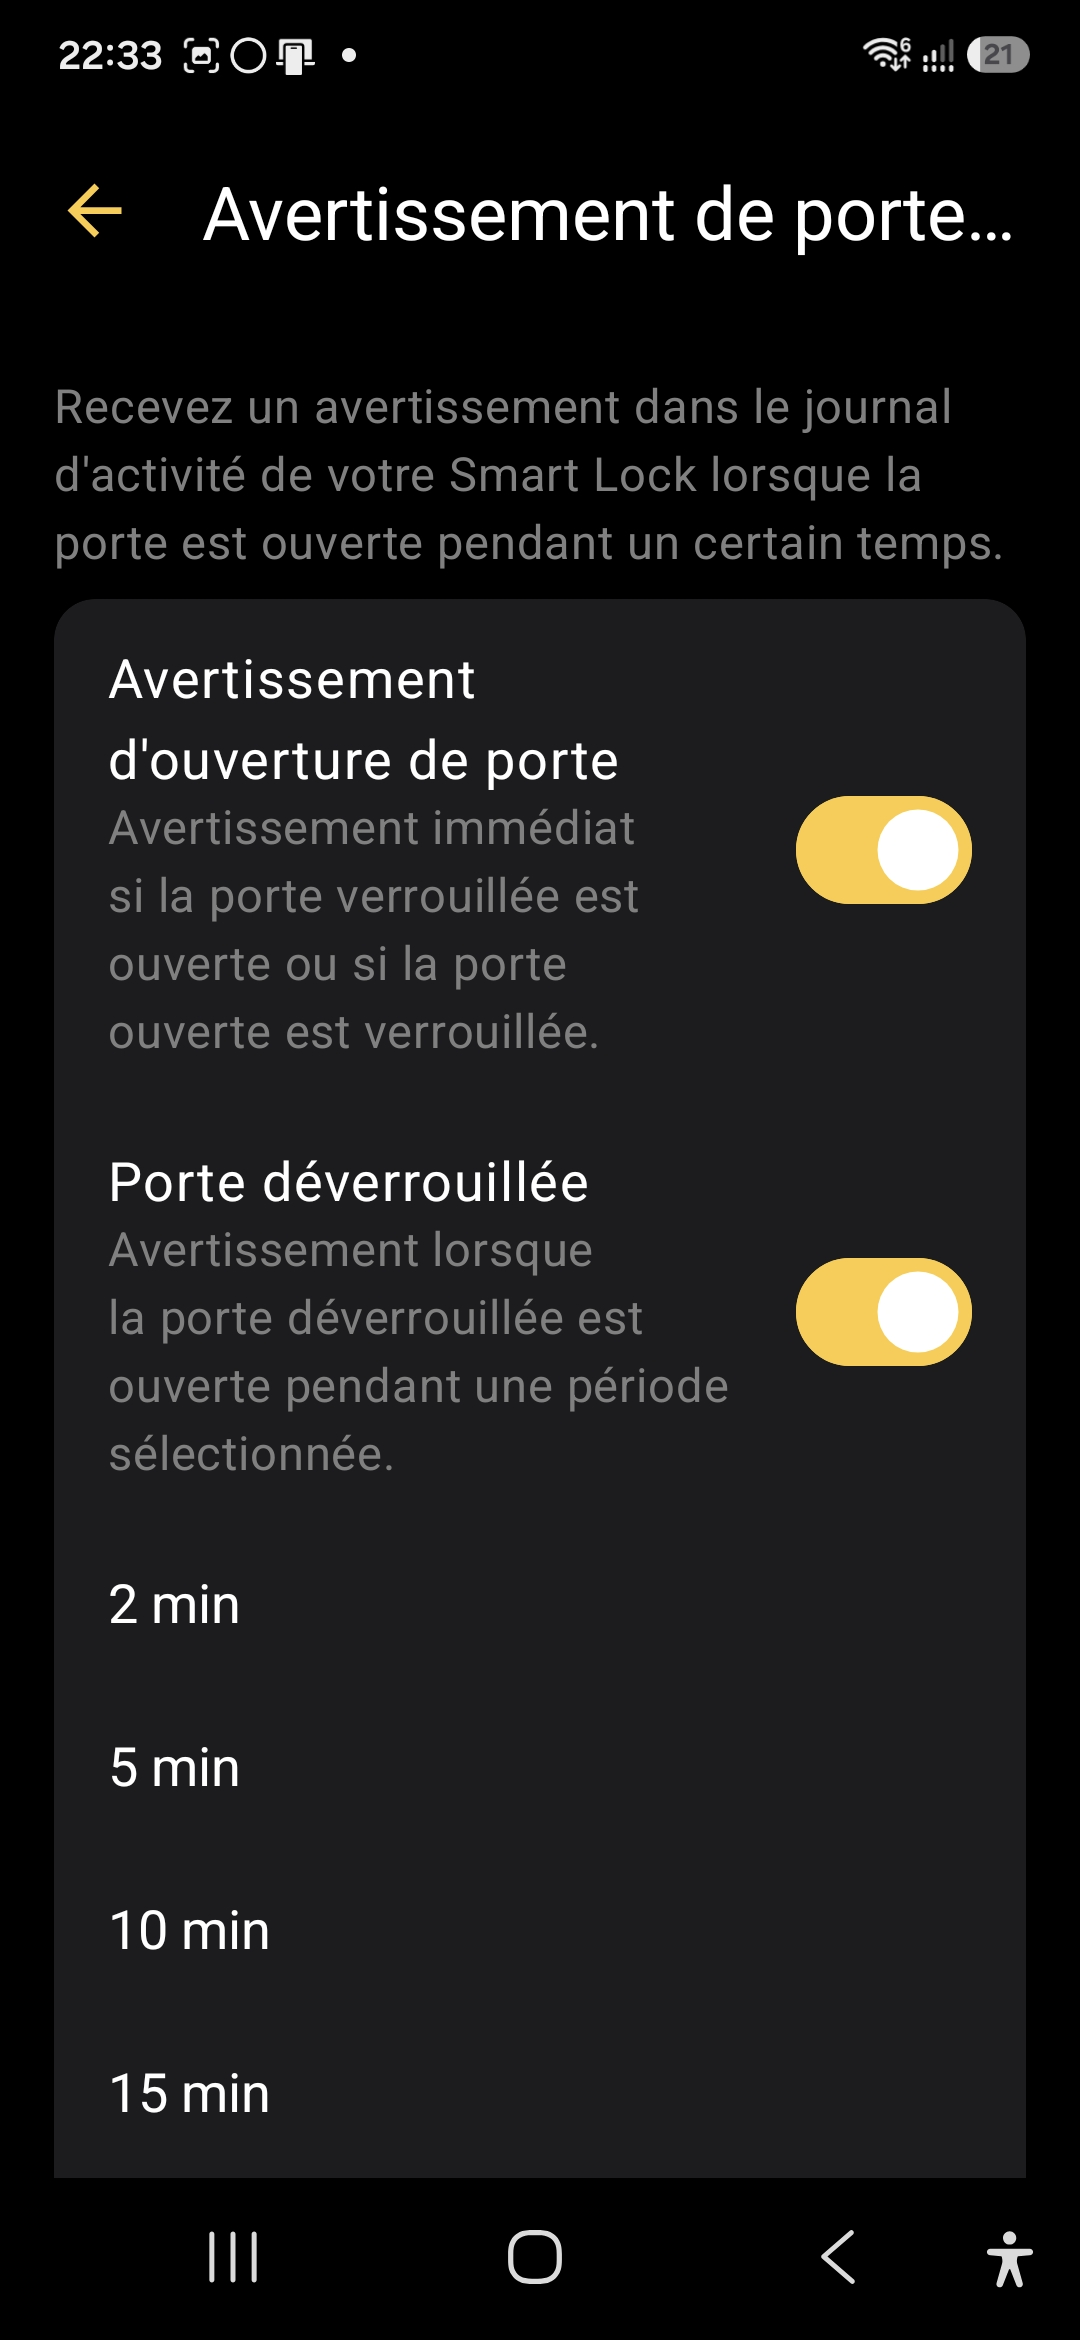
The app allows you to configure notifications related to the condition of the door:
- alerts if the door remains open too long;
- alerts if the lock tries to lock while the door is not closed.
For a front door, this is exactly the kind of detail that ends up counting on a daily basis. Everyone can choose what they want to do: be notified all the time, only in absence mode, or not at all.
🤓 And on the home automation side, what does it look like?
As I explained in I connect the Nuki Smart Lock Ultra to my home automation :
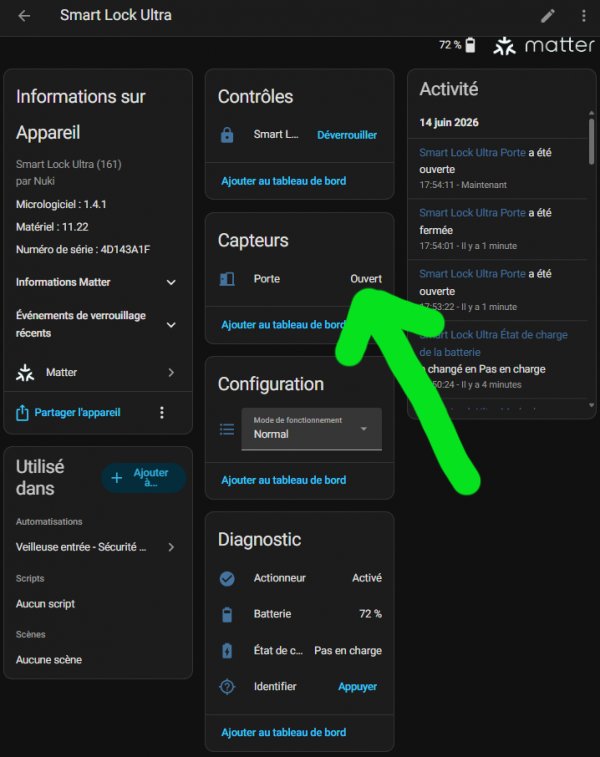
The status of the door (Open or Closed) can be found in Home Assistant, whether in MQTT or Matter.
Indeed, on the side of home automation integrations (Nuki Hub, MQTT, Home Assistant), we see that the Door Sensor is exposed as separate entity, in addition to the lock:
- an entity
lock.xxxfor the Smart Lock; - an entity
binary_sensor.xxx_door(or equivalent) for the condition of the door.
Some Matter/SmartThings drivers consider that anything that is not “closed” is treated as “open”. In other words, if it is not explicitly closed, it is considered open.
From there, we can imagine scenarios in Home Assistant:
- prevent an automatism from locking if
doorState!= closed; - trigger an alert if the door switches to “open” while the house is in “Absent” mode;
- turn on the ‘closed → open’ transition input lighting after dark.
For beginners: You don't have to get into this from day one. The Door Sensor already works very well with the Nuki app alone. The Home Assistant part is a second stage to go further.
✅ My opinion after installation
After a few weeks of use, my feeling is clear:
- The Door Sensor is the brick that was missing for the Nuki Smart Lock Ultra to have a coherent view of the whole lock + door.
- The technological difference with a simple magnetic contact explains the price : we are no longer in the small generic binary sensor, but in an integrated module, calibrated, designed to work hand in hand with the lock.
- On the usage side, the ‘door remained open’ notifications and the possibility to exploit the state of the door in Home Assistant bring a real plus in comfort and security.
- The real plus is that the lock lock locks a few seconds after the door is closed: it’s impressive, totally brilliant … and you get used to it way too quickly!
 English
  French
  Spanish
  Chinese
  German