

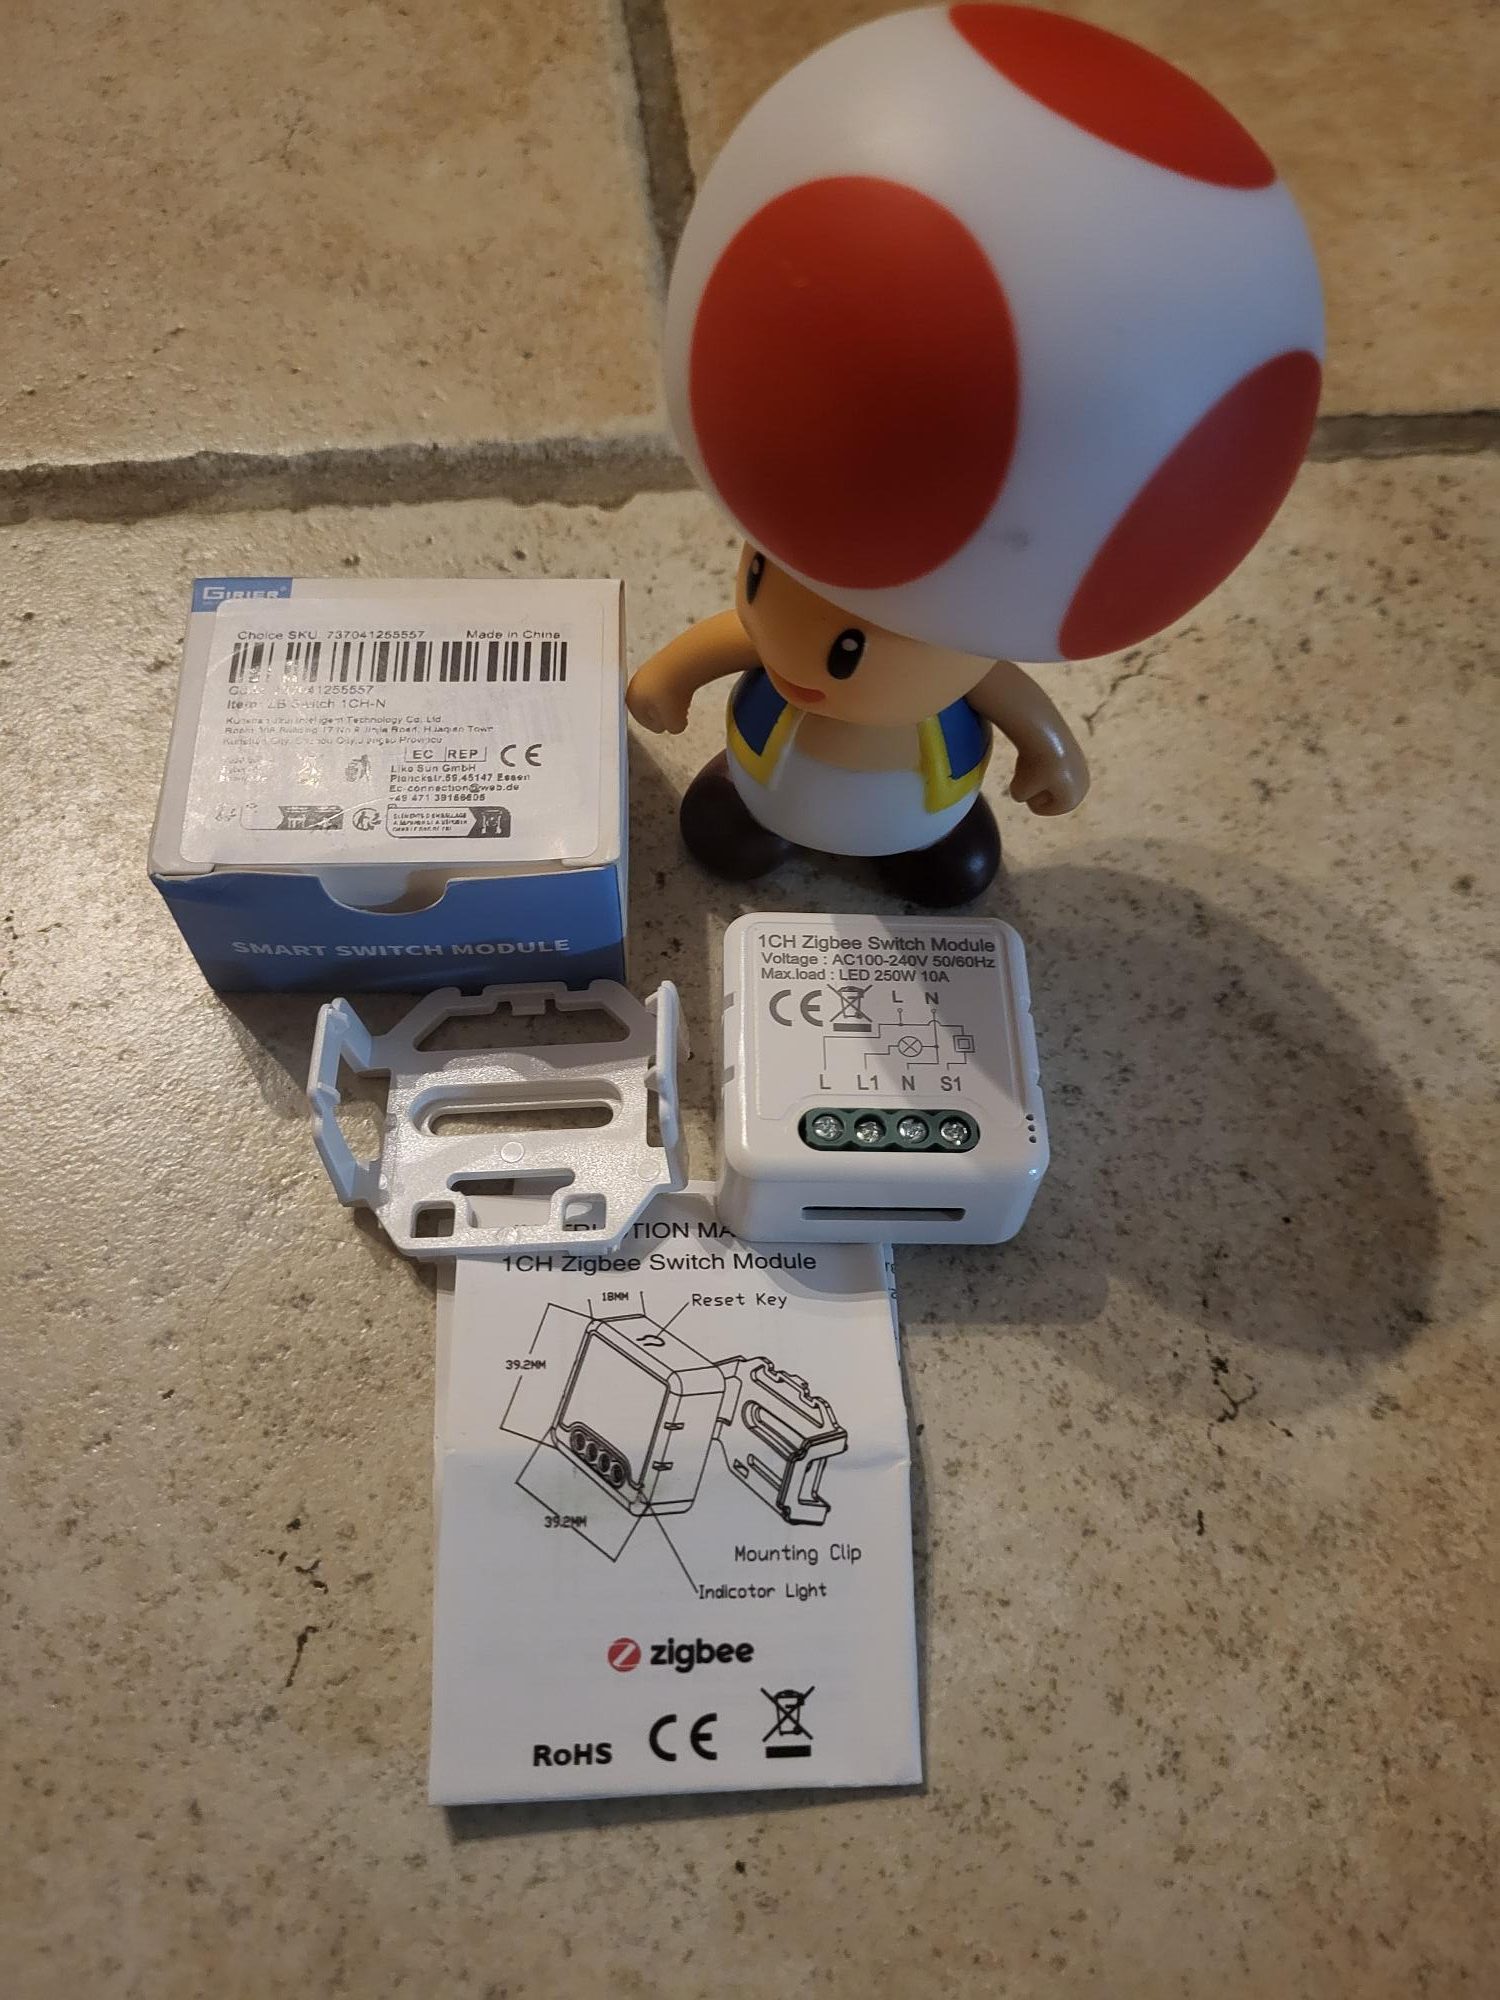
Zigbee Tuya module with neutral: verification and installation
This Zigbee Tuya module requires a neutral to operate and improve the Zigbee network. I received a model without visible reference, marked JR-ZDS02 at the time of purchase, with mandatory N terminal. Unlike the neutral-free module like the ZB-Switch-1ChL, it routes the Zigbee frames, thus enhancing the reach and stability of the mesh.
Neutral allows active routing of Zigbee signals: Each module with neutral acts as a repeater, relaying commands between remote devices. Without neutral, the equipment remains a terminal point, limiting network coverage. Choosing a module with neutral therefore optimises the entire home automation installation.
I check the received model
Many references exist for these Tuya Zigbee modules, but mine does not display any on the box or module. I noted JR-ZDS02 because it was indicated at the time of purchase. This specific version requires the presence of the neutral (blue wire in the electrical installation).
Attention: this module looks like a line for a line Module L (ZB-Switch-1ChL) which, on the other hand, operates without neutral. The key difference lies in the terminals: N (neutral) here, COM (common) on the other model.
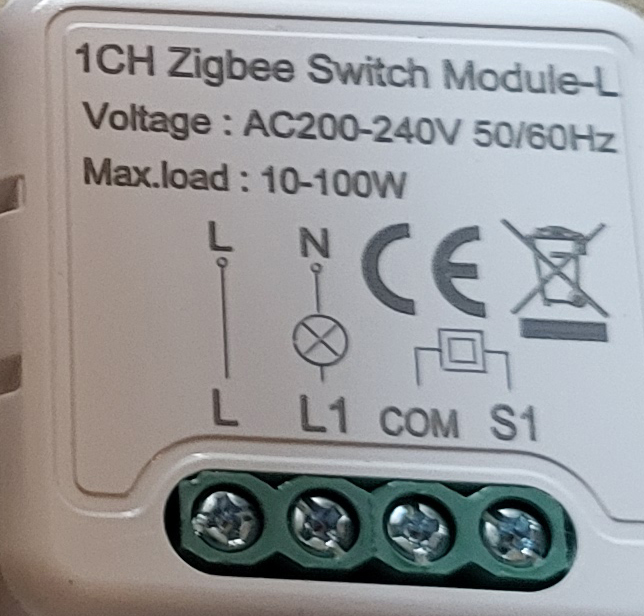
As a reminder, favoring equipment with neutral improves the Zigbee network. They route the frames, creating a robust mesh where each module relays the signals. Without neutral, they terminate the network without relaying, reducing the overall reach.
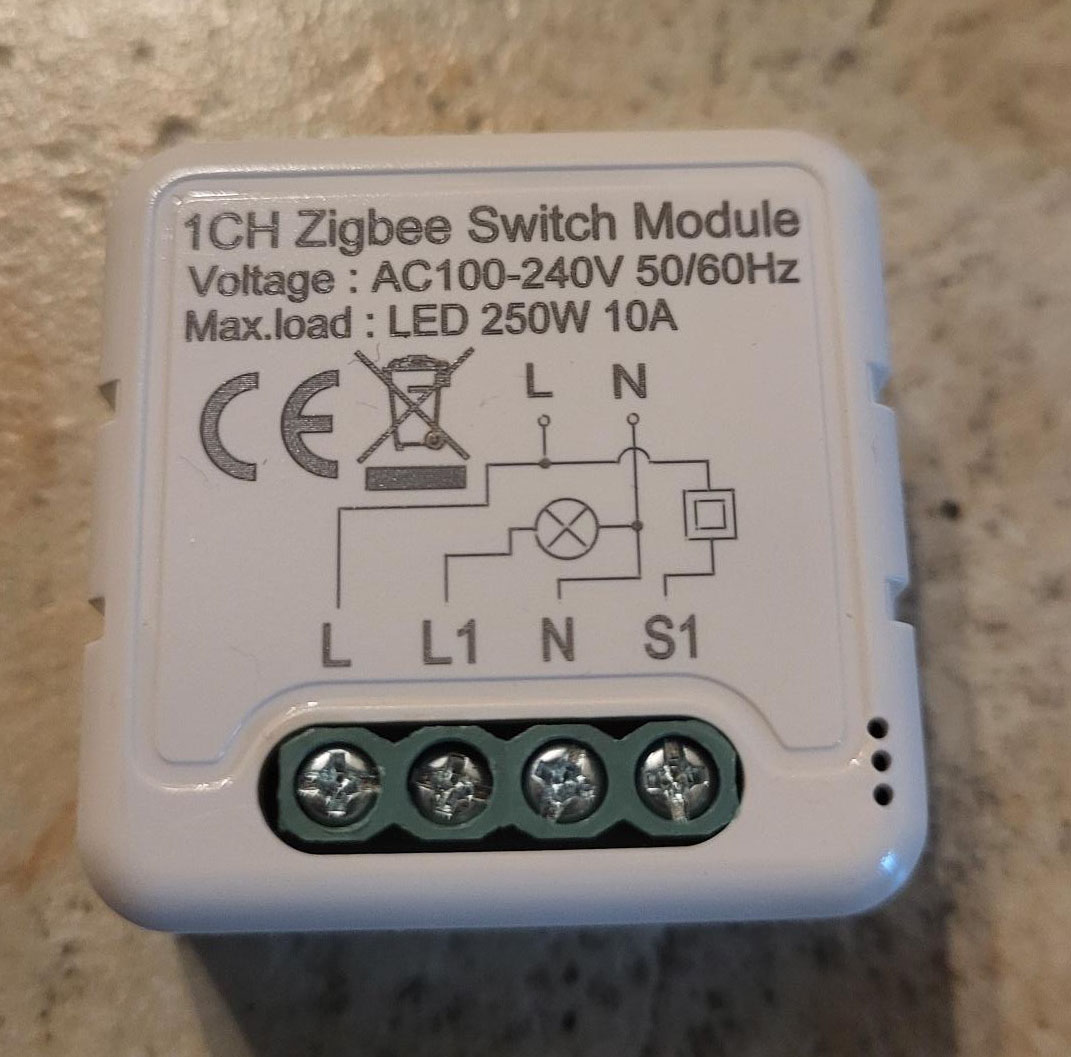
I connect L and N
Connections use a standard Wago or screw connector, typical of built-in modules. Connect the phase (L, brown) to the L terminal, the neutral (N, blue) to the N terminal, and the load (lamp or circuit) to the output terminal.
Always check that there is no tension with a tester before handling. Cut off the general circuit breaker, securely connect the twisted wires, and then close the flush-mounted housing.
I integrate this box with Zigbee2MQTT
When power is turned on, the blue LED flashes immediately: sign that the module is switching to automatic pairing mode. Enable the pairing mode in Zigbee2MQTT (Permit Join button for a minimum of 30 seconds).
The pairing succeeds in a few seconds: the module appears in the list of devices. It is recognised as _TZE200 _fwoovgla (TS0001), with the exact icon of the 1 channel module.
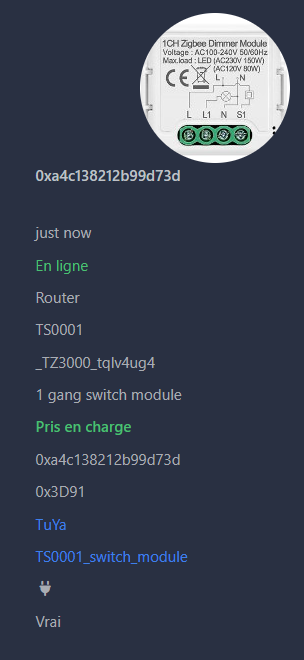
Entities shall immediately report: state (on/off), brightness (if dimmable), power, and linkquality. Test the ignition/turn-off: Everything works without any additional configuration.
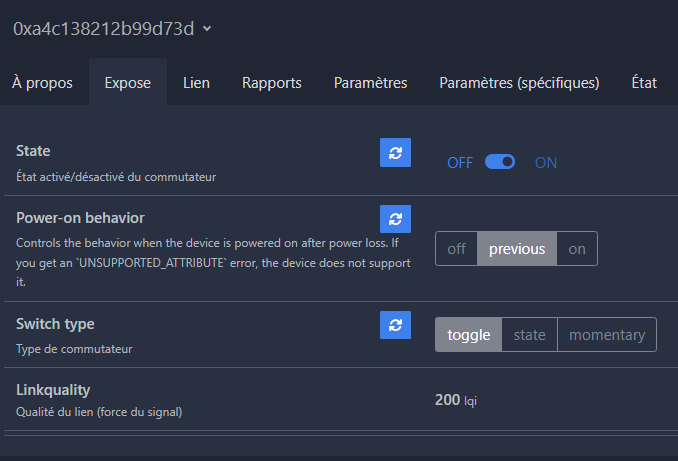
I'm going to Home Assistant.
In Home Assistant, the equipment appears automatically via the MQTT integration. It is configured in switch or light according to the exposed entities (state for on/off, brightness for dimmer).
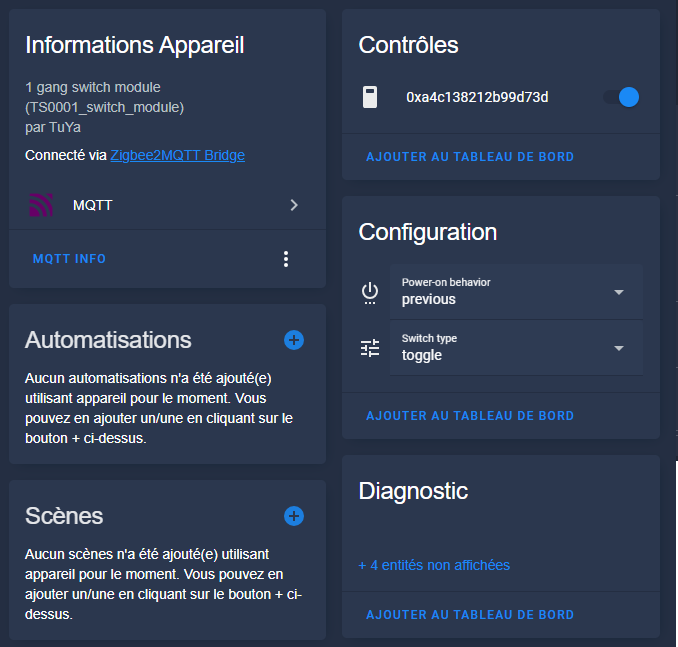
The whole is perfectly integrated: fluid controls, immediate responsiveness, and monitoring of power consumption. No additional YAML configuration required.
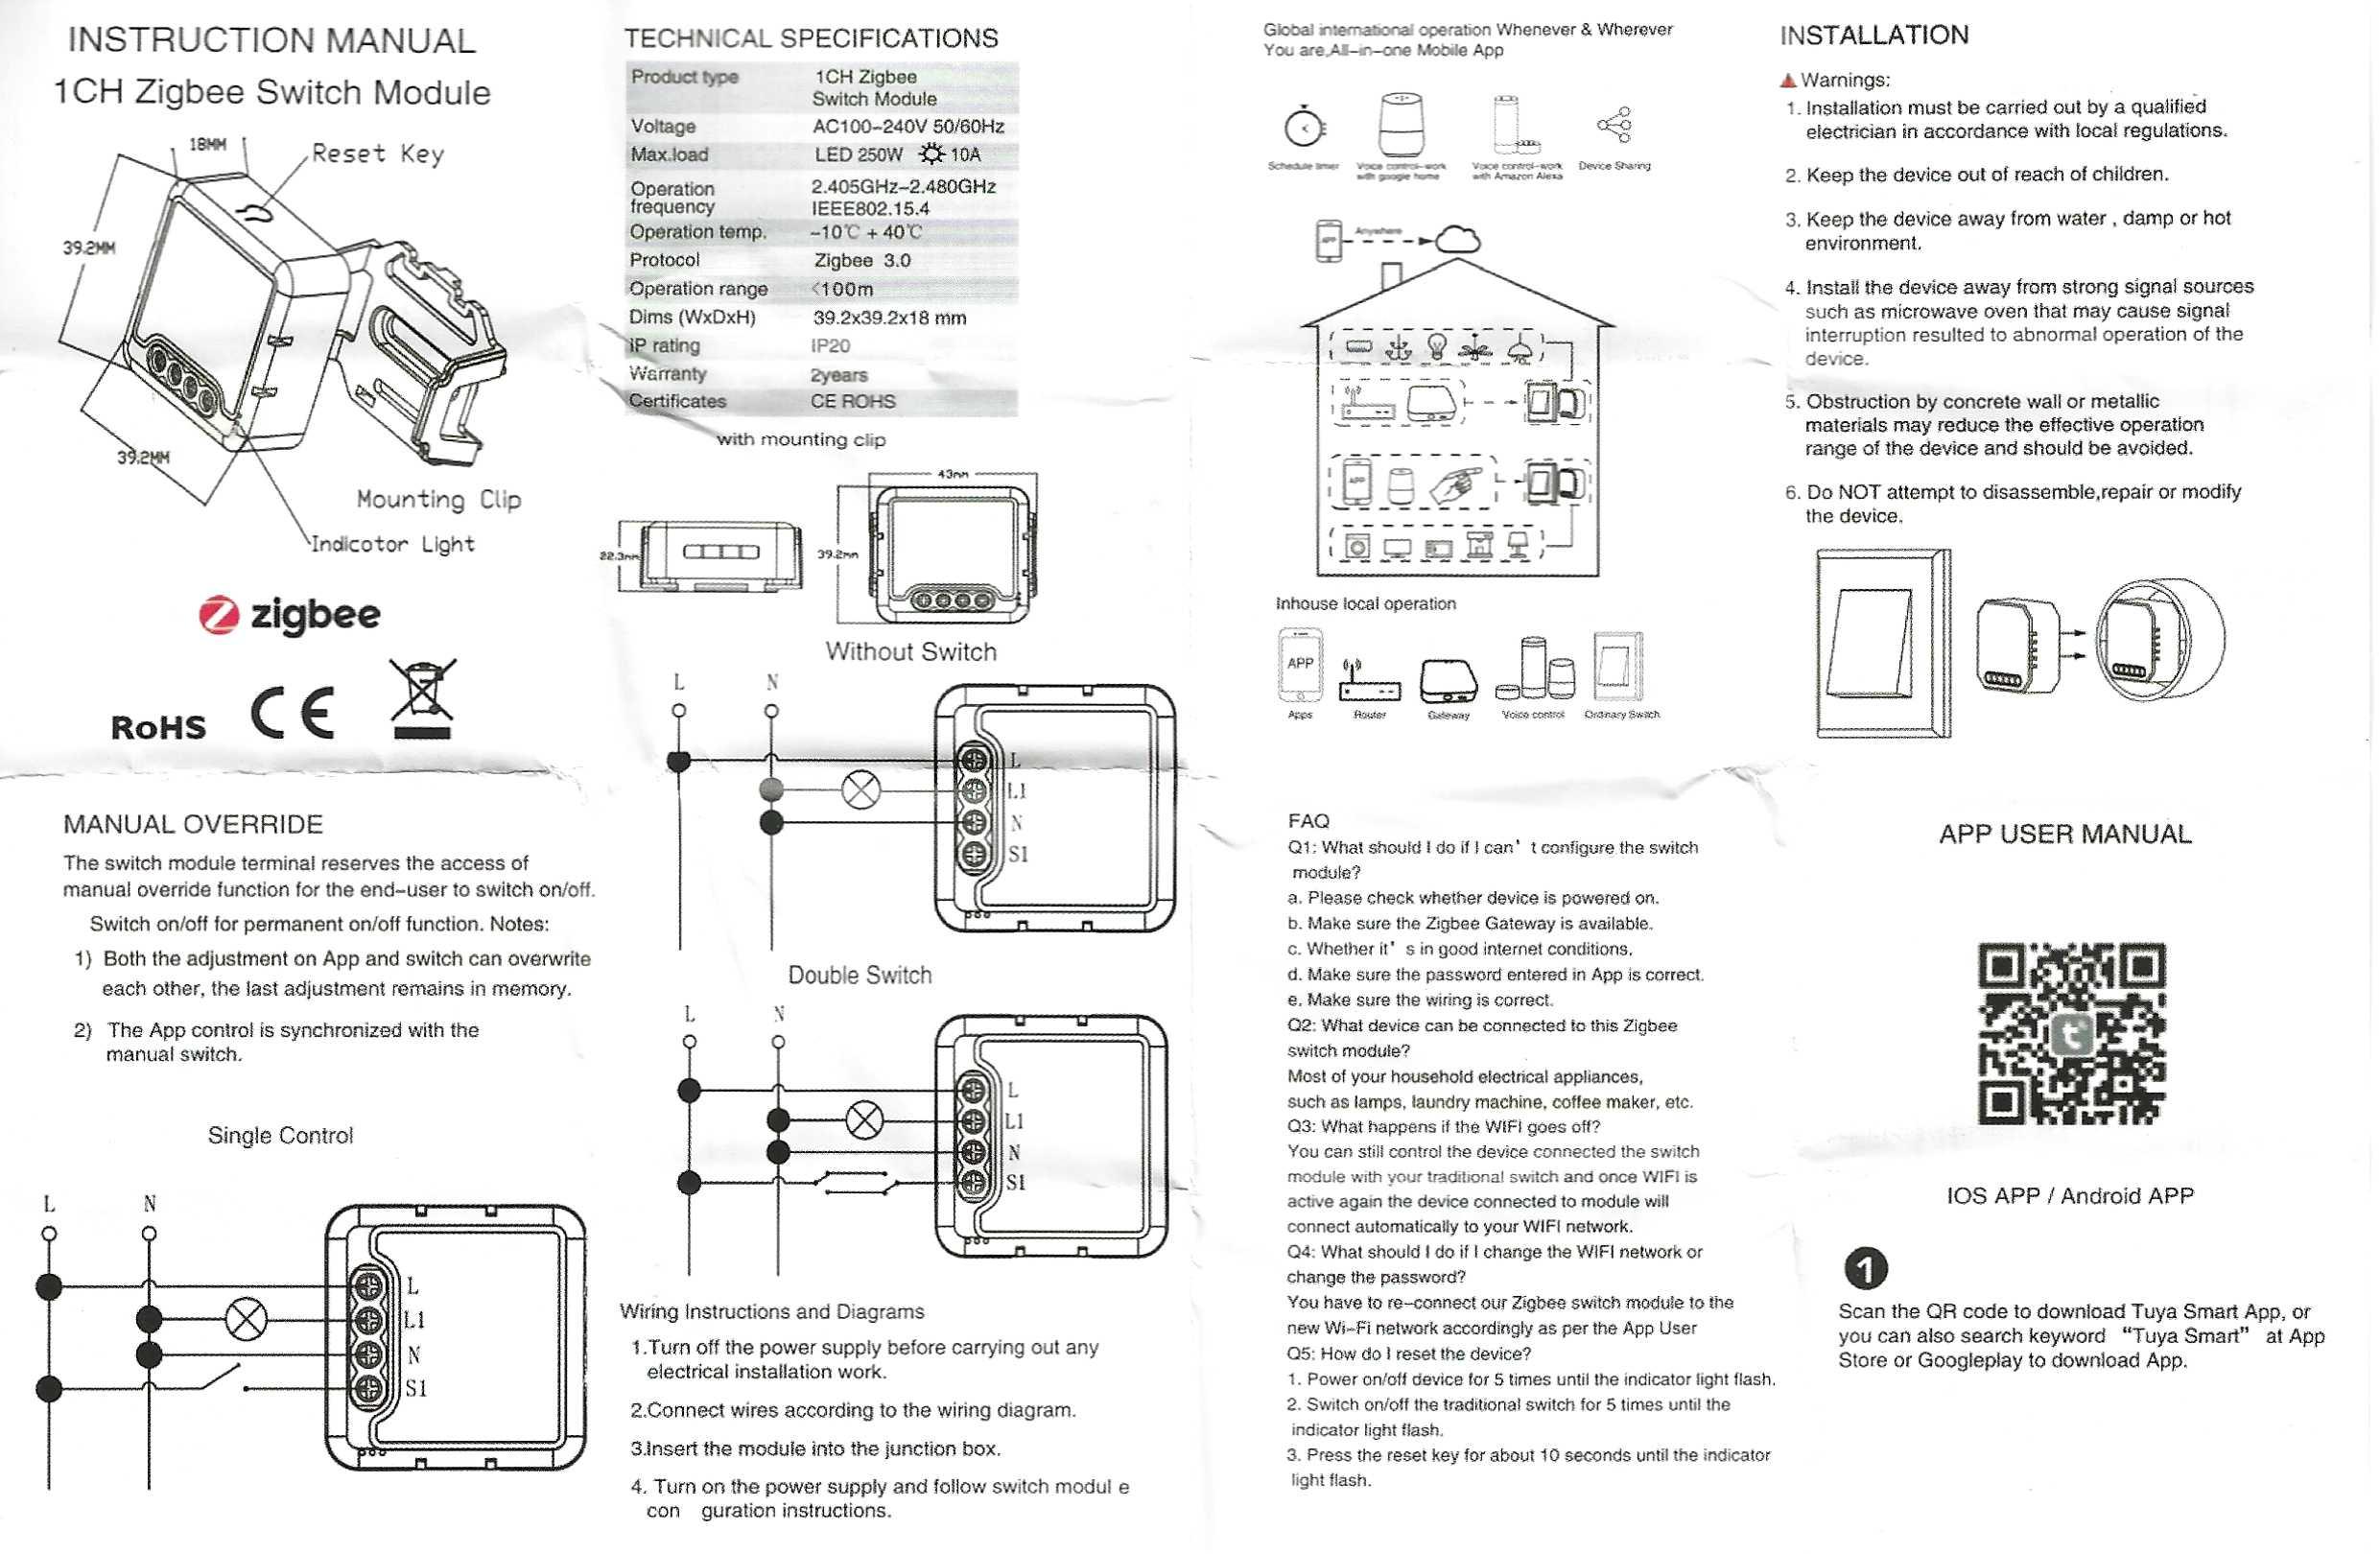
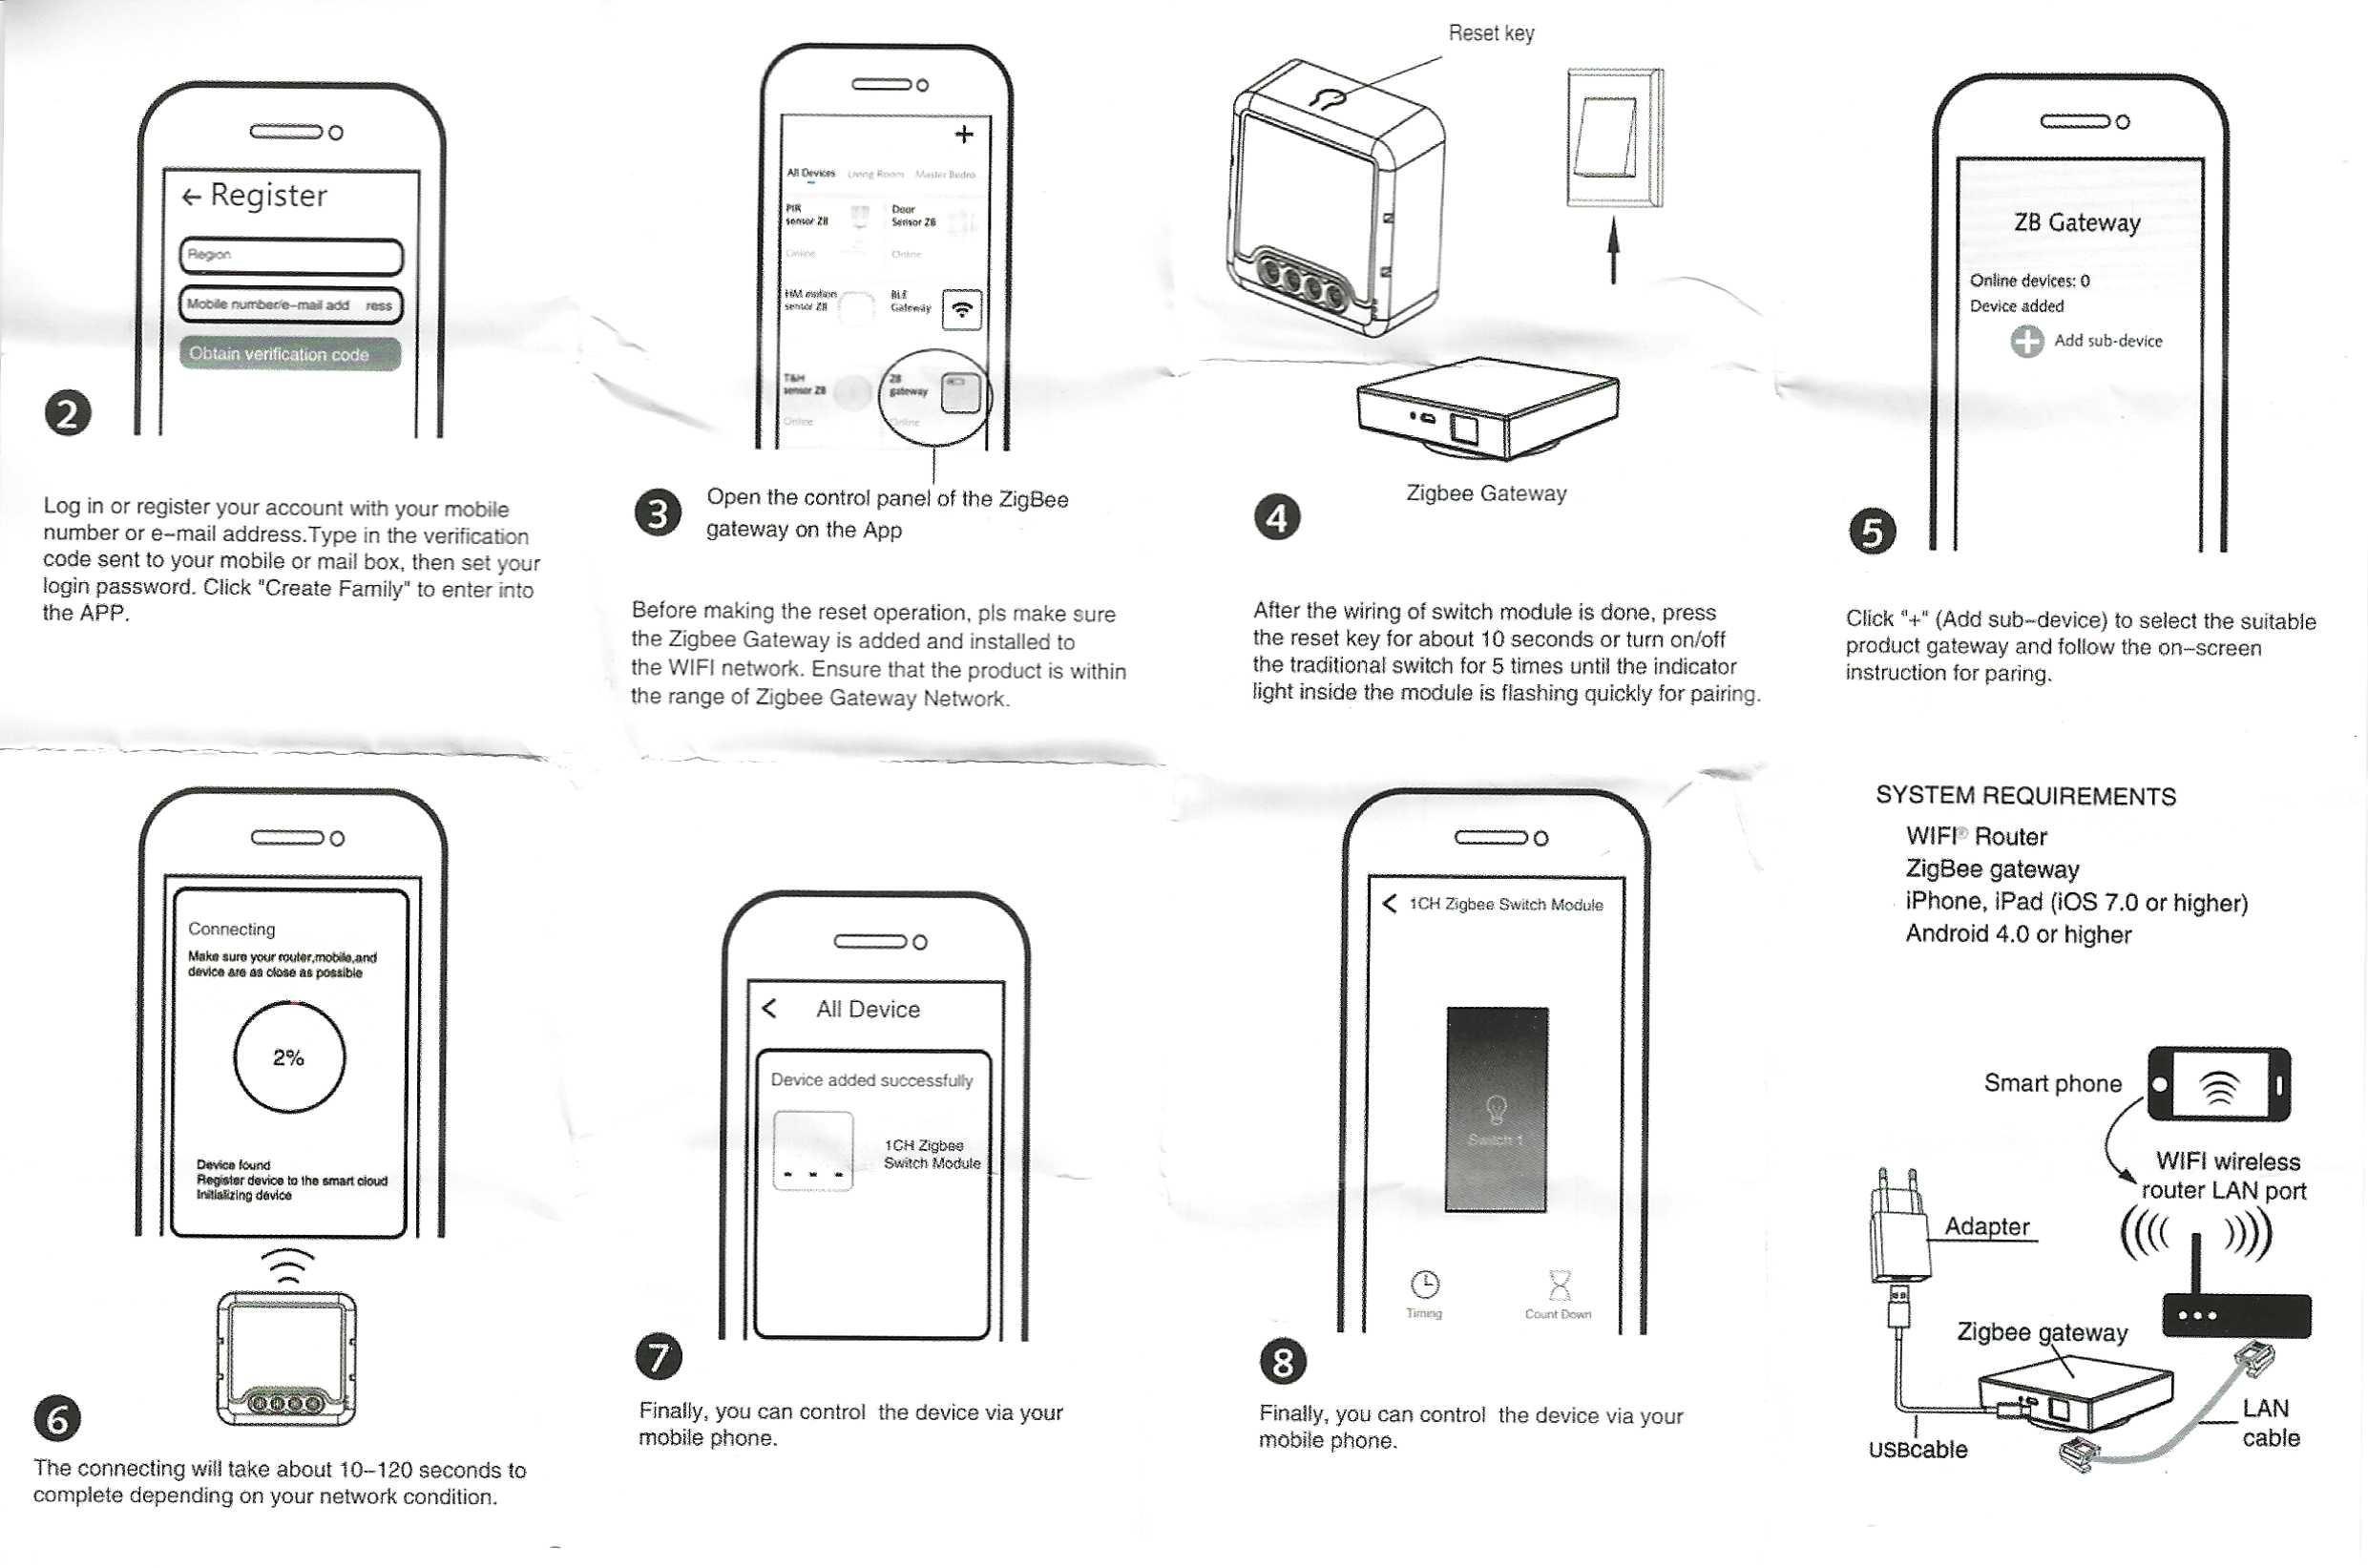
For archive: instructions for use
 English
  French
  Spanish
  Chinese
  German