

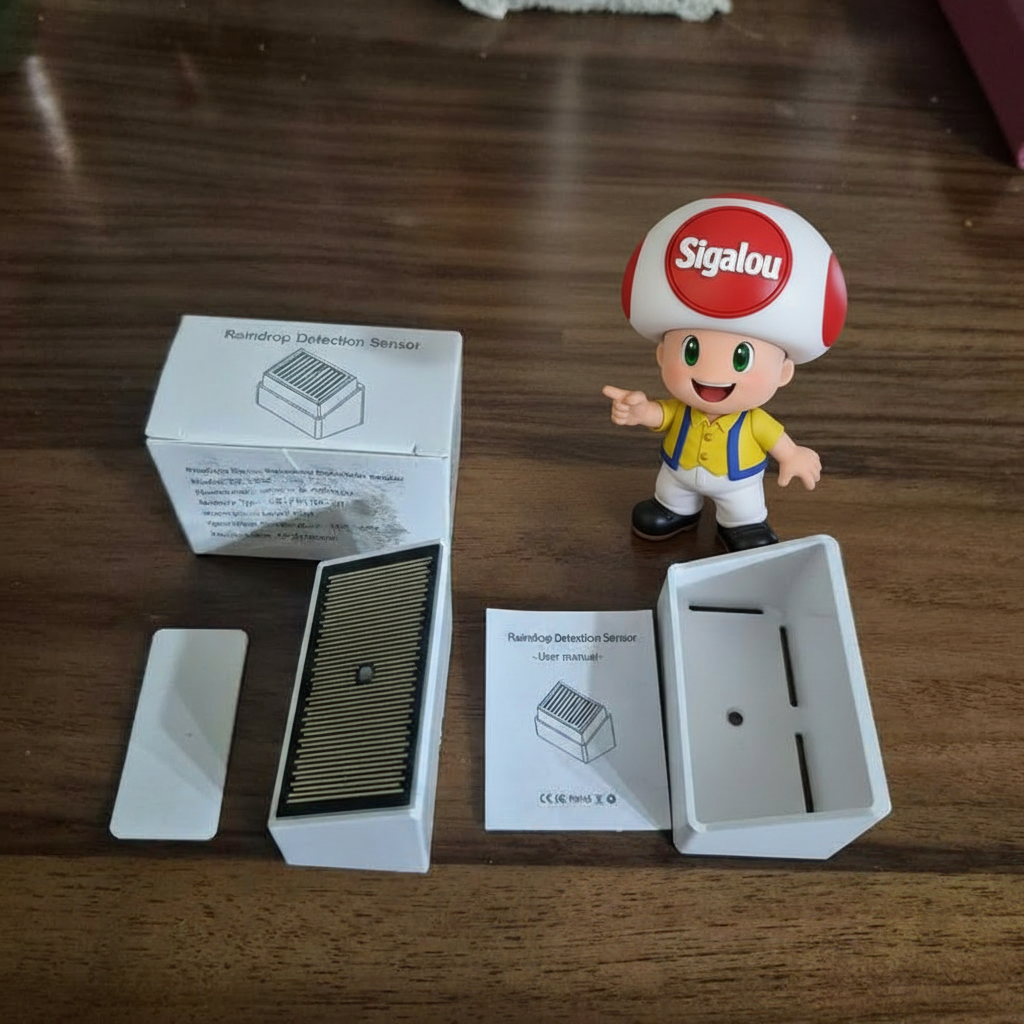
I need to monitor the rain around my house to protect my laundry, my blinds and my watering. So I chose the Zigbee rain sensor ZG-223Z, a small module that detects rain and measures illumination. Its big interest is to operate locally via Zigbee2MQTT, without depending on a cloud weather service or a full weather station.
🎯 My objectives
I just want to know if it is really raining at home, not 20 km away, and use this info in my home automation scenarios. My goal is to cut off the watering as soon as it rains, automatically close some openings, and receive an alert if a shower arrives while the laundry is drying outside. The ZG-223Z promises a binary “it's raining / it's not raining” return and brightness measurement, perfect for reliable automations.
🔍 I check the received model
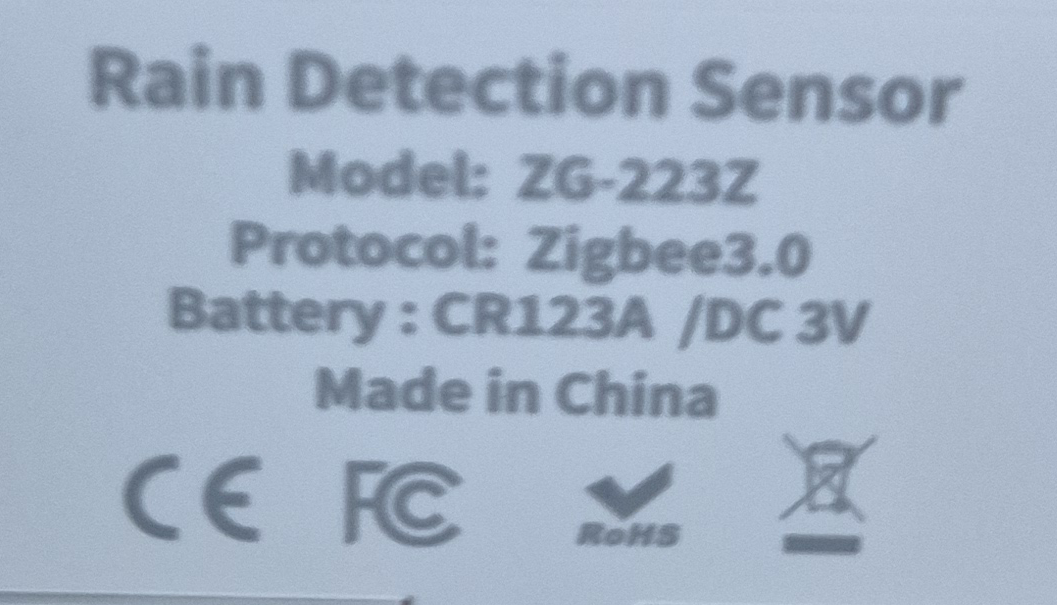
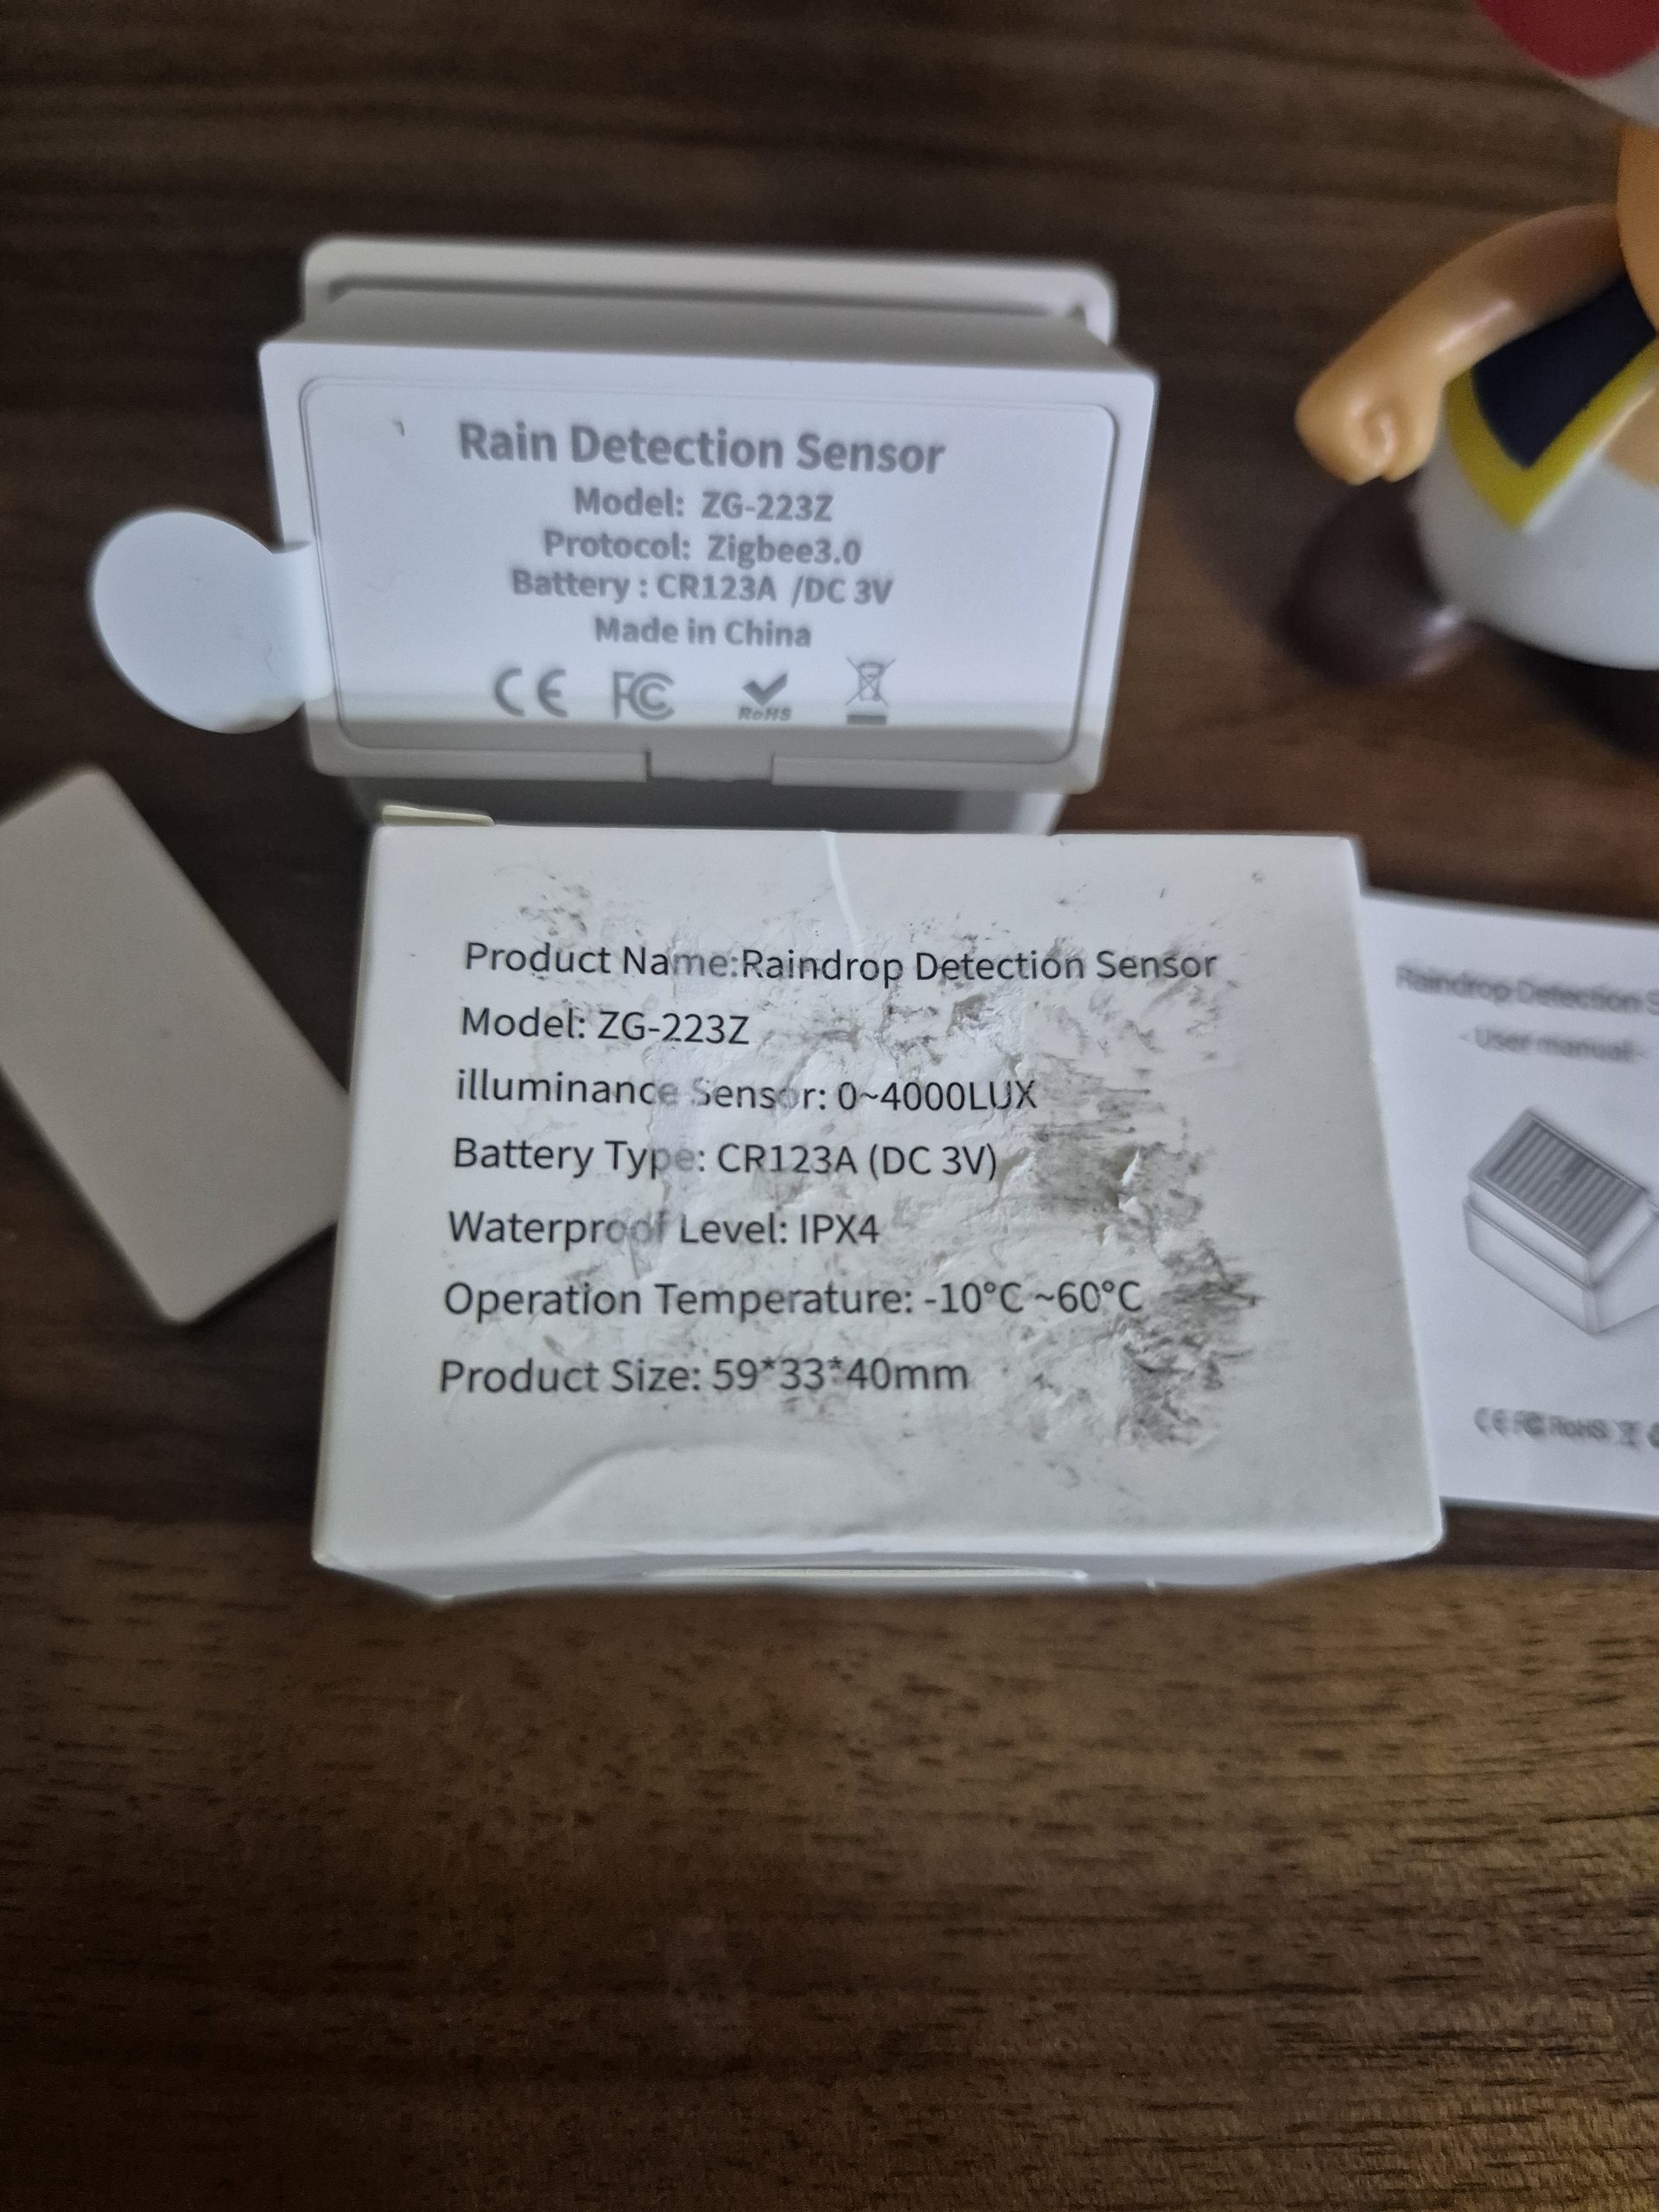
- On the technical sheet : ZG-223Z, Rainwater detection sensor 2-in-1 (rain + brightness).
- On the carton : reference ZG-223Z clearly indicated, compatible Tuya Zigbee.
- Type of equipment : Binary rain sensor with built-in brightness sensor.
- Protocol : Zigbee 3.0, recognized by Zigbee2MQTT as ZG-223Z.
- Power supply : internal battery (button type or AAA depending on the version) or reduced energy module.
- Intended installation : outside, sensor oriented to the sky to capture the first drops.
- Measuring ranges : rain status (none / raining) and level of illumination.
- Dimensions / IP : small compact case, rain protection (IPX4 or similar depending on seller).
🛒 Where to buy this equipment?
Here is the link to the page dedicated to the Zigbee rain sensor ZG-223Z. I referenced the sellers, the prices.
📦 Unpacking and First Impressions
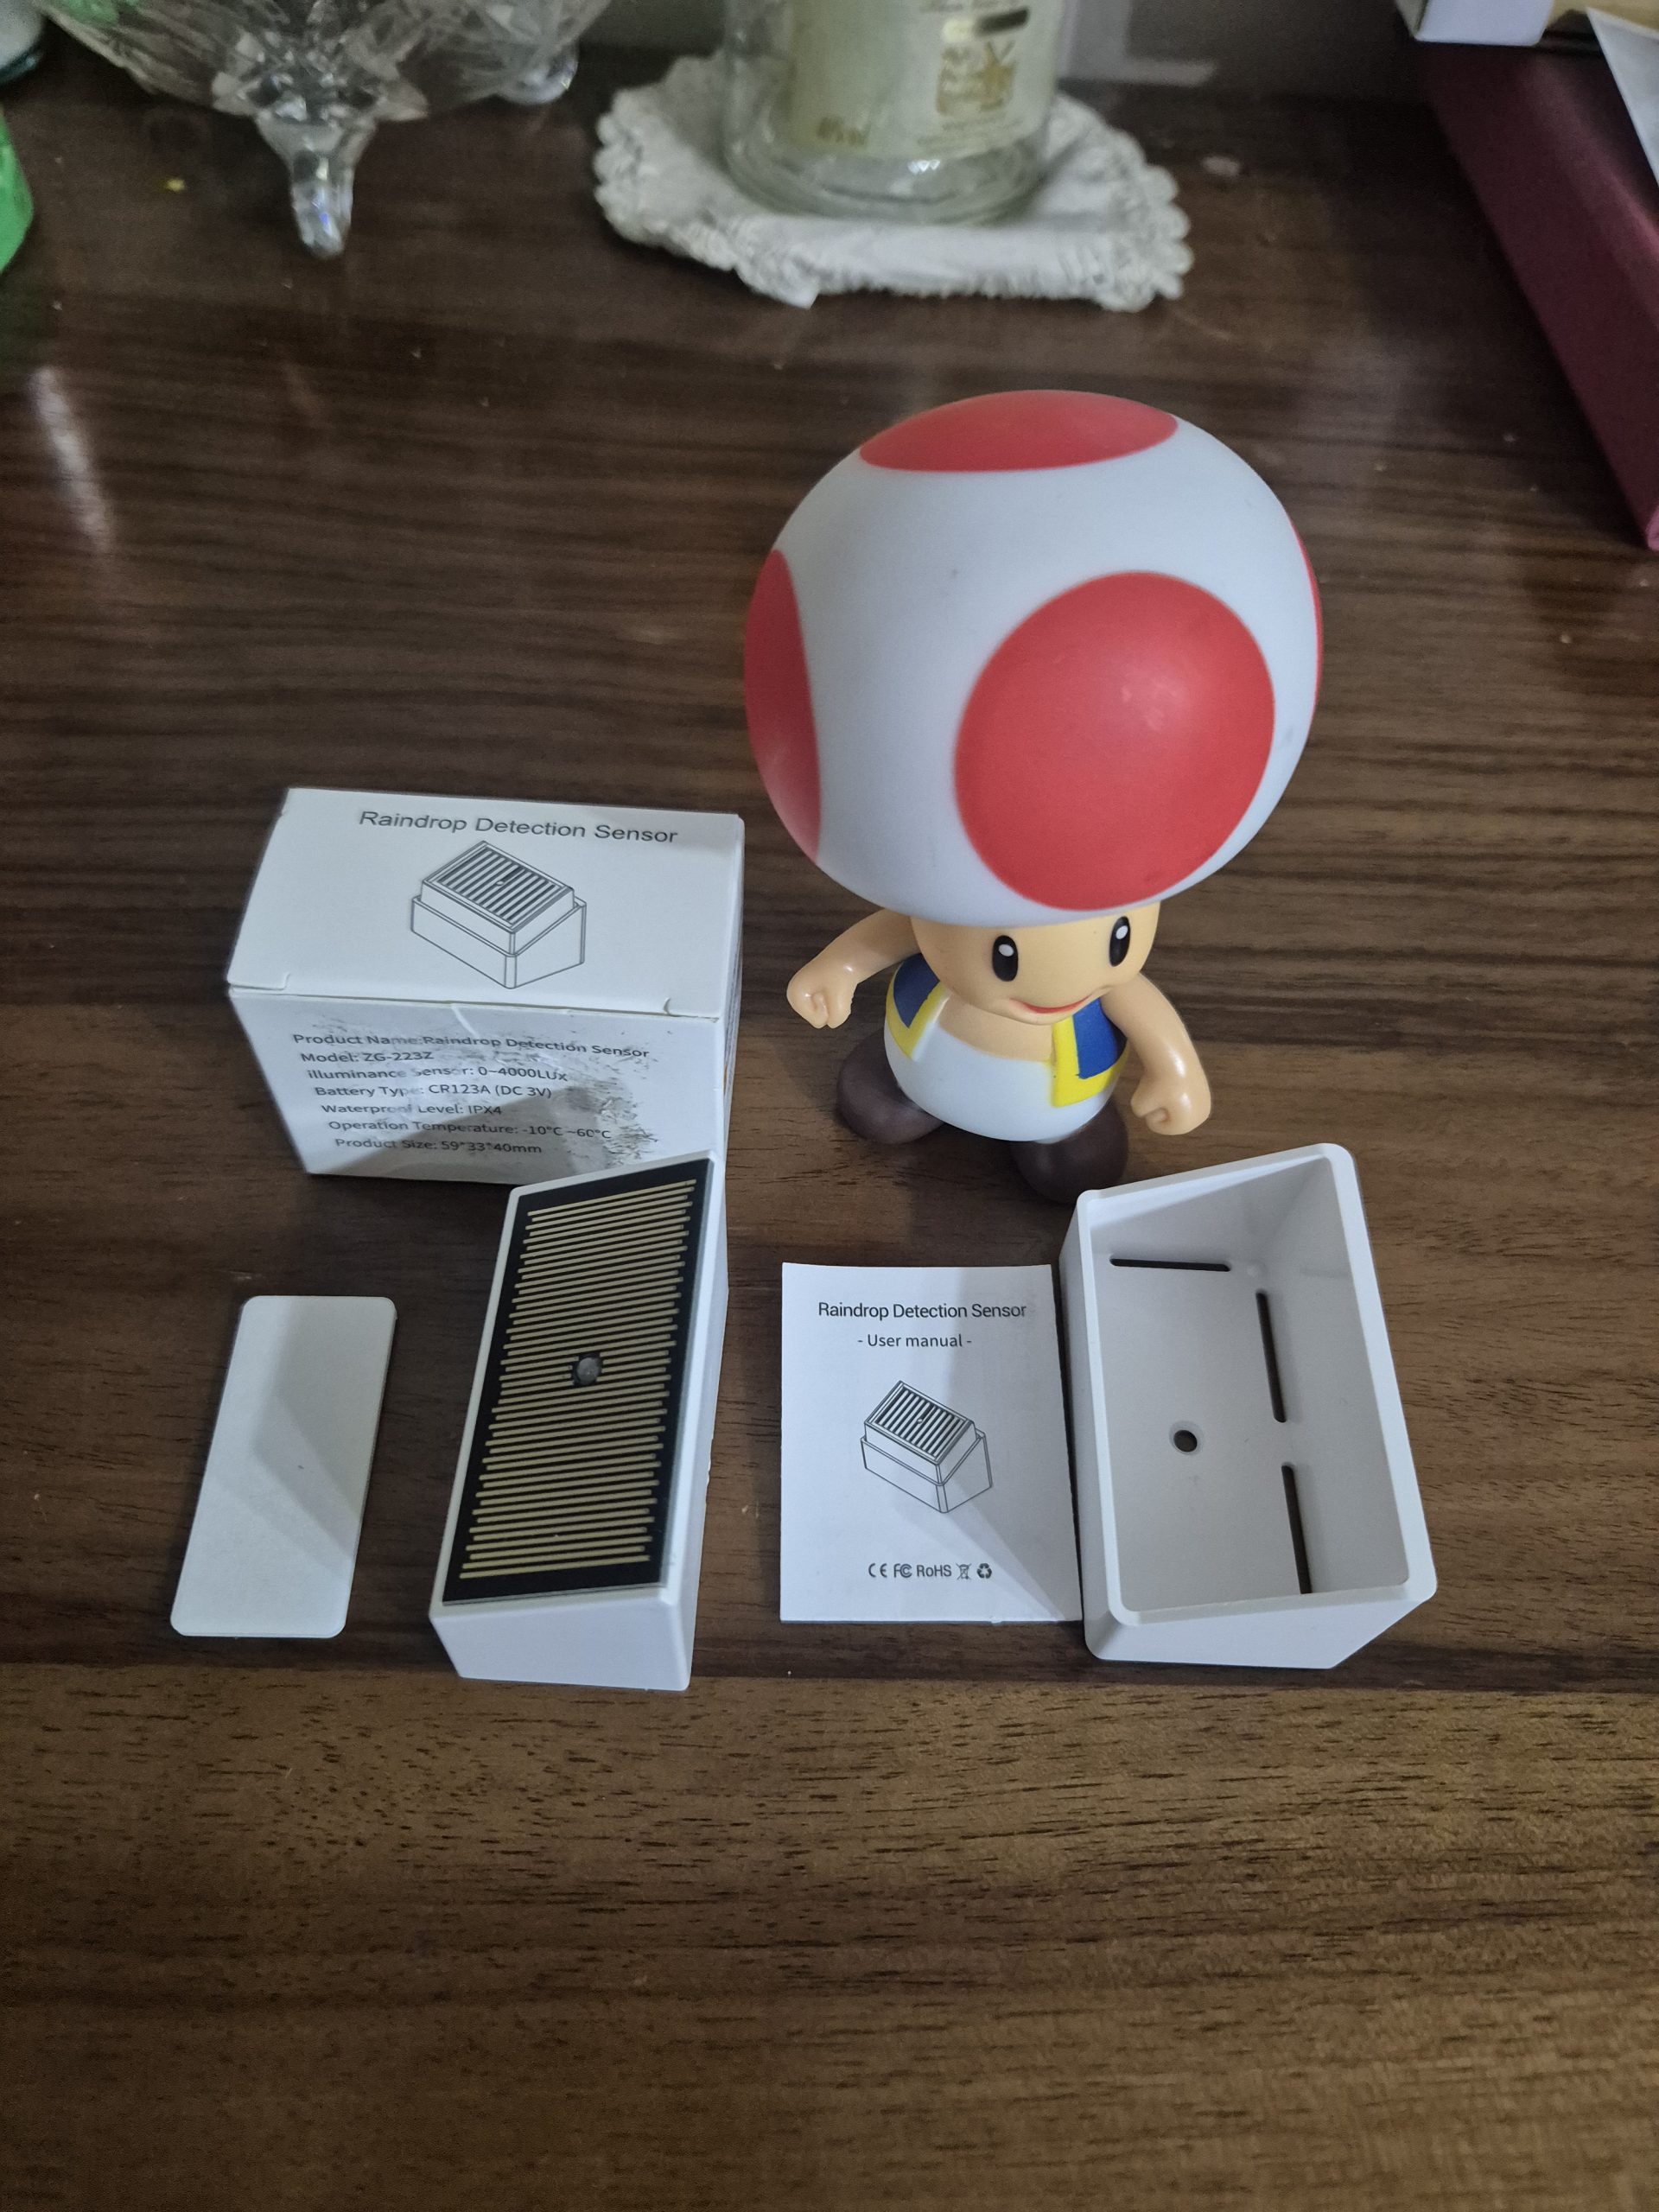
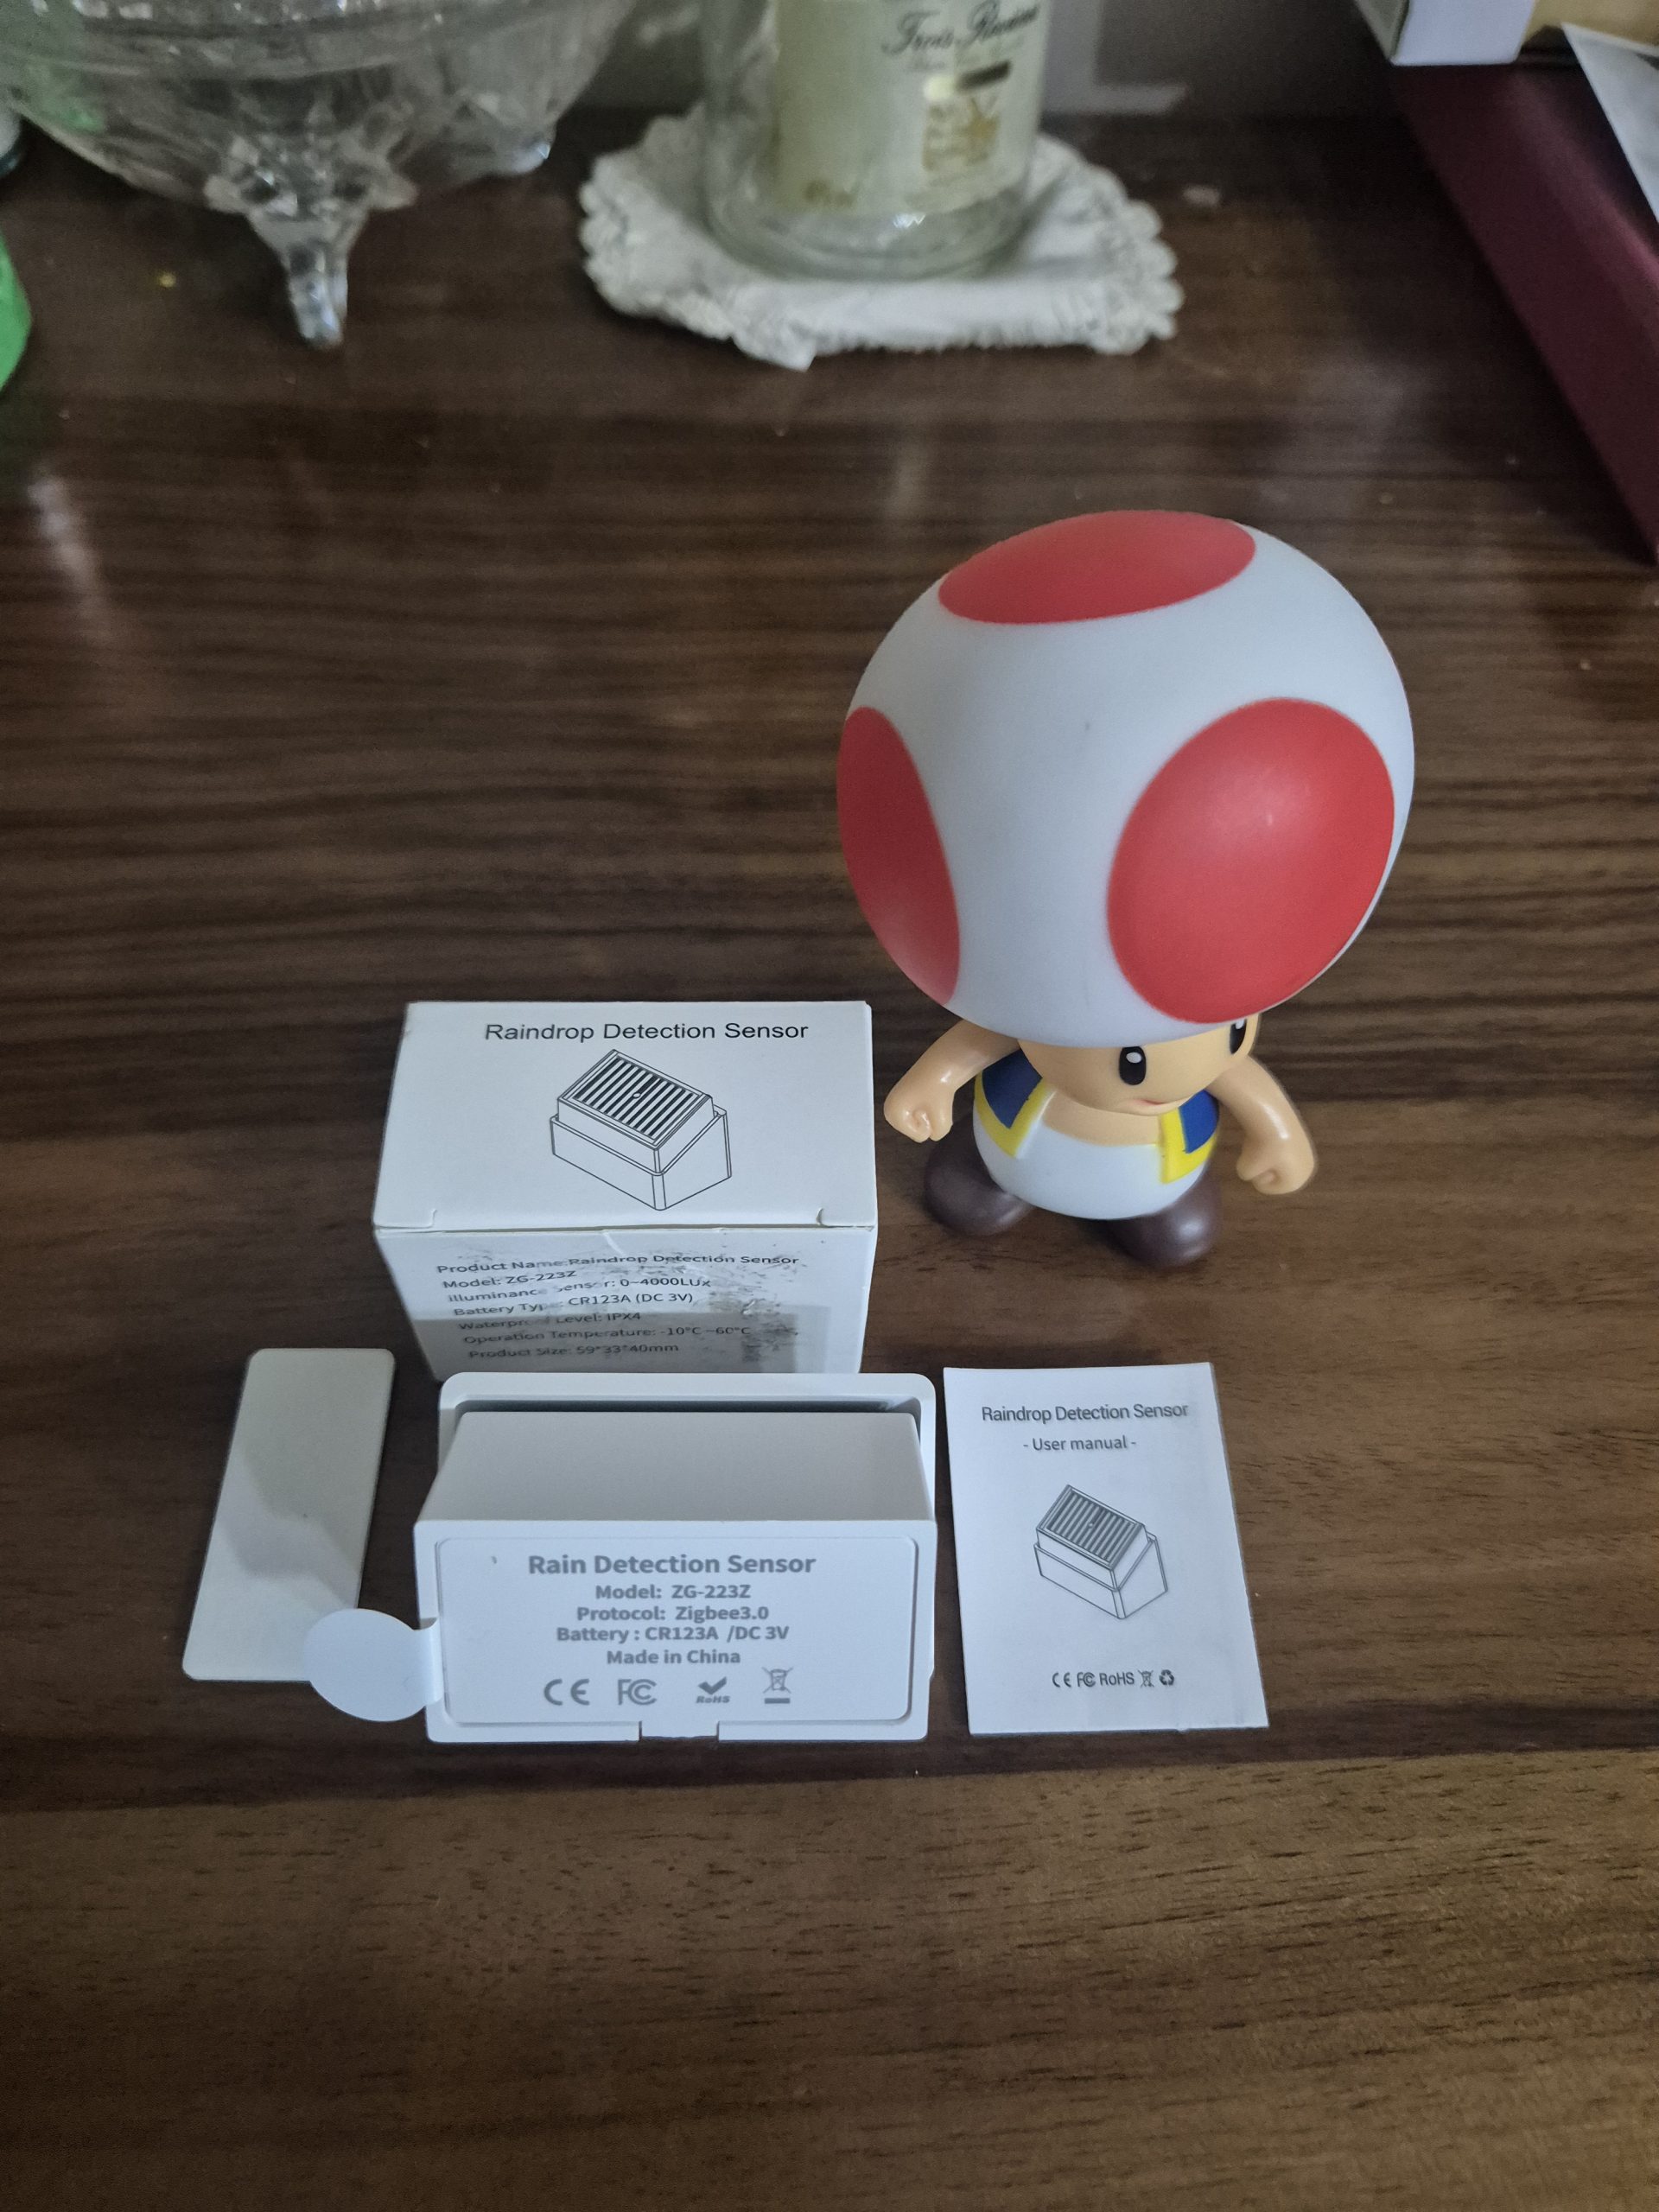
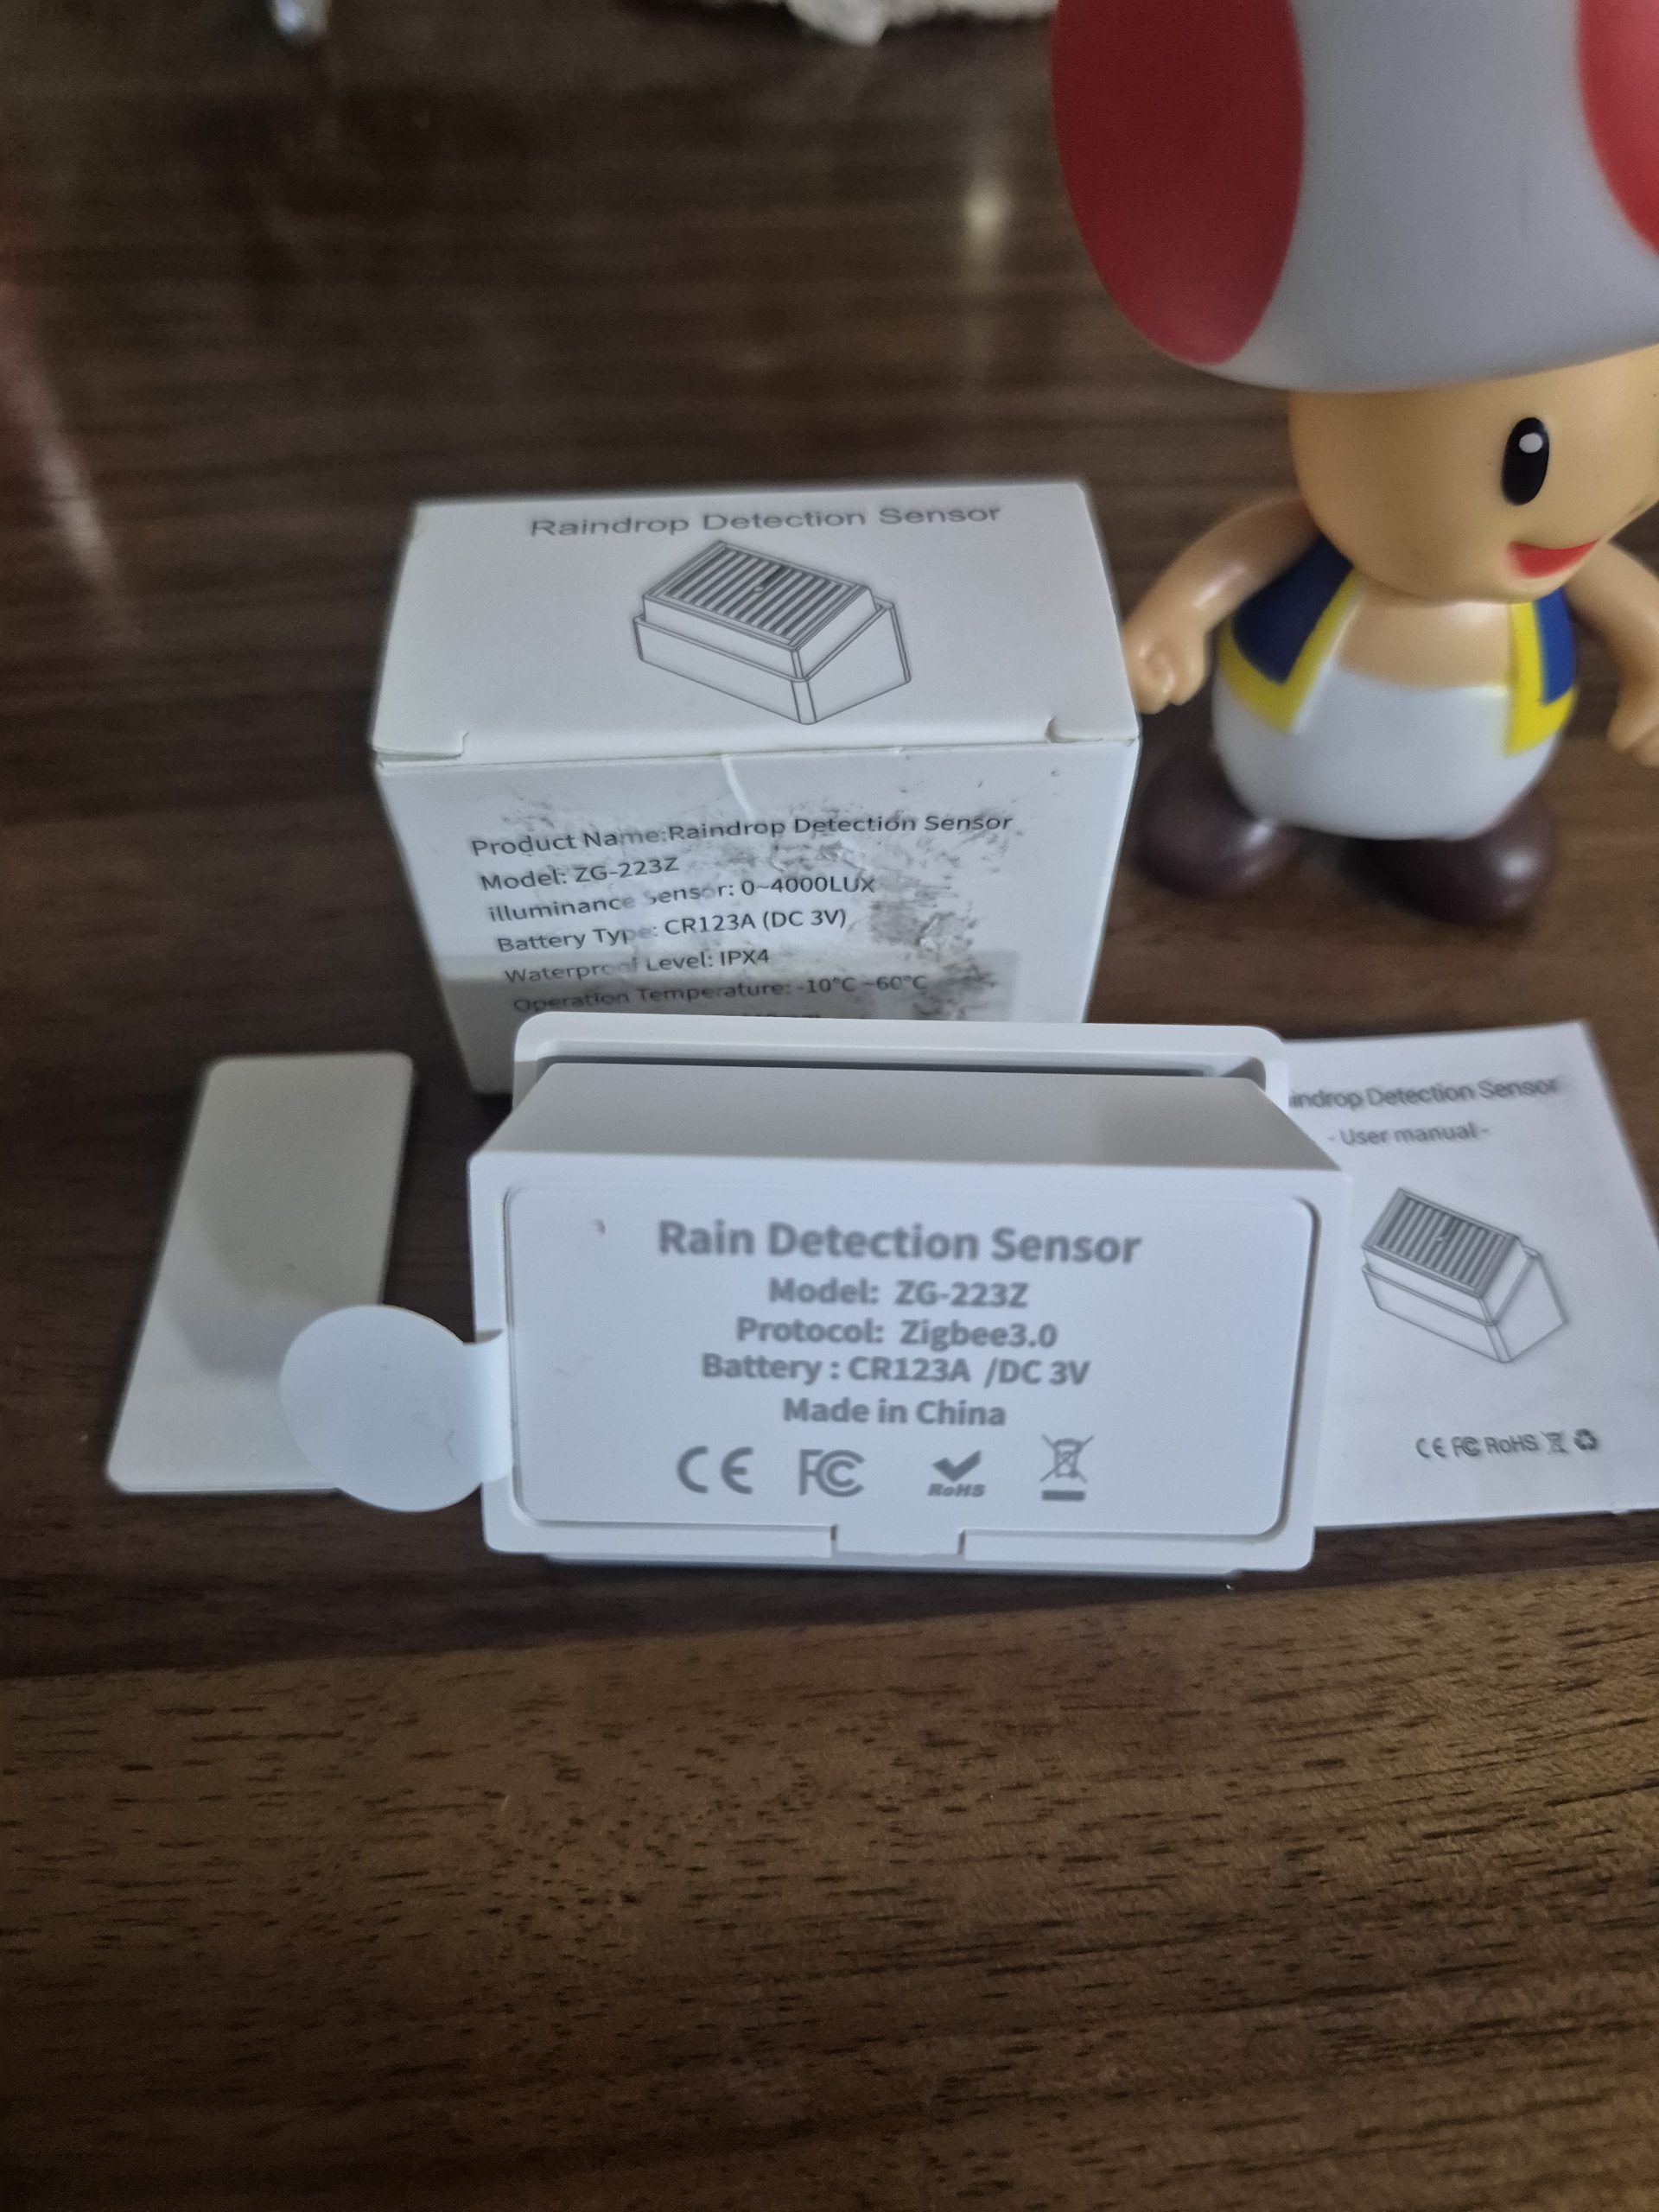
At the reception, I unpack everything: the Rain Sensor ZG-223Z with its detection plate, the mounting bracket, the double sided and the leaflet in English.
 |
 |
 |
 |
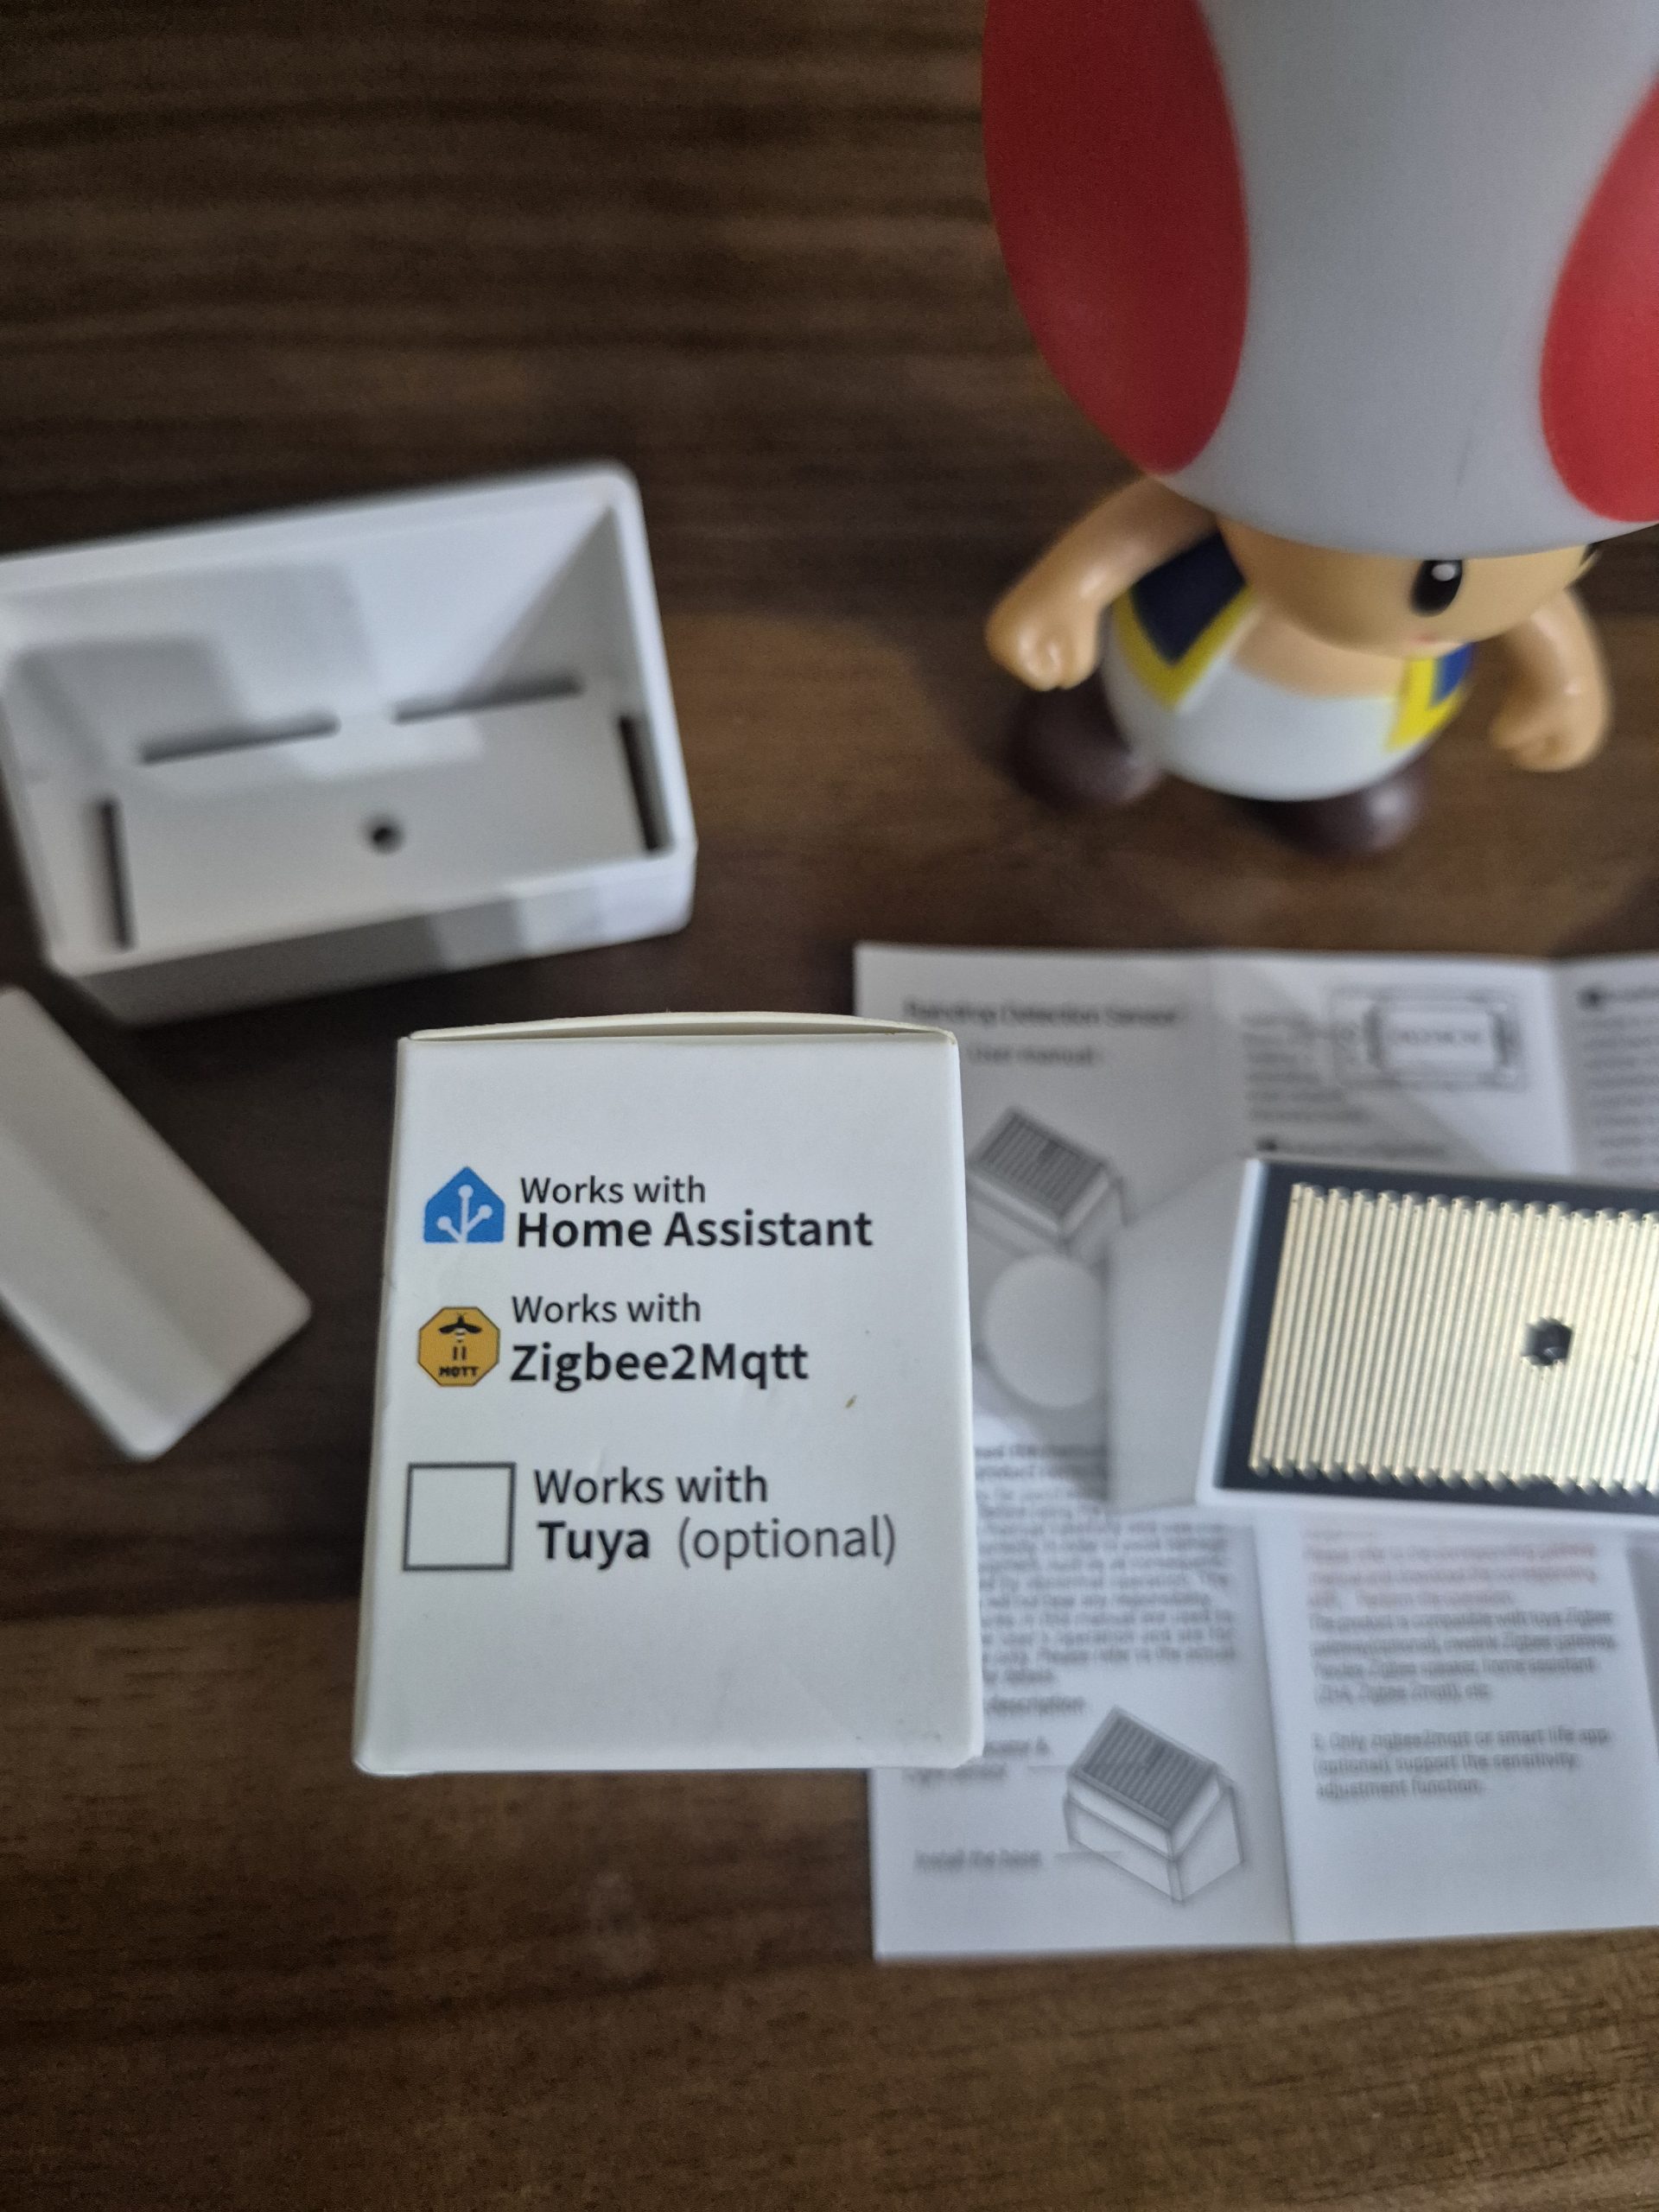 |
The case is lightweight but looks sturdy enough to stay outside, with a clearly visible detection area on the top.
I find the correct finish for an affordable Zigbee product, even if the plastic is not “high-end”.
🔧 Power On / Enclosure Opening
I check the battery supplied: it is already in place, with a protective tab to be removed before first use.
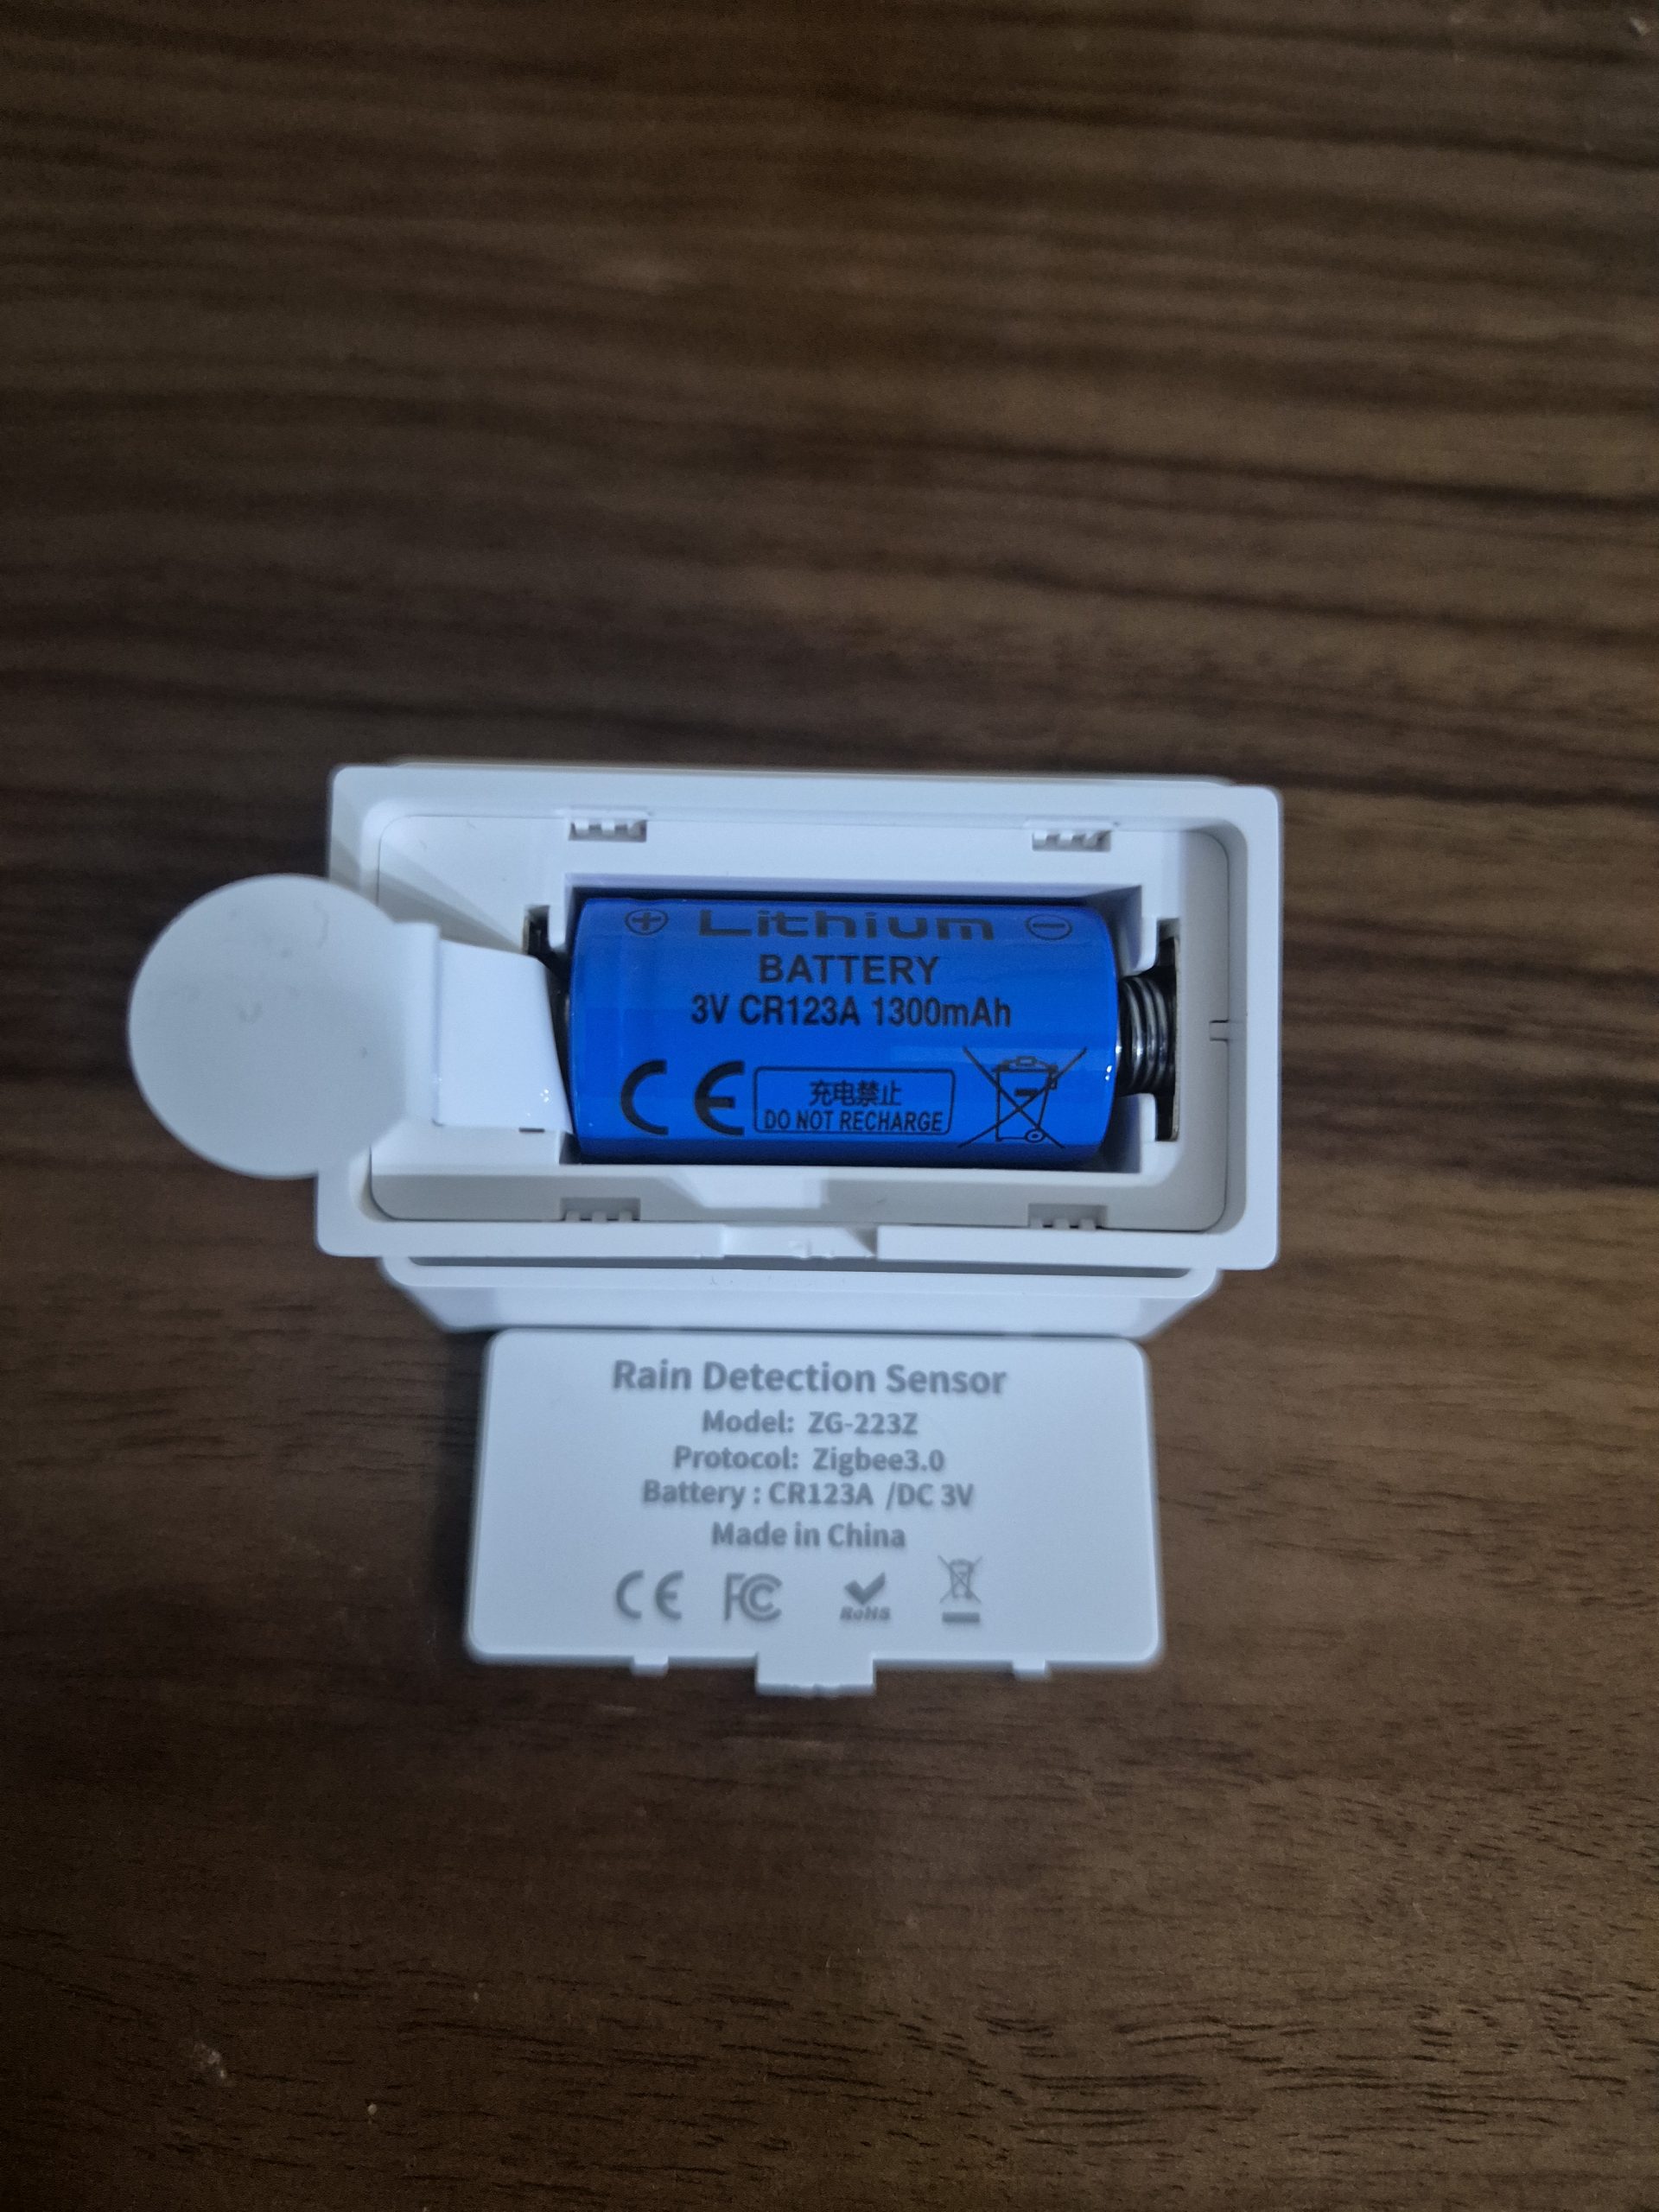
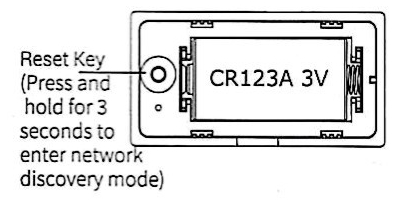
The battery is a CR123A 3V, we imagine that it should last a long time. It is not a rechargeable version, this sensor does not have a solar energy recovery logic.
I open the case gently to see the tightness and access to the battery, it is simple but it will not have to be opened every four mornings. There is no particular watertightness, but the direction of rainfall should prevent water from entering. I see that the holes at the bottom of the support make it possible not to drown the module.
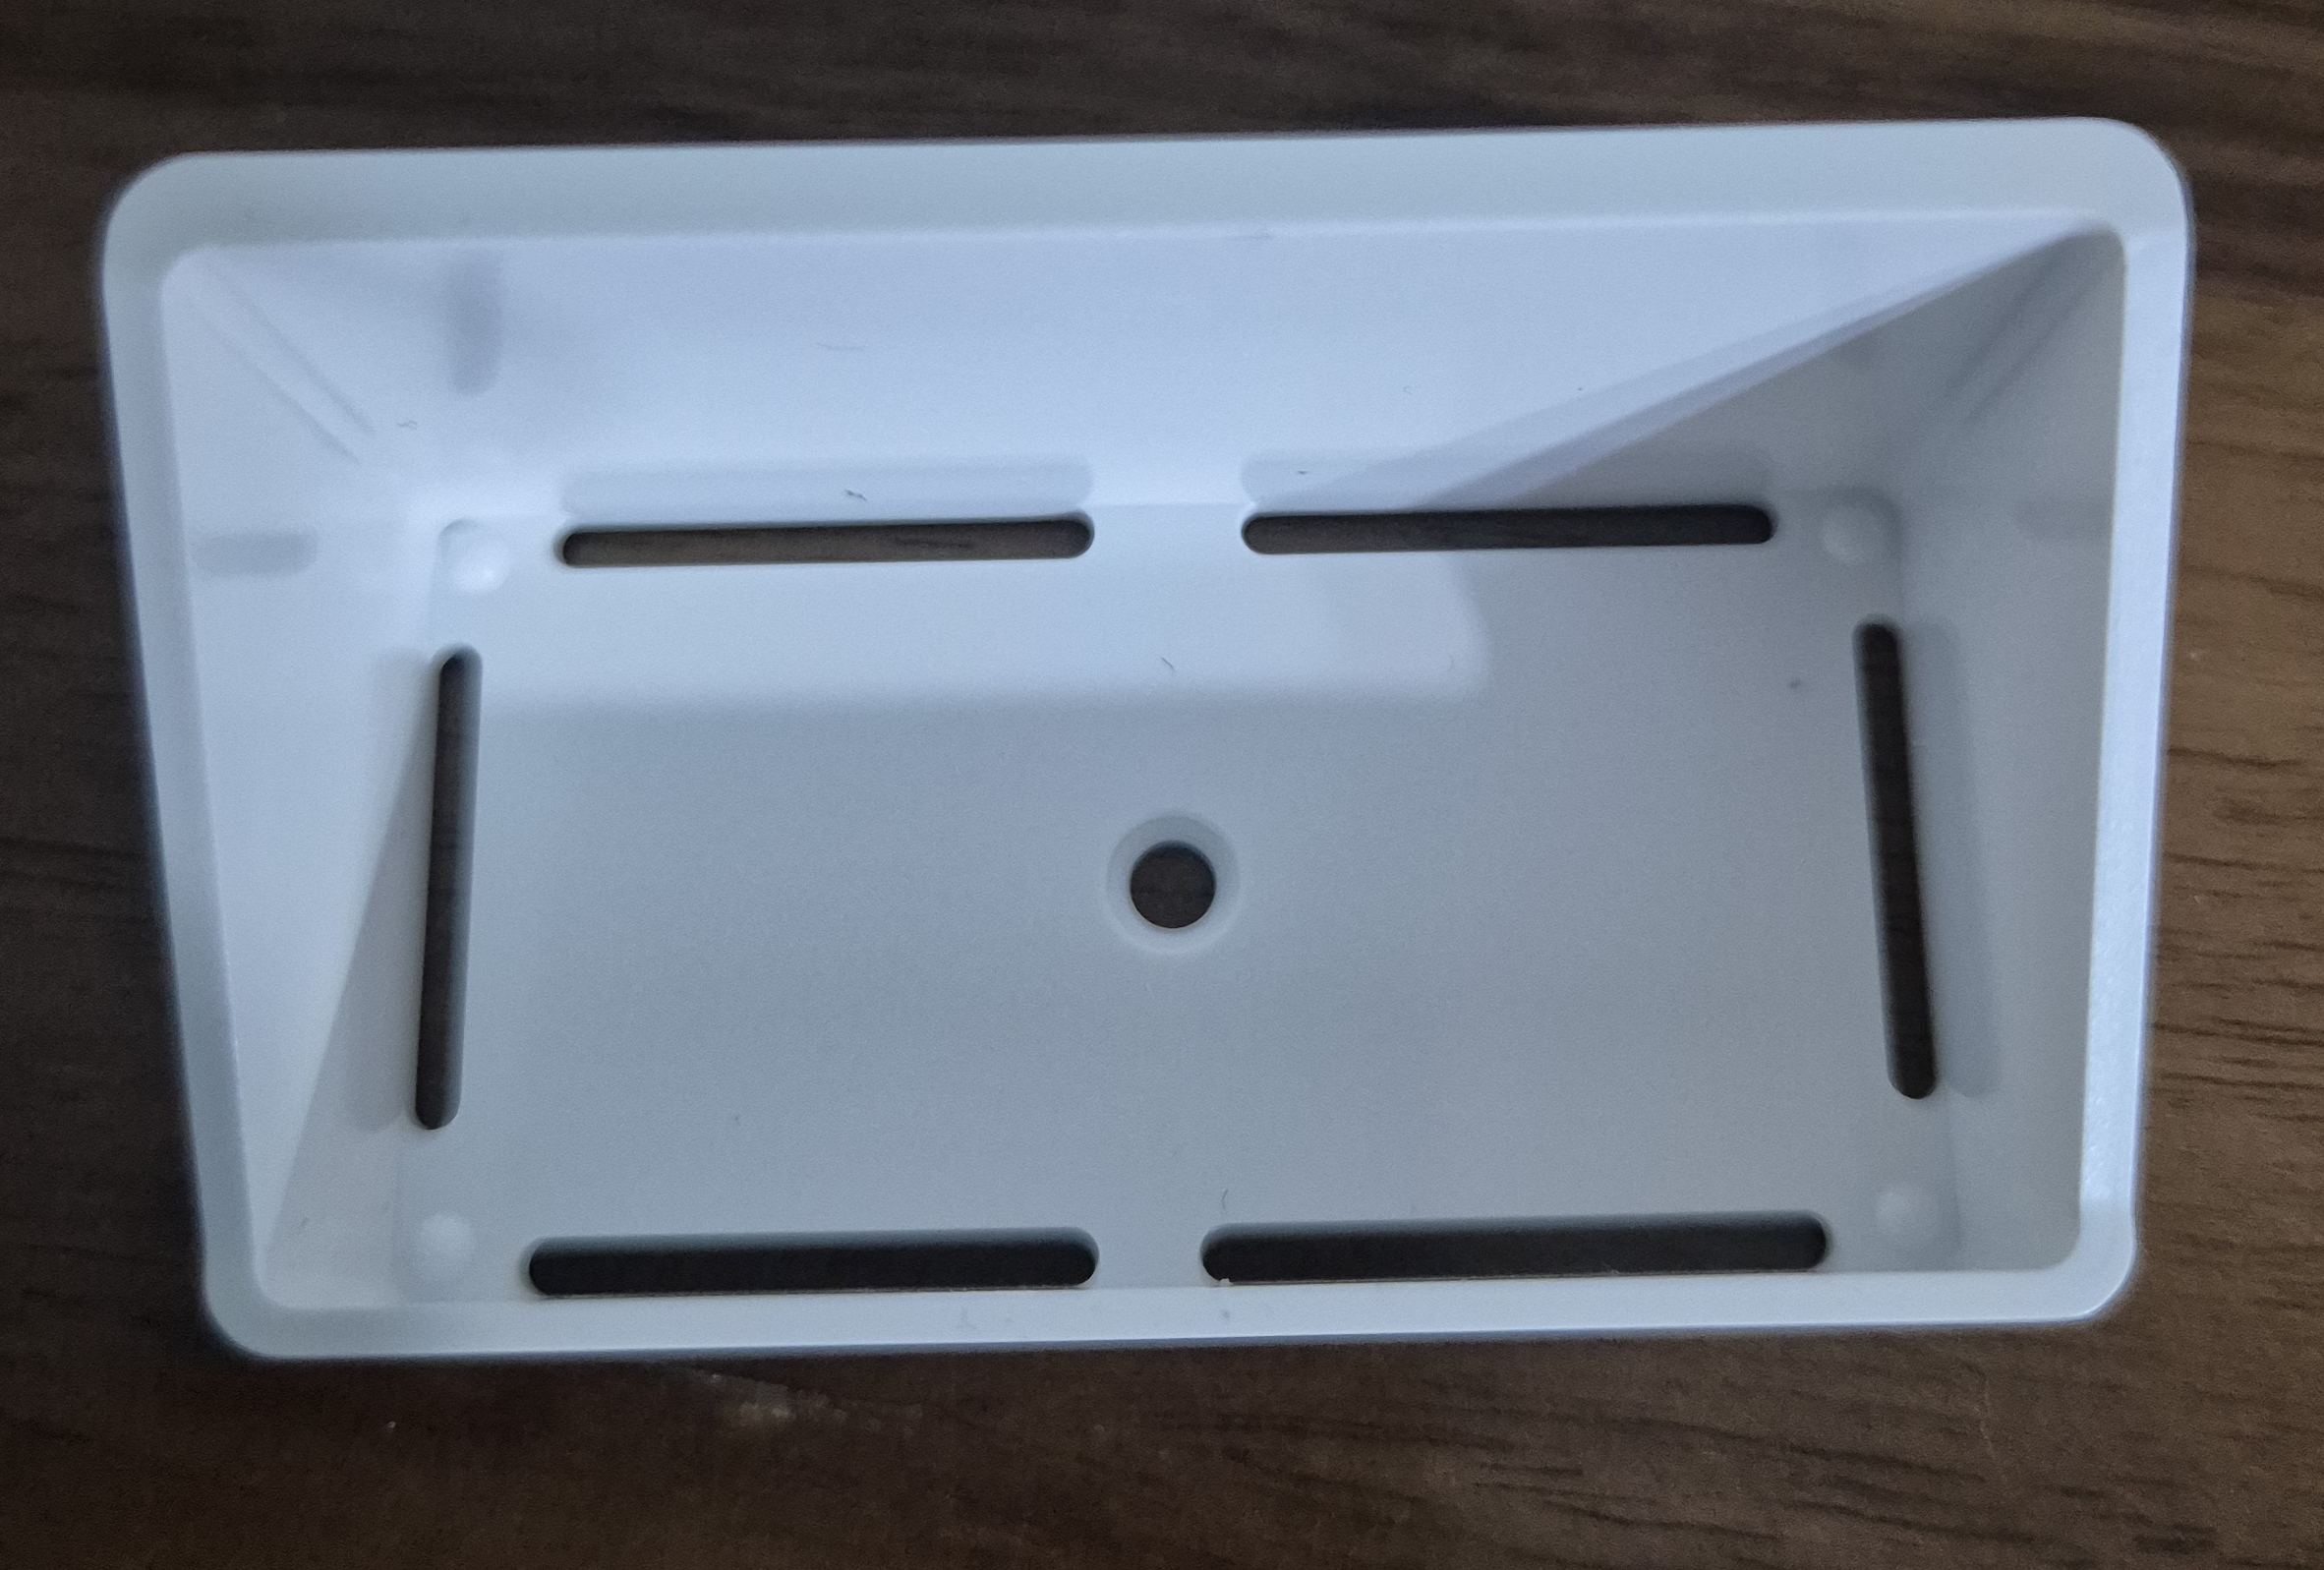
I note the presence of a small black button on the side; this is the internal button to switch to pairing mode.
🏡 Where I install it
For reliable measurements, I choose an open location, outside, where rain falls directly on the surface of the sensor. I avoid areas that are too sheltered, under a deep balcony or under a roof advance that would cut off the first drops. I also make sure that the sensor remains accessible to change the battery, without the need for a construction ladder but not too low to prevent children from playing with it.
🔗 I pair the ZG-223Z in Zigbee2MQTT
- I switch Zigbee2MQTT to peering mode from the interface, enabling the addition of a new device.
- I hold the button of the ZG-223Z for a few seconds (usually 3 s).
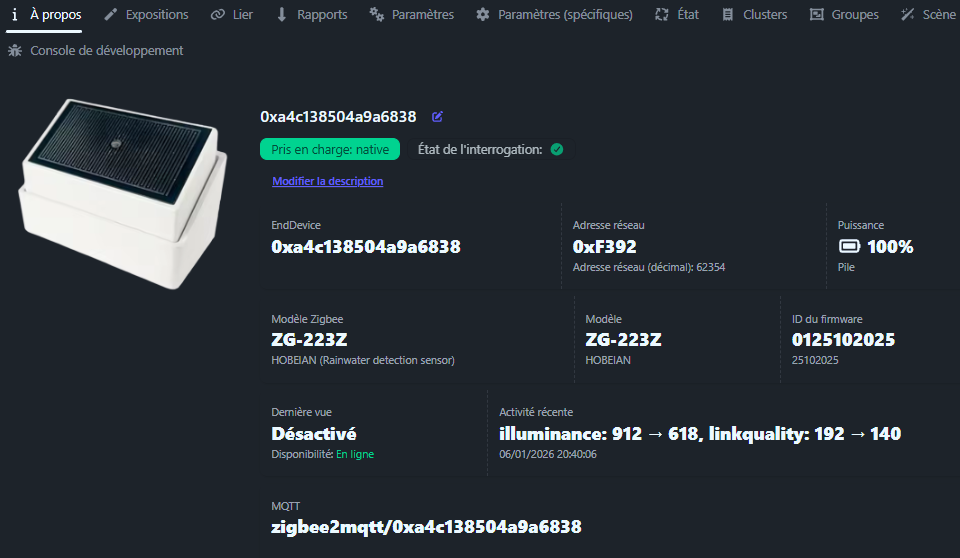
- Sensor is detected as model ZG-223Z, manufacturer HOBEIAN, with exposure “rainwater” and “illuminance”.
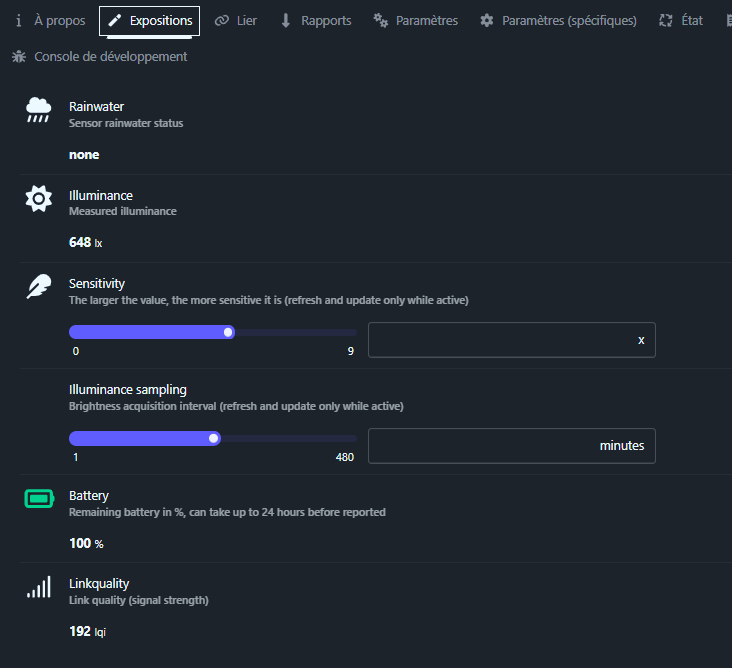
Rainwater
-
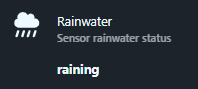
Rainwater displays the rain status detected by the sensor, here none So no rain.
-
The possible values are usually none (sec) or raining (rain detected), which I use as a trigger in my automations.
Illuminance
-
Illuminance corresponds to the measured brightness, here 648 lx, This gives an idea of the ambient clarity.
-
I can use it for “it's raining AND it's dark” scenarios or to adapt the outdoor lighting.
Sensitivity
-
Sensitivity adjusts the sensitivity of rain detection on a scale from 0 to 9, the greater the value, the faster the sensor reacts to small drops.
-
I increase this value if I want to detect a fine rain very early, and I decrease it if I have too many false alerts (splashes, projections).
Illuminance sampling
-
Illuminance sampling sets the brightness refresh interval from 1 to 480 minutes.
-
If I set a low value, the brightness is updated often but the battery drains faster; a high value saves the battery but makes the sensor less responsive on the light.
Battery
-
Battery displays the remaining battery percentage, here 100%, sometimes with a delay of up to 24 hours before the first lift.
-
I monitor this value to plan battery replacement before the sensor stops, especially if it is difficult to access.
Linkquality
-
Linkquality indicates the quality of the Zigbee signal (here 192 lqi), the higher the value, the better the link.
-
If this value regularly drops very low, I know that I need to bring the sensor closer to a Zigbee router or coordinator to avoid loss of messages.
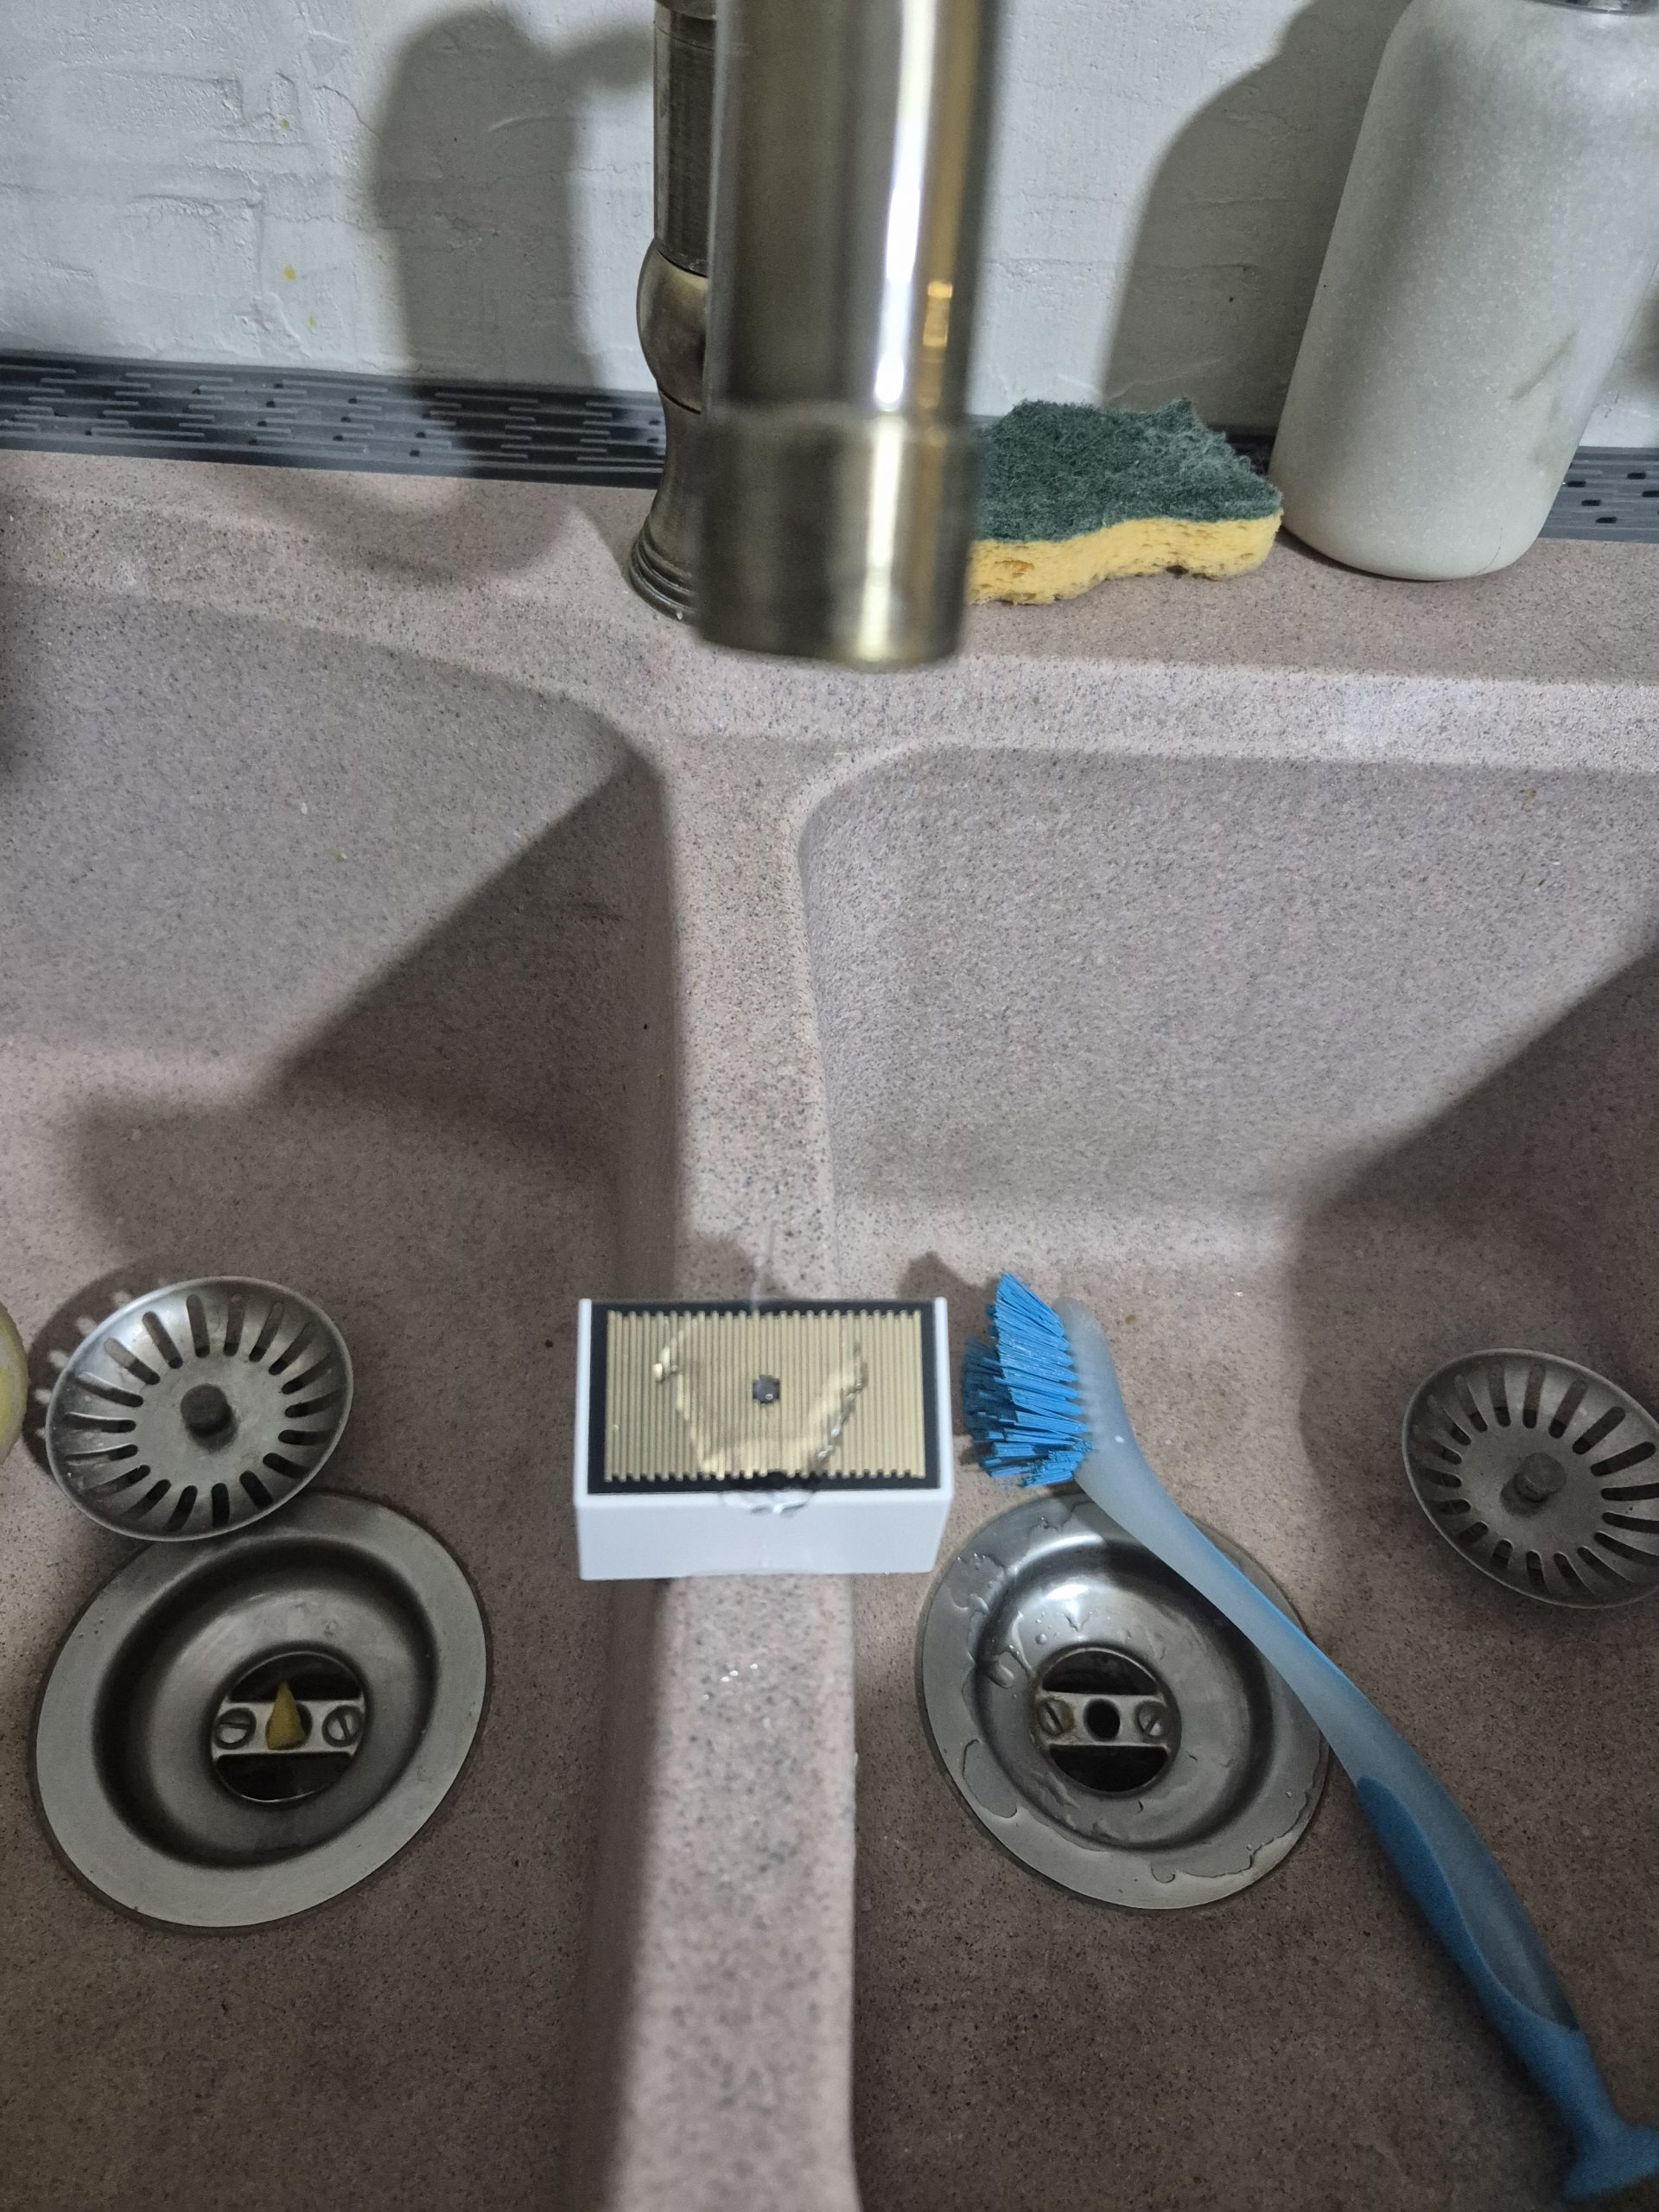
Obviously, as a player, I place the sensor in the rain (of my kitchen):
Rainwater sensor switches to raining
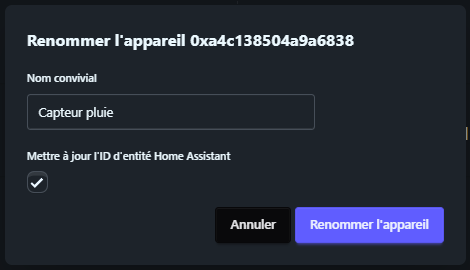
Before leaving Zigbee2MQTT, I rename the sensor.
🏠 Integration in Home Assistant
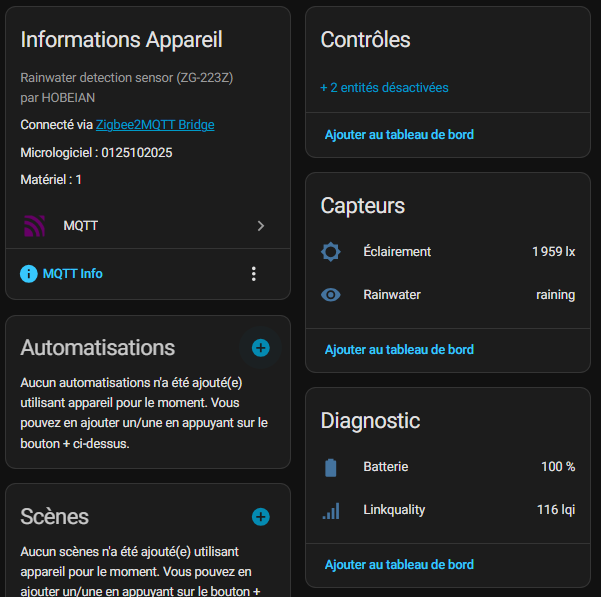
I can find the device in Home Assistant via the MQTT integration linked to Zigbee2MQTT. The state of rain rises like a binary entity or a text sensor (none / raining) and brightness like a digital sensor that can be used in automations.
Everything works like a classic sensor, I can already display it on a dashboard and test simple scenarios.
I disable the controls that I will set in Zigbee2MQTT to have full equipment in HA and I activate linkquality because I will monitor this value for some time to check the proper integration of the module in my network.
📊 My first measurements
| Situation | Rain condition | Brightness | Note: |
|---|---|---|---|
| Blue sky, dry | none | High illumination value | Dry sensor, stable values. |
| First drops | raining | Slight drop according to clouds | Almost immediate change of state. |
| Sustained rain | raining | Lower value | Condition maintained as long as the plate remains wet. |
| After the rain | none | Gradually rise | Return to “none” after drying the surface. |
⚙ Automations I am considering
- Alert : As soon as the status changes to “raining”, I send a notification to my smartphone to prevent it from raining.
- Comfort : If the sensor says “raining” and my motorised windows are open, I close them automatically.
- Watering : if rain is detected, I immediately cut off the automatic watering and shift the next cycle.
- Protection : if the rain comes when the wind is not too strong, I roll up my awnings to avoid damage.
📅 Installation and monitoring of batteries
To understand the installation, I did a lot of tests because the manual is incomprehensible and the illustration images of the sales sites mean absolutely nothing, they are clumsy montages, often with the module upside down.
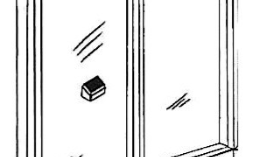
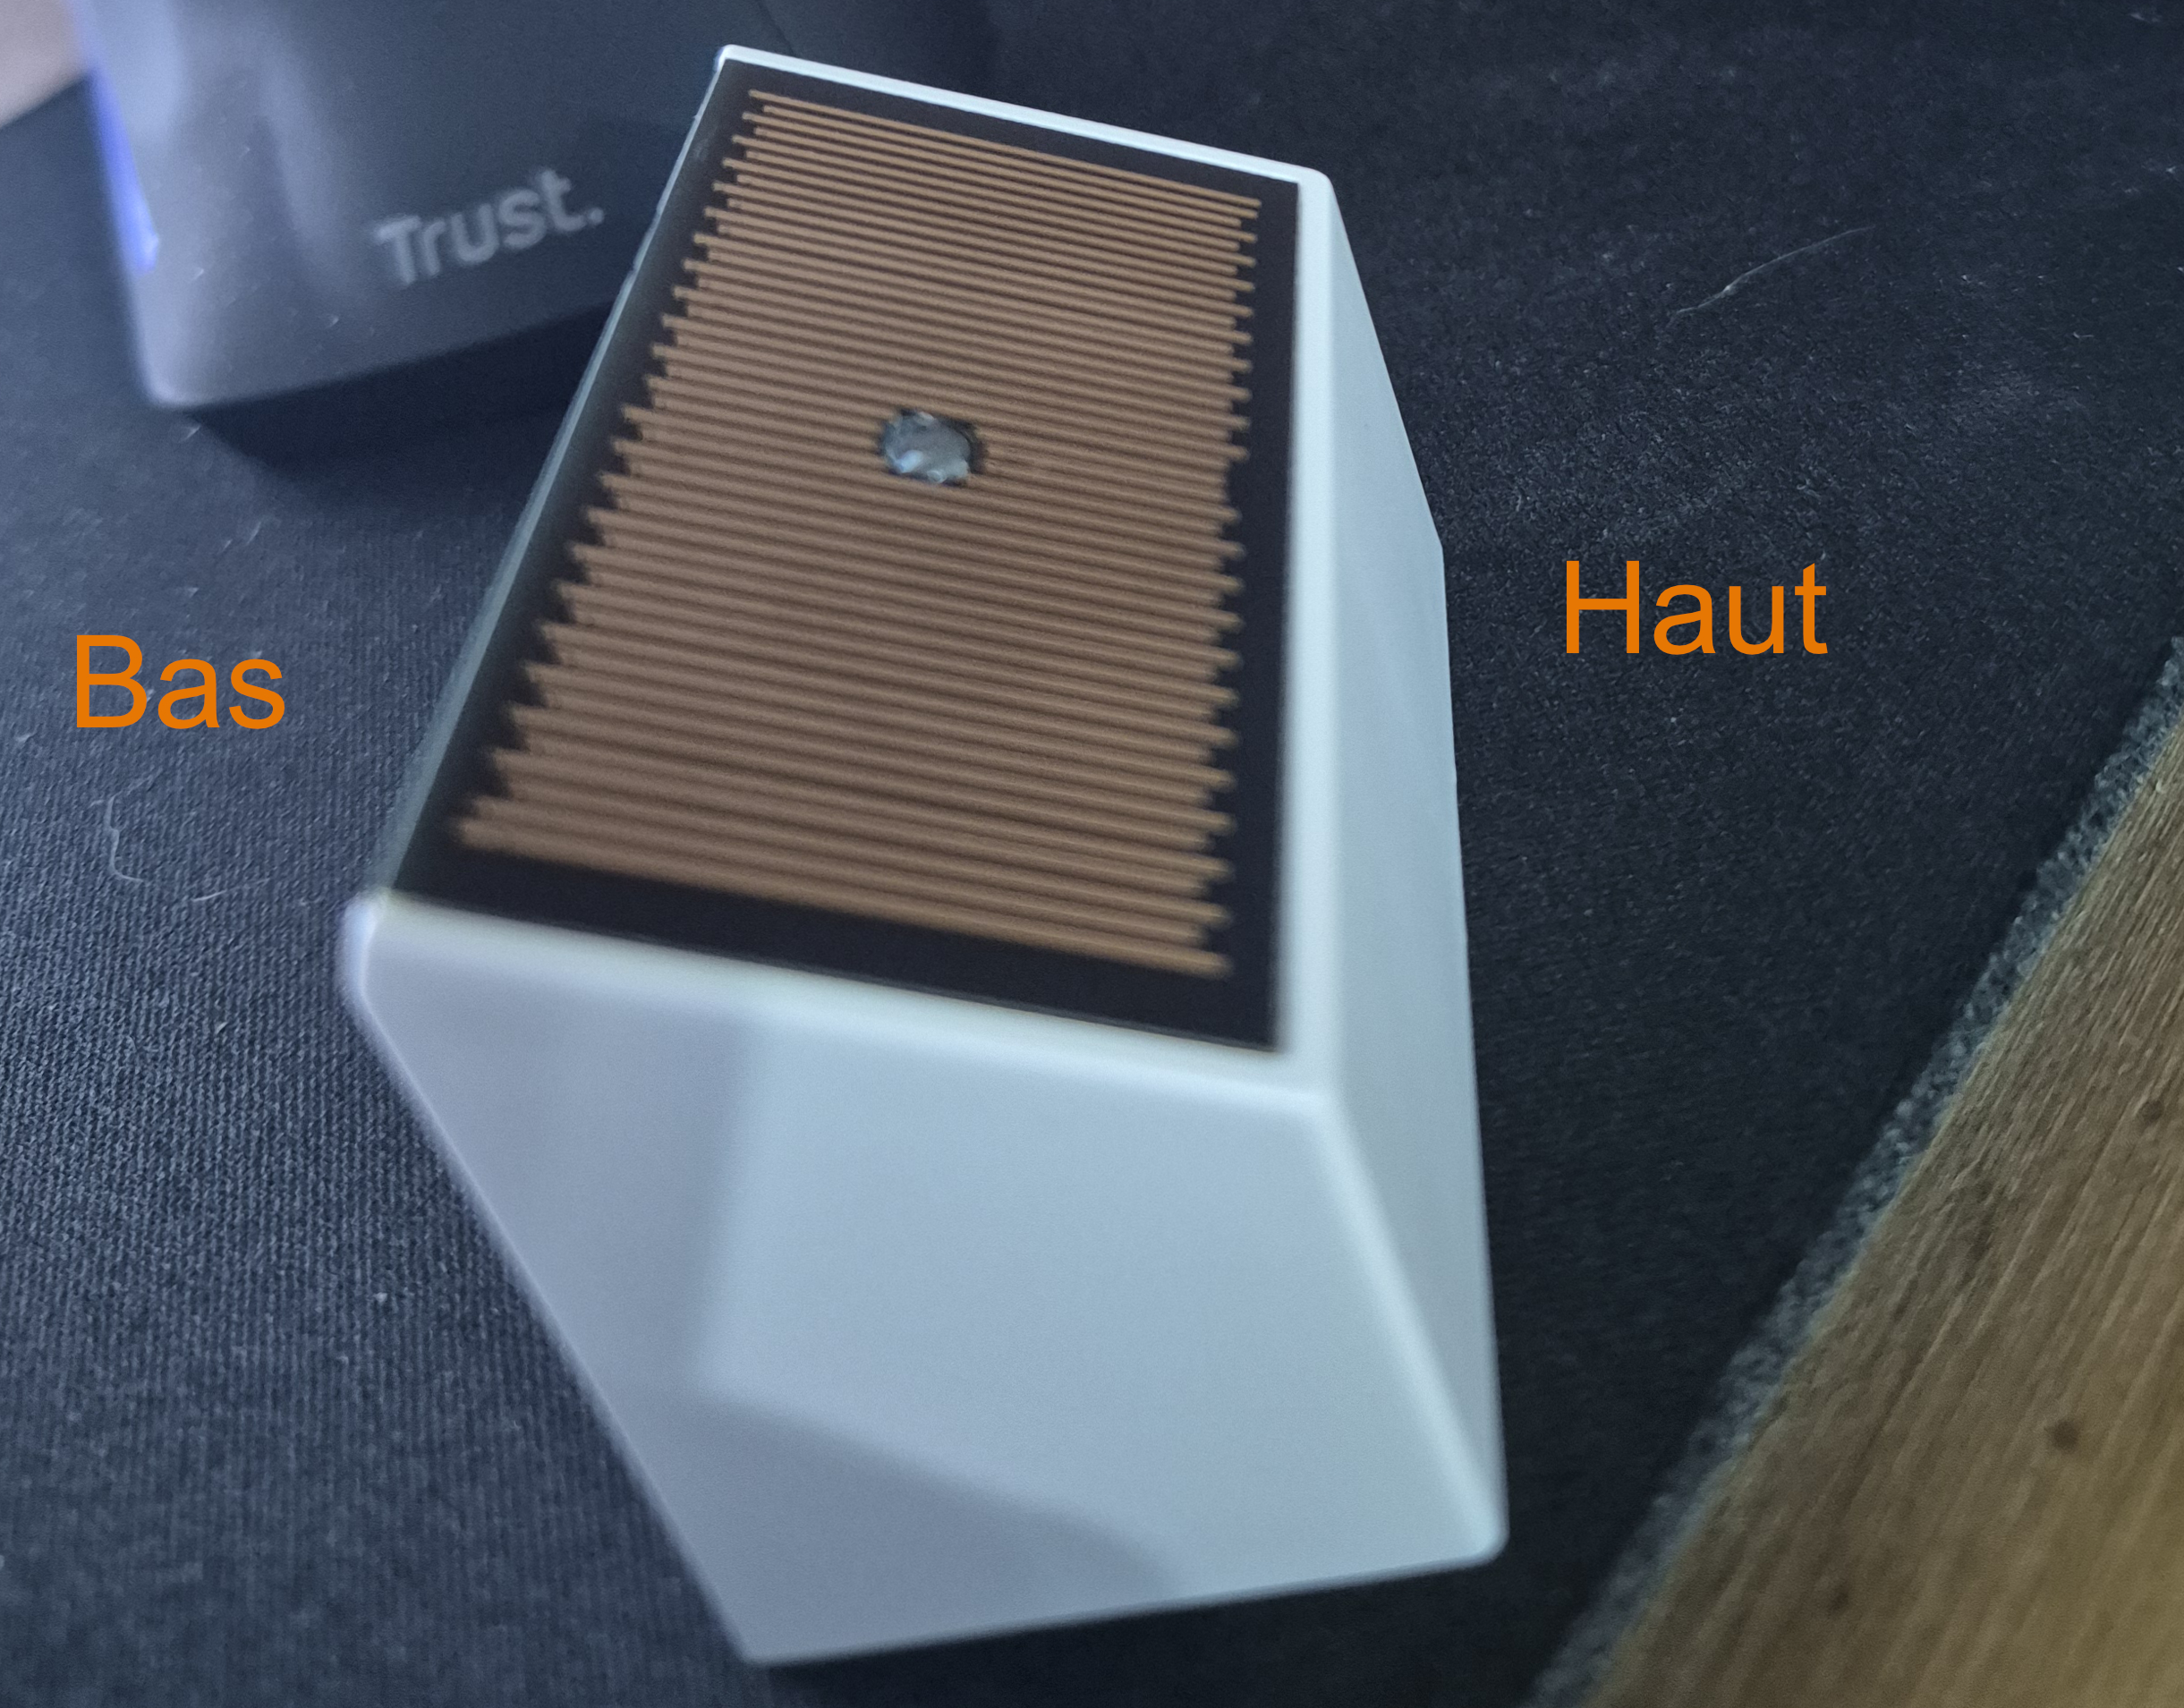
Finally, I noticed that the two sides of the module were not designed in the same way, this is an indication for the meaning to be used. One side with a white edge, it must be at the top otherwise the drops remain blocked on this edge, triggering false rain positives when the water stagnates.
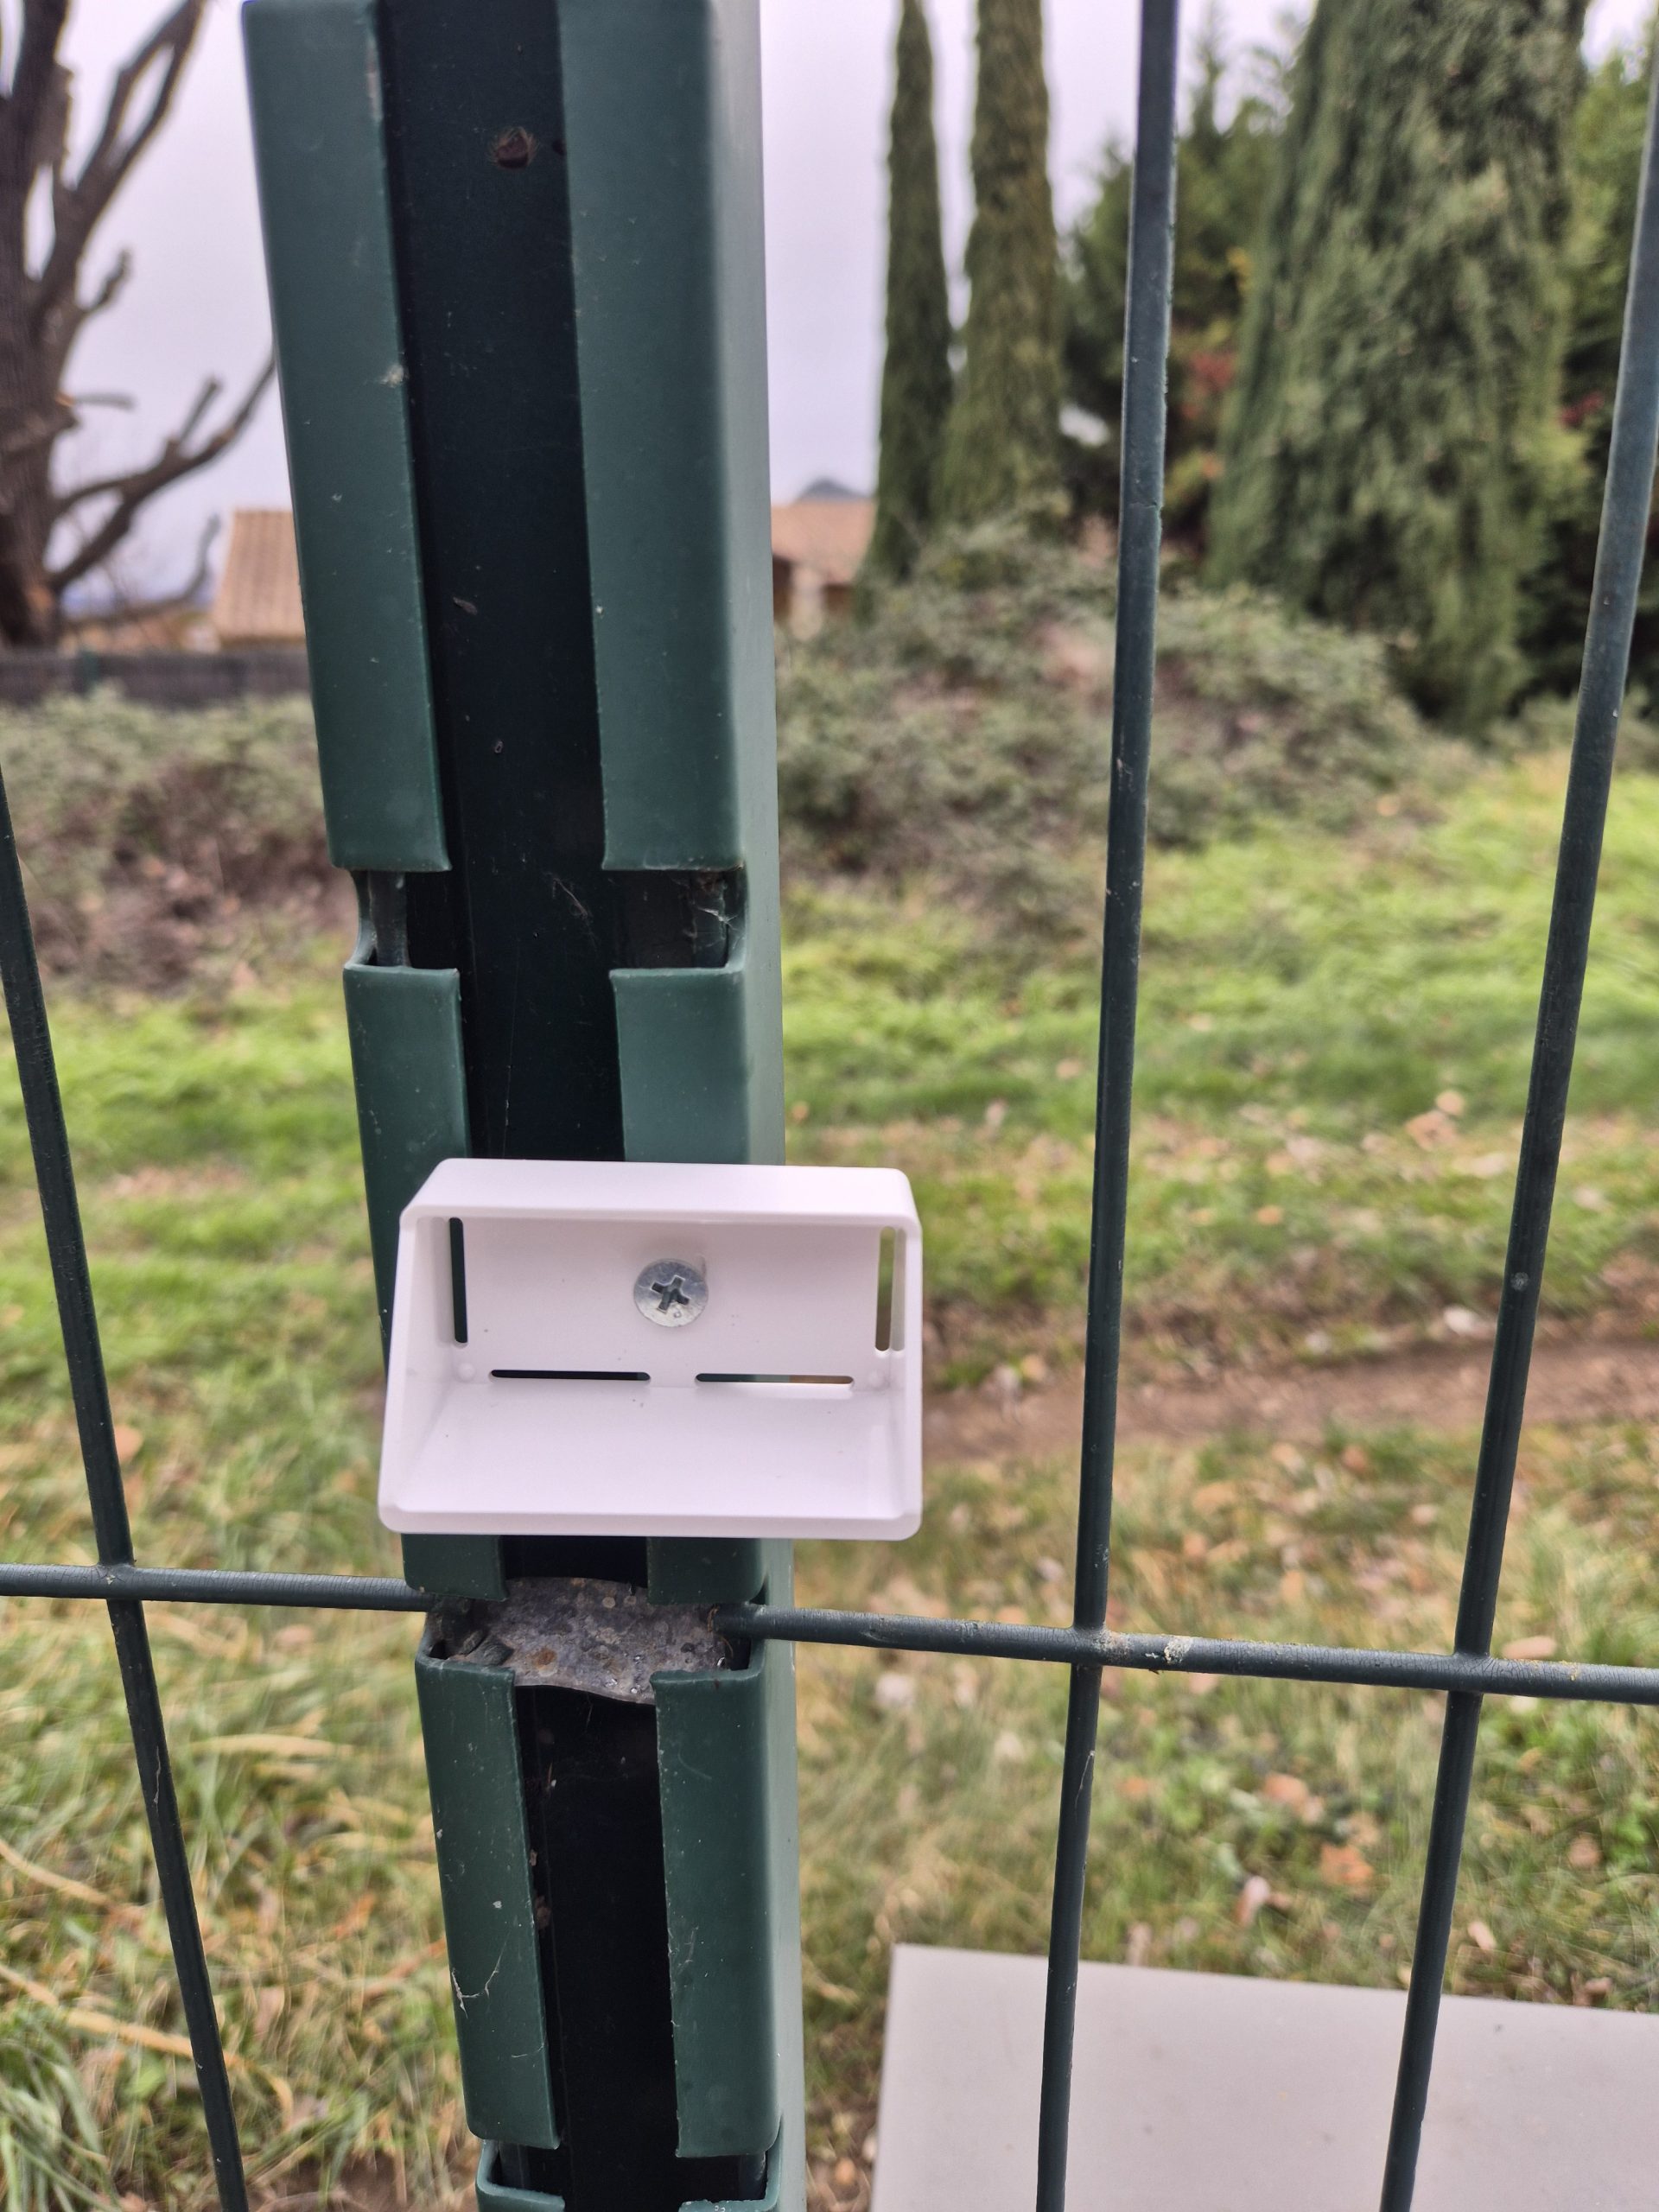
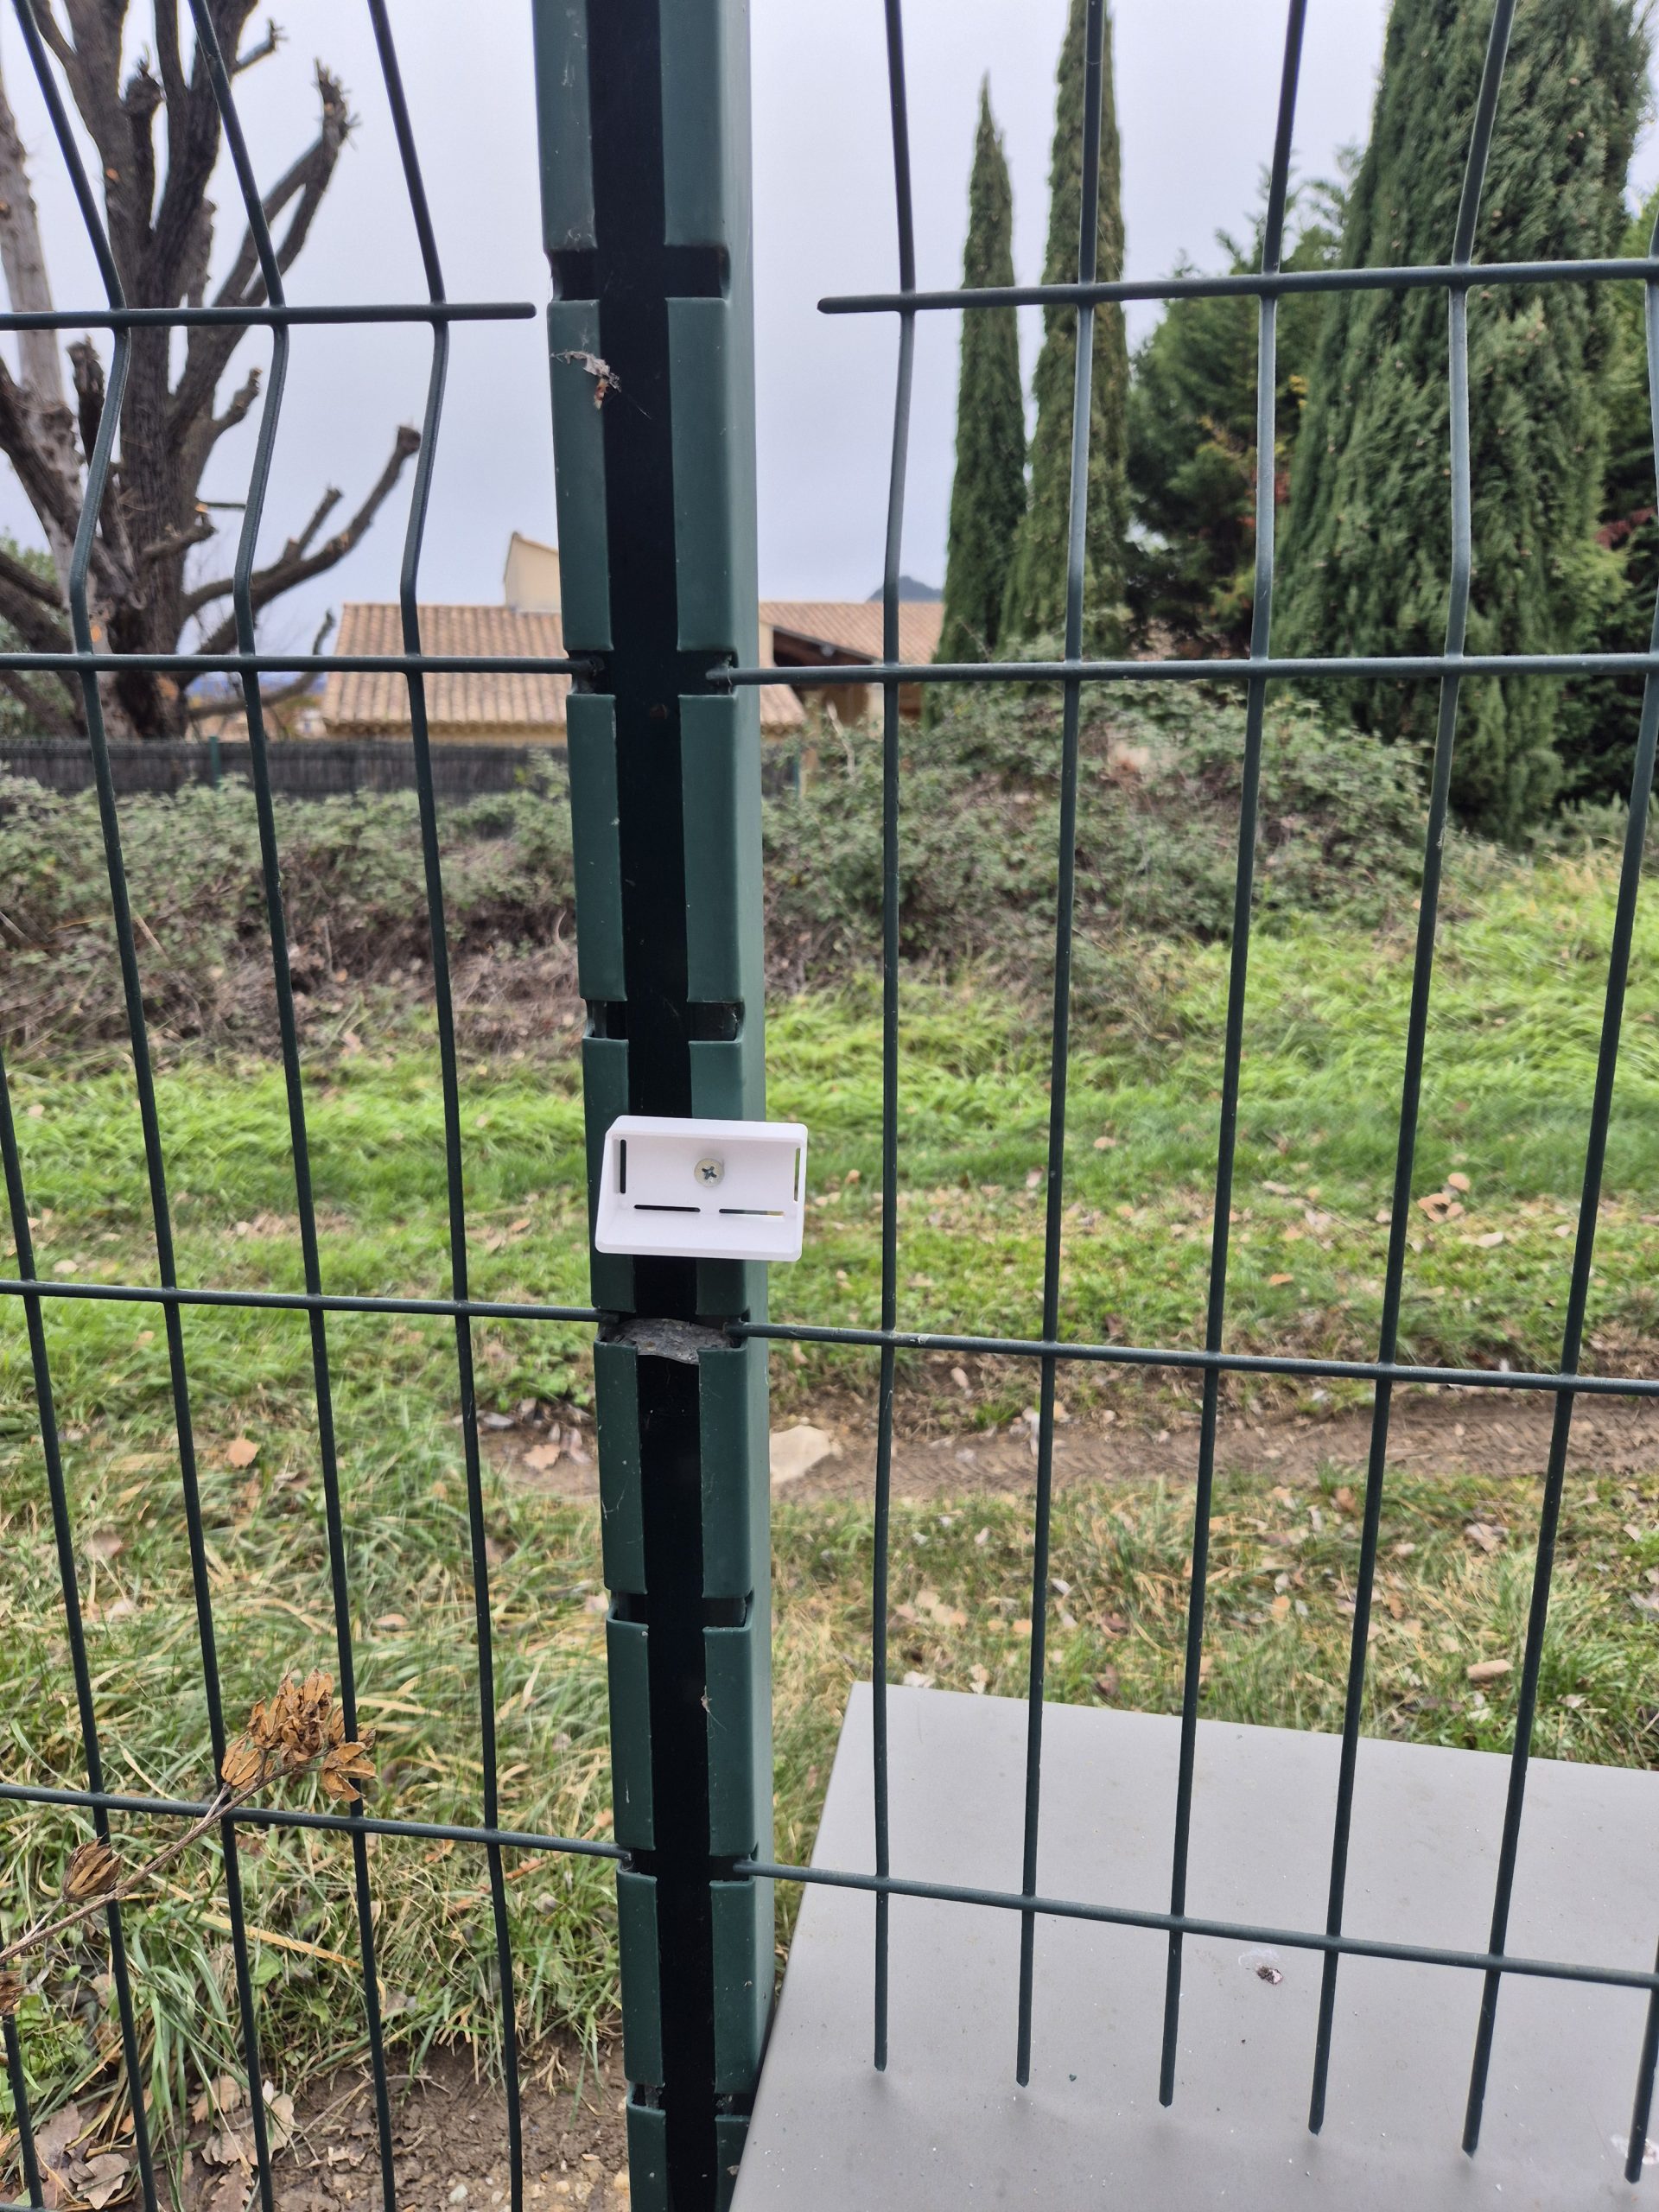
I positioned the module in its support, itself fixed by a self-drilling screw on the fence post.
 |
 |
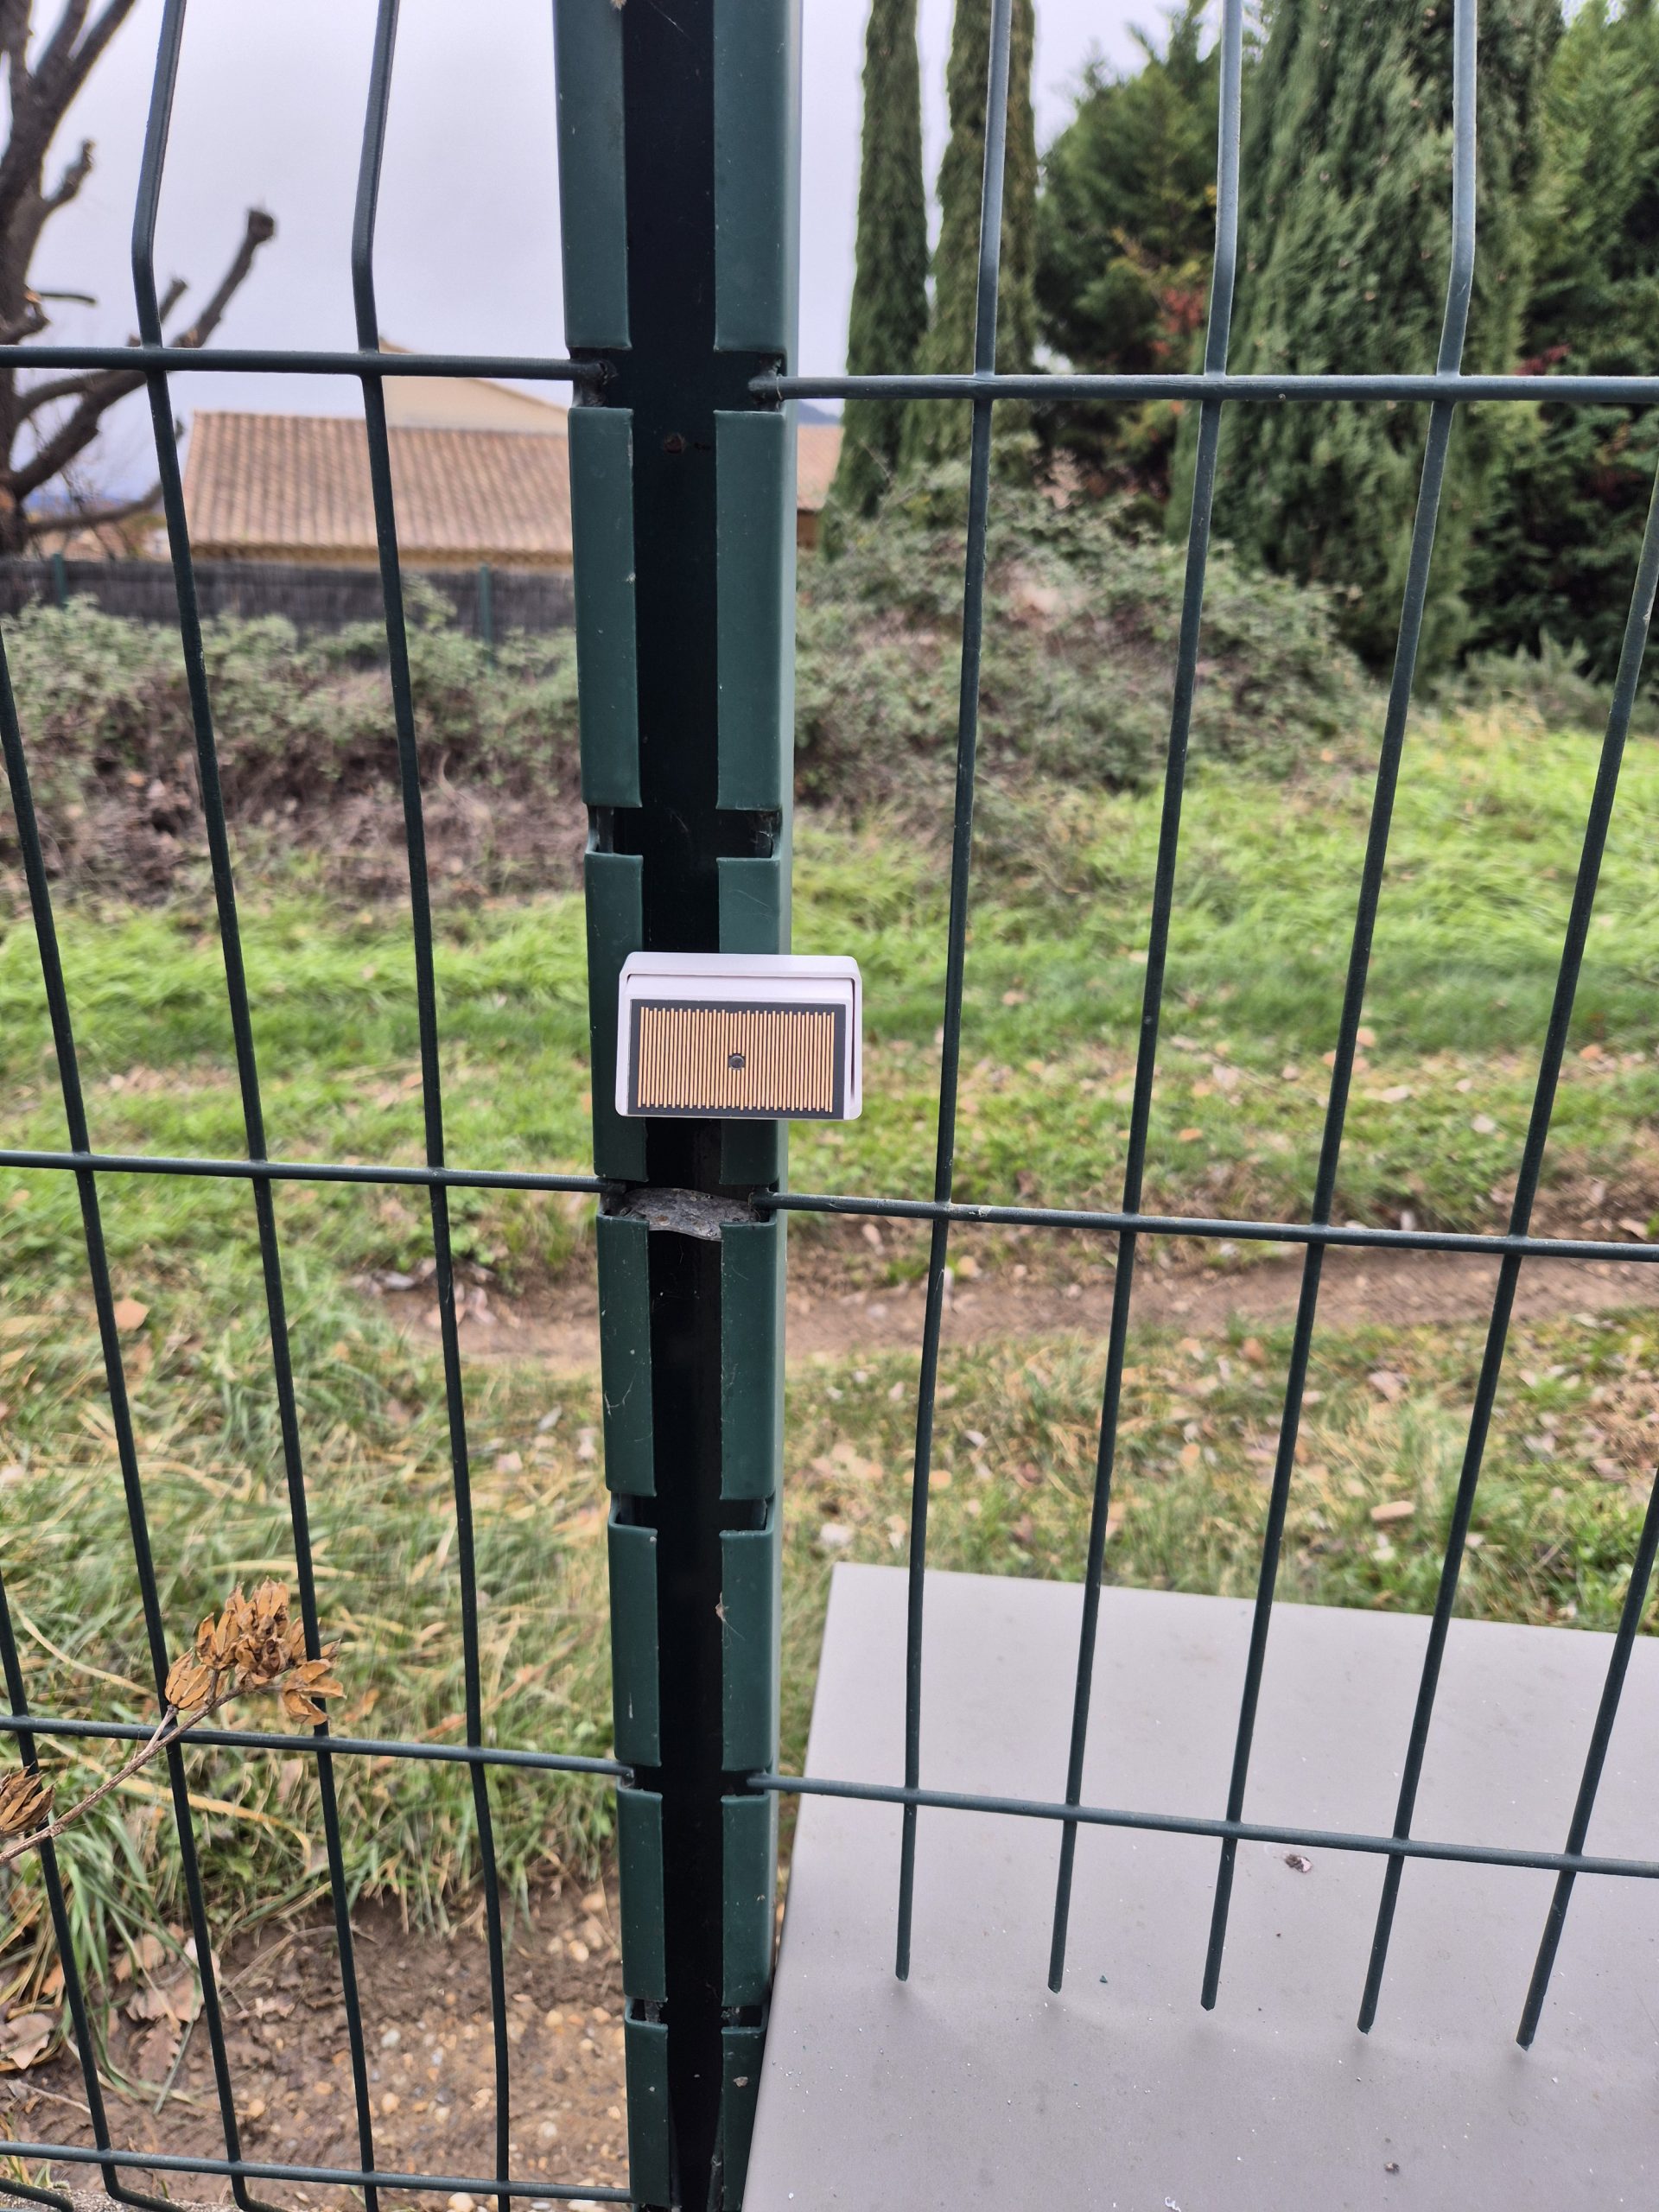 |
- Installed on 06/01/2026 (outside, portal side).
- I note the installation date to monitor the actual battery life under my conditions.
- I schedule a visual check every few months to make sure there is no oxidation or dirt on the detection surface.
🔍 What communities say
Problems : some reports mention occasional concerns about illumination that disappears after updating Zigbee2MQTT or Home Assistant, or sensors that sometimes lose connection and require rebind. Users also report that the sensor is very sensitive, which can generate frequent state changes with small drops or splashes.
My tips : I recommend checking the version of Zigbee2MQTT and the compatibility of the ZG-223Z before installation, positioning the sensor properly to avoid false drops (e.g. watering, splashing gutter) and to add a small delay in the automations (e.g. state “raining” maintained a few minutes before triggering a significant action).
💬 My opinion after commissioning
✅ Forts : Simple integration with Zigbee2MQTT and Home Assistant, clear and actionable rain, brightness to enrich scenarios, compact and easy to place. The sensor provides real local information, much more reliable than an internet weather to know if it is really raining in my home.
❌ Weak : basic plastic finish, lightweight documentation, sensitivity that may require some adjustments to avoid false detections. Some user feedback mentions small instabilities on the connection or on the illumination entity after some software updates.
My verdict : the Rain Sensor ZG-223Z does very well what I ask him, namely telling me “it is raining / it is not raining” and giving me an idea of the ambient brightness.
For a reasonable budget, it makes it possible to secure a lot of external situations, especially when it is properly integrated into Zigbee2MQTT and Home Assistant.
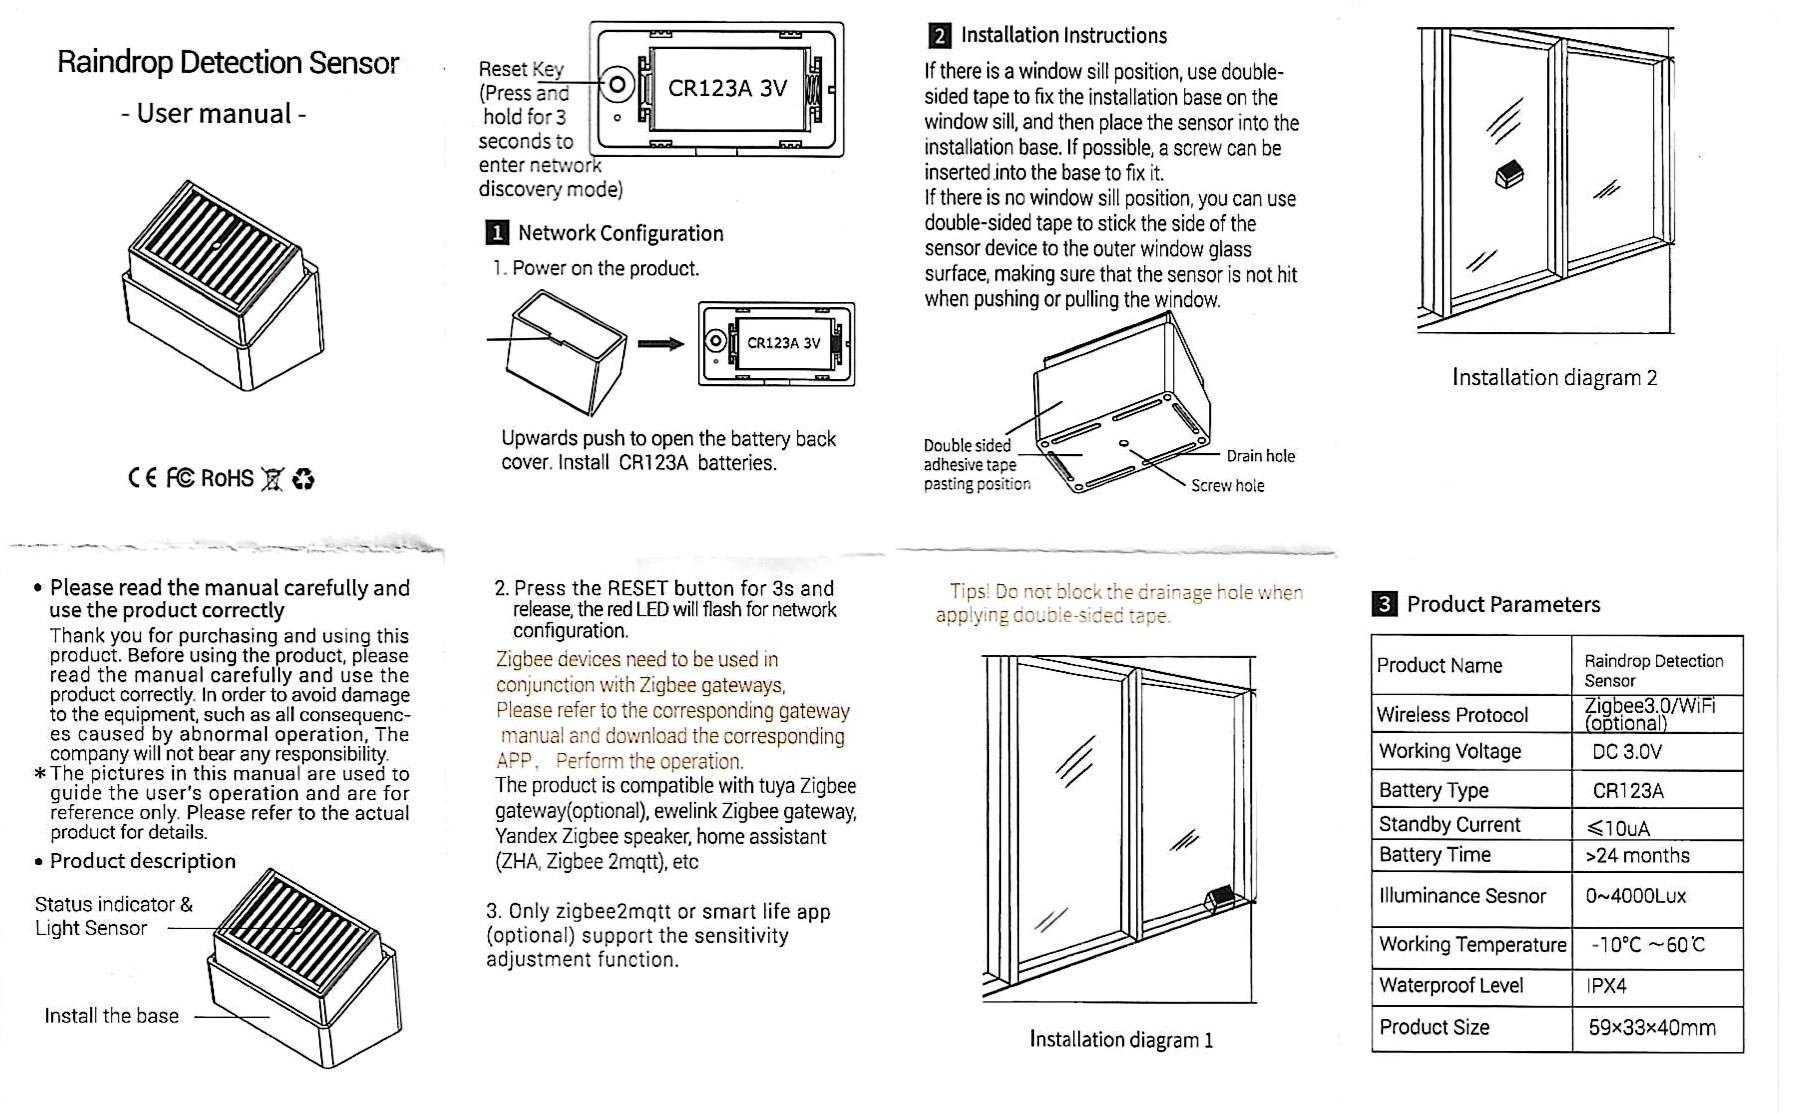
For the record, the instructions for use
 English
 French
 Spanish
 Chinese
 German