

Objective
Using a Chinese home automation relay: 10A/250VAC 10A/30VDC associated with a WIFI module (ESP8266 module), we can have a relay in electrical cut-off or dry contact.
And as a bonus, in addition to the interface in Jeedom, it is possible to order this relay from anywhere in the world with a simple internet connection.
Material
The ordered package costs €2.61, including shipping.
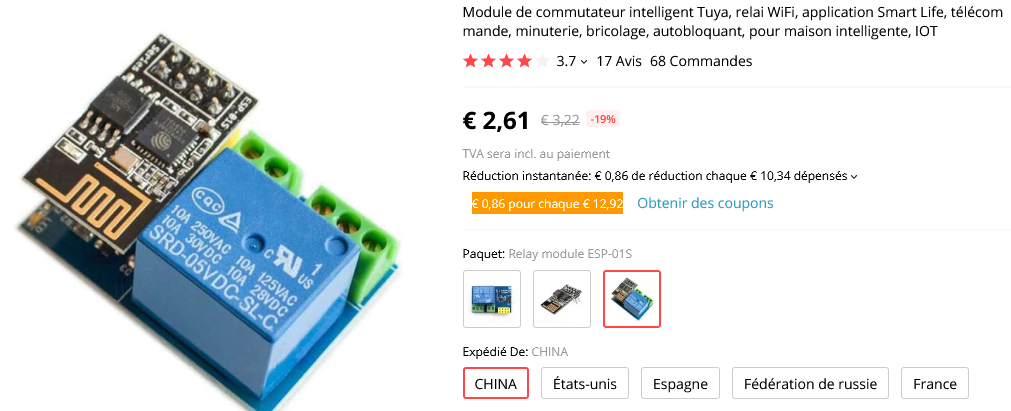 |
It is specified that this equipment worked with Tuya or SmartLife, I quickly tried to connect to Wifi AI-THINKER_D8D017 out of curiosity but there is no web server, you have to send AT commands. I am not wasting time on this, but it must explain the negative opinions on the buyer’s page, as customers probably want a product that is close to being used.
Flashing the EPS-01S Wifi Module
Module connectors
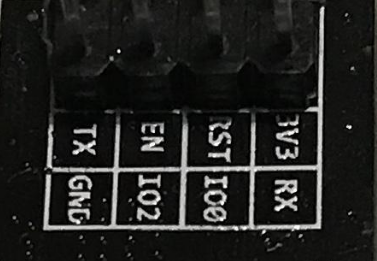
Connection to the FTDI
As explained in the other tutorials on flashing Sonoff products, an FTDI232 must be used:
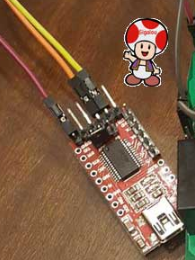
- the 3V3 together
- the NDGs together
- the TX on the RX
- the RX on the TX
- The GPIO IO0 at the GND
- EN to 3V3
Flash Software
Go get the latest version of ESP EASY
I took ESPEasy_ESP82xx_mega-20210503.zip to create this tutorial.
Unzip the zip in a folder. Retrieve the ESP_Easy_mega_20210503_normal_ESP8266_1M.bin file from the bin folder and remount it next to the FlashESP8266.exe file
Launch FlashESP8266.exe, select the FTDI port and select the Firmware and then Launch the Flash.
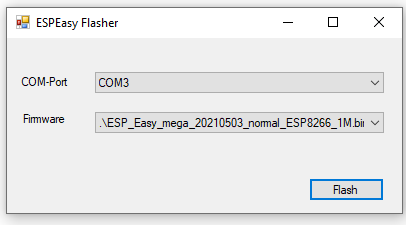
If all goes well, it ends with:
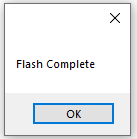
Disconnect and store the FTDI.
Connect to Wifi
First, it is necessary to configure the Wifi.
Connect the Wifi module to the yellow terminal block of the relay.
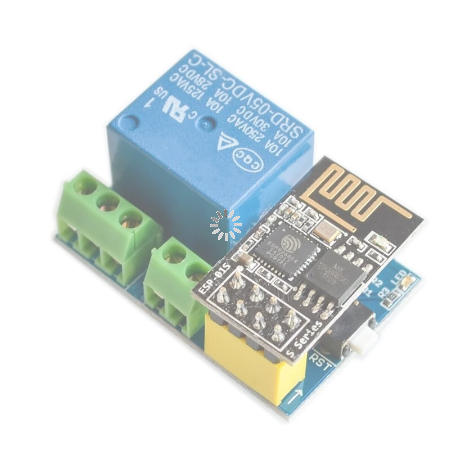
Power the module in 5v.
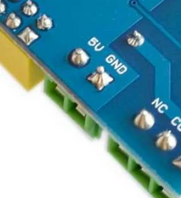
Connect to the Wi-Fi generated by the module with the mobile phone. (ESP-Easy). If a password is required, it is configesp
Go to 192.168.4.1 for the Wi-Fi identification page.
Choosing the Wi-Fi of the local network, putting the password and clicking on Connect, this will relaunch the connection.
Depending on the version of Esp Easy, the page is reloaded and the IP can be retrieved or the last IP assigned by the DHCP can be seen in the router.
Enter the IP address in a browser on the local network to access Esp Easy.
Orders to be sent
Nothing was really well documented, it was necessary to look for the commands to be sent to operate the relay module.
Reminder: When the relay is deactivated or switched off:
- NC (Normally Closed) is glued (On) and
- NO (Normally Open) is open (Off).
I found 4 commands that work (192.168.1.93 being the ip of my module)
- http://192.168.1.93/control?cmd=GPIO,2,1 Turn off the LED
- http://192.168.1.93/control?cmd=GPIO,2,0 Turn on the LED
- http://192.168.1.93/control?cmd=GPIO,0,1 Activate Relay NC Off and NF On
- http://192.168.1.93/control?cmd=GPIO,0,0 Disables relay NC On and NF Off
Configuration of LED and Contact devices
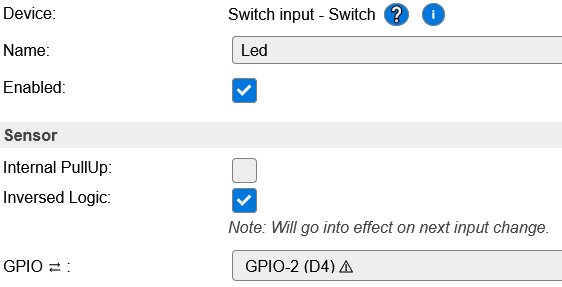 |
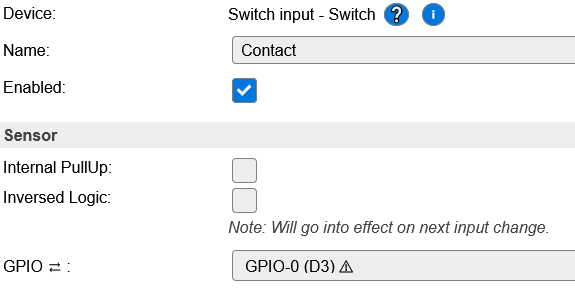 |
Integration in Jeedom
For integration in Jeedom, we follow the ESPEasy plugin documentation or my other tutorials on integrating Sonoff modules.
Both Contact and Led info appear automatically
The commands to add are to send On or Off to the Led or to the contact
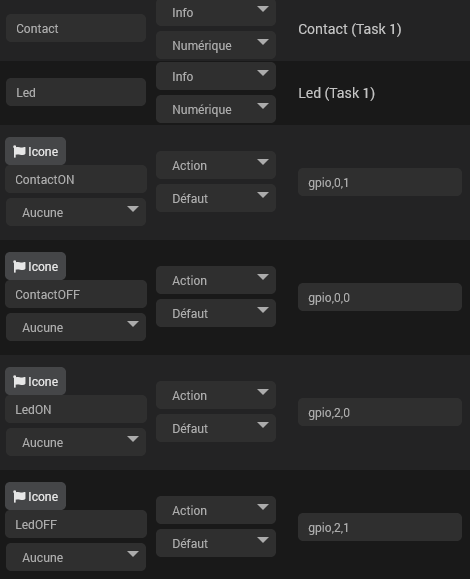
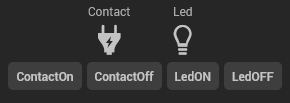
And on the DashBoard:
Bonus: Reach this relay without going through Jeedom, from outside
Configure router
Reach port 80 of the relay thanks to port 1993 from the internet.
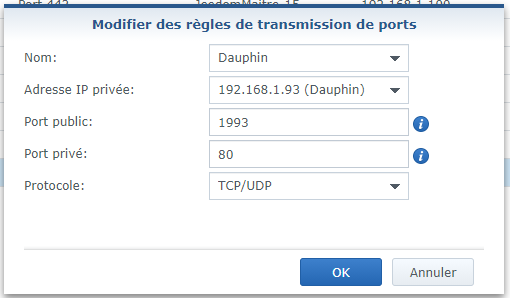
Thus, with the IP address of the box (or Reverse DNS) the relay can be accessed from the outside.
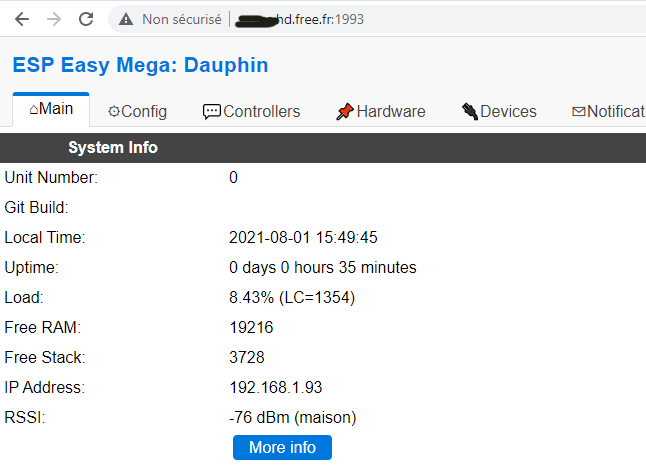
Or send a paste command to the relay:
- http://xxx.hd.free.fr:1993/control?cmd=GPIO,0,1
Requests for clarification, … questions
Please use the Jeedom forum rather than the comments below which are much less convenient for me.
https://community.jeedom.com/t/un-relais-domotique-pour-2-61/65392
 English
  French
  Spanish
  Chinese
  German